in rod we trust
Aficionado

- Total Posts : 447
- Scores: 4
- Reward points: 1985
- Joined: 2016/02/27 17:13:04
- Status: offline

my capri journey
ok boys had bit of time this morning so thought id try get my pics together and post the journey brought this as it was a number matching capri and the only thing it had going for it started with this looked half ok untill you dug deeper the whole left side was bogged up and was pretty thick on there .. so off came the quater , sill , front fender, rear beaver , front valance only good panel was the right quater panel the car was brought from some bloke up central coast he thought it was in better shape but it was pretty bad told me half the pics the bloke sent him were selected pics didnt show the real nature and condition after i seen it and checked it out forgot what use to go bad on em and the memory of owning one when i was a wjipper snapper i thought what the hell and took over the project and bought it ,,, 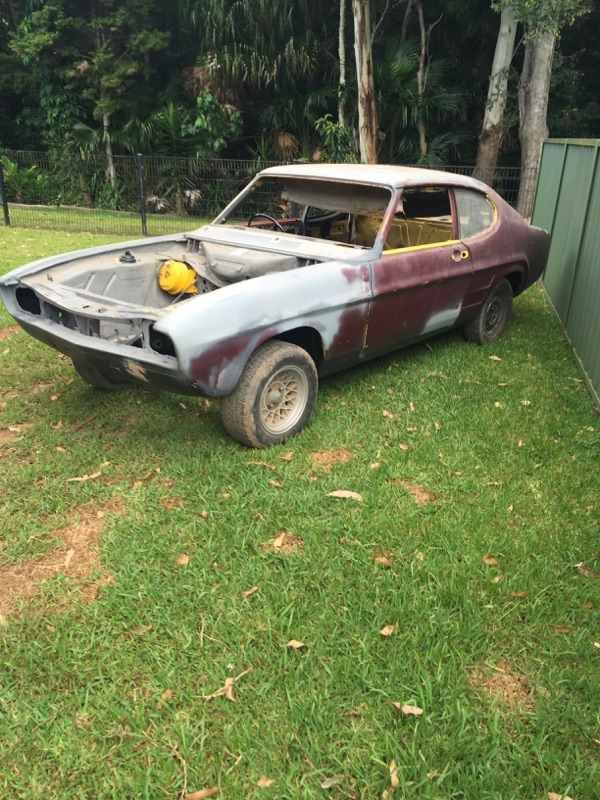 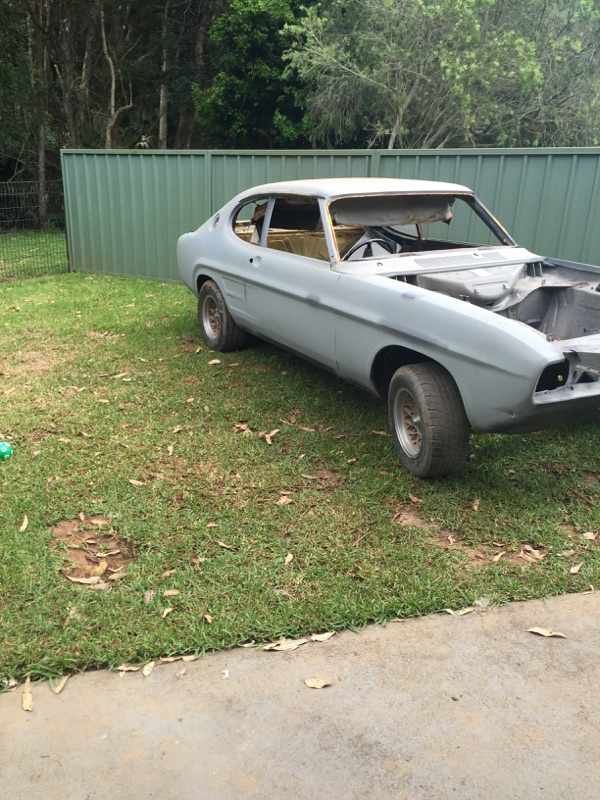 these pics he sent me i have pics scattered everywhere on the panels and different stages so ill fix the pics up along the way once i go thru the mountain of them and upload them this is how it stands at the moment 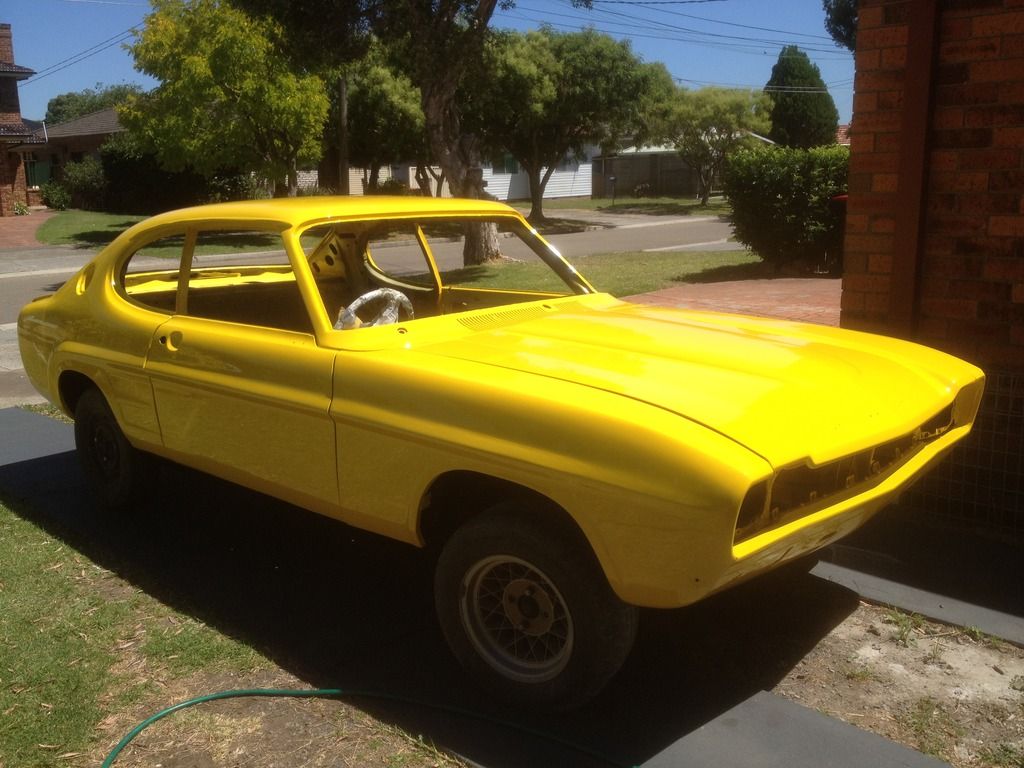 its at this stage at the moment and few things have been put on
post edited by in rod we trust - 2016/12/10 07:12:36
|
in rod we trust
Aficionado
- Total Posts : 447
- Scores: 4
- Reward points: 1985
- Joined: 2016/02/27 17:13:04
- Status: offline
Re: my capri journey
2016/12/10 06:40:40
(permalink)
|
in rod we trust
Aficionado
- Total Posts : 447
- Scores: 4
- Reward points: 1985
- Joined: 2016/02/27 17:13:04
- Status: offline
Re: my capri journey
2016/12/10 07:20:54
(permalink)
i ended up after quite some time searching buying parts everywhere ..some parts came off a few members on here as well which i appreciate very much and had great help from you boys in where to source parts etc ..
quater panels , sill panels , beaver panel , valance panel , bonnet , bumper's , interior , gt wheels, etc etc long list of spares i brought ...
im just waiting on the pics to upload got that many may take a week to sort them but just posted a couple i ahd uploaded already
|
Wiggy333
Deity

- Total Posts : 1012
- Scores: 42
- Reward points: 3744
- Joined: 2014/12/01 13:28:20
- Location: Sydney
- Status: offline
Re: my capri journey
2016/12/10 07:45:07
(permalink)
Looking good. Show us more.
|
Drewdog
Deity
- Total Posts : 1073
- Scores: 177
- Reward points: 5652
- Joined: 2013/03/06 22:31:01
- Status: offline
Re: my capri journey
2016/12/10 09:56:55
(permalink)
Its come a long way, love the retina scorching yellow, was that its original hue or one of your choosing?
Cheers Drew
GT Cortina Project "The Ugly Duckling"
|
in rod we trust
Aficionado
- Total Posts : 447
- Scores: 4
- Reward points: 1985
- Joined: 2016/02/27 17:13:04
- Status: offline
Re: my capri journey
2016/12/10 11:19:03
(permalink)
Wiggy333
Looking good. Show us more.
cheers will do as soon as these pics get uploaded Drewdog
Its come a long way, love the retina scorching yellow, was that its original hue or one of your choosing?
Cheers Drew
its supposed to be the original color off the plate yellow glo went thru couple samples youd be amazed on how different yellow glow can be from different paint suppliers..
|
BEE VEE
Scholar

- Total Posts : 1020
- Scores: 17
- Reward points: 3952
- Joined: 2014/01/02 15:53:02
- Location: MORNINGTON PENINSULA, melbourne
- Status: offline
Re: my capri journey
2016/12/10 13:21:38
(permalink)
Looking good Rod.............wish I had time to do same to my "Wild Plum" GTV6, but with 19 cars, I have to spread the love very thinly !...........and then there's the wife(#20) that always wants more than a 1/20th !
"GOOD BETTER BEST: NEVER LET IT REST: UNTIL YOUR GOOD IS BETTER, AND YOUR BETTER, BEST" ( Furphy WW1 HORSE-DRAWN water-tank end-plates)
|
in rod we trust
Aficionado
- Total Posts : 447
- Scores: 4
- Reward points: 1985
- Joined: 2016/02/27 17:13:04
- Status: offline
Re: my capri journey
2016/12/10 13:50:10
(permalink)
here is quater panel after i remove all the bog 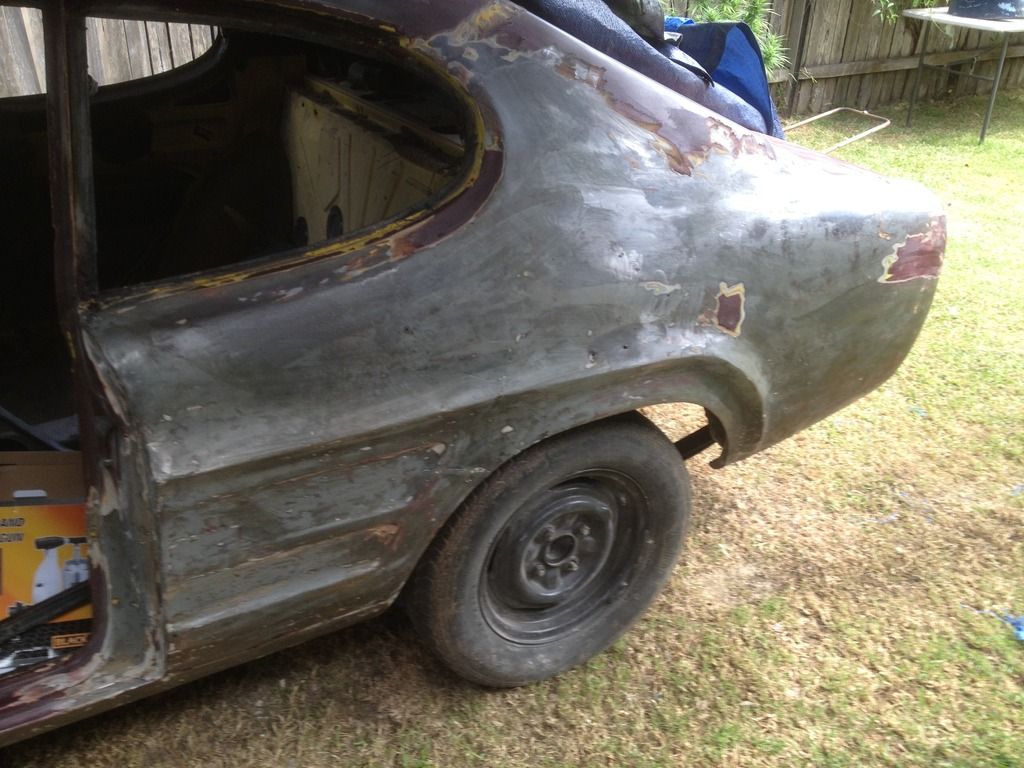 quater was like bondi beach wavey as so off with the quater 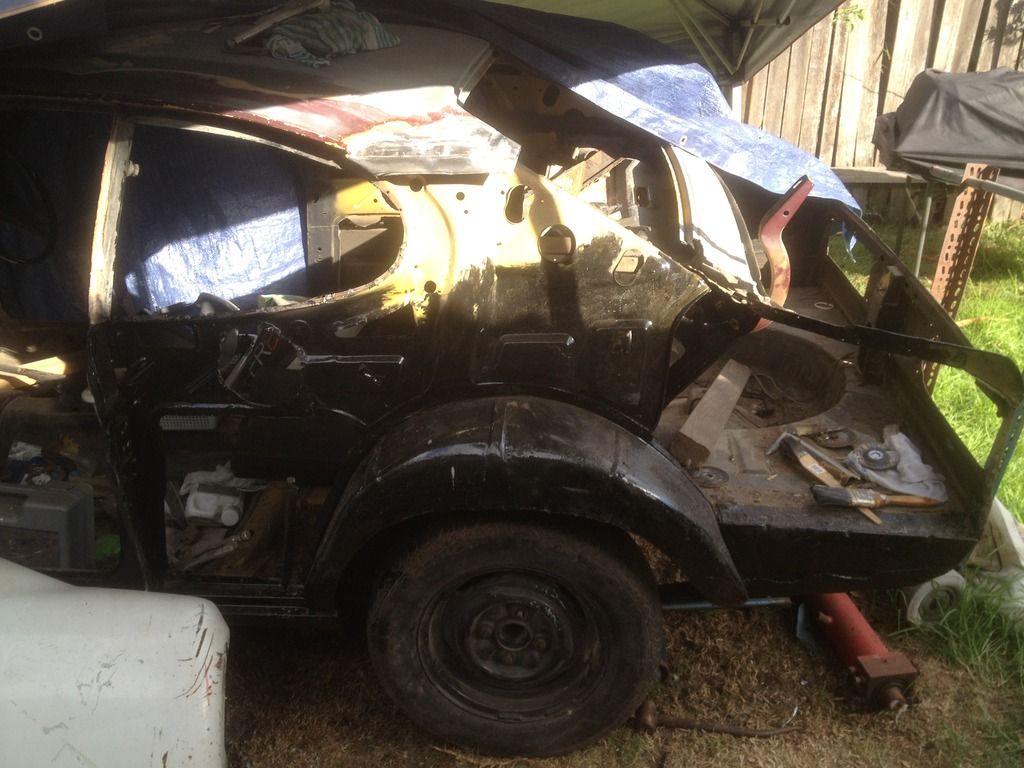 the factory joint 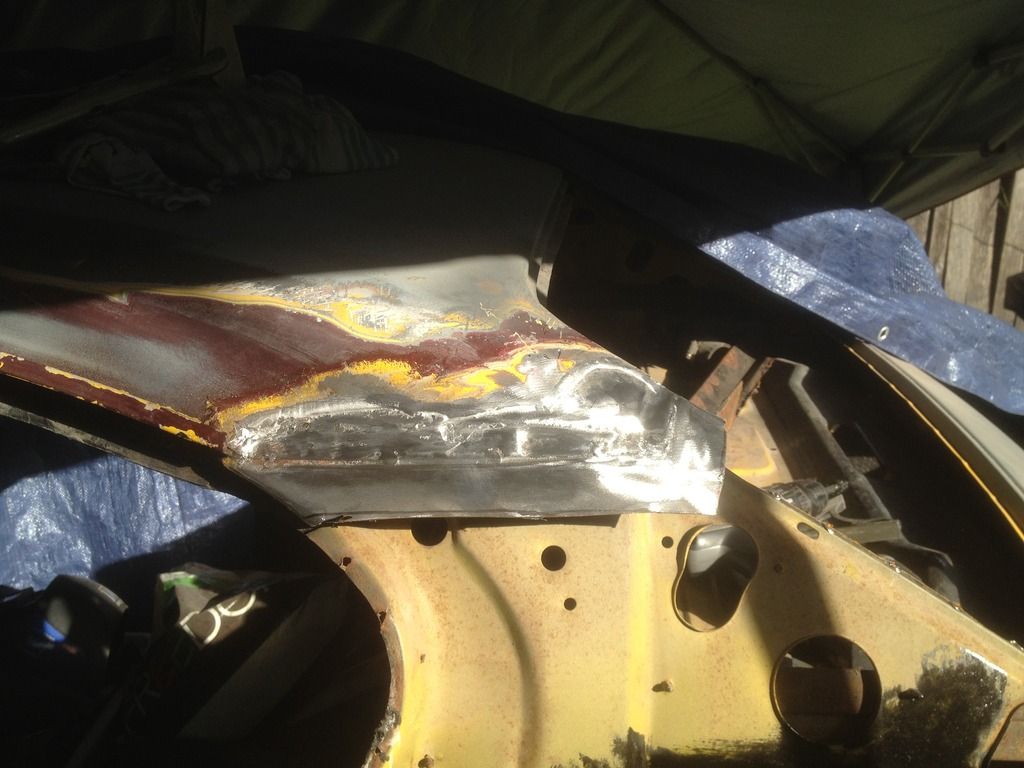 linning up new quater 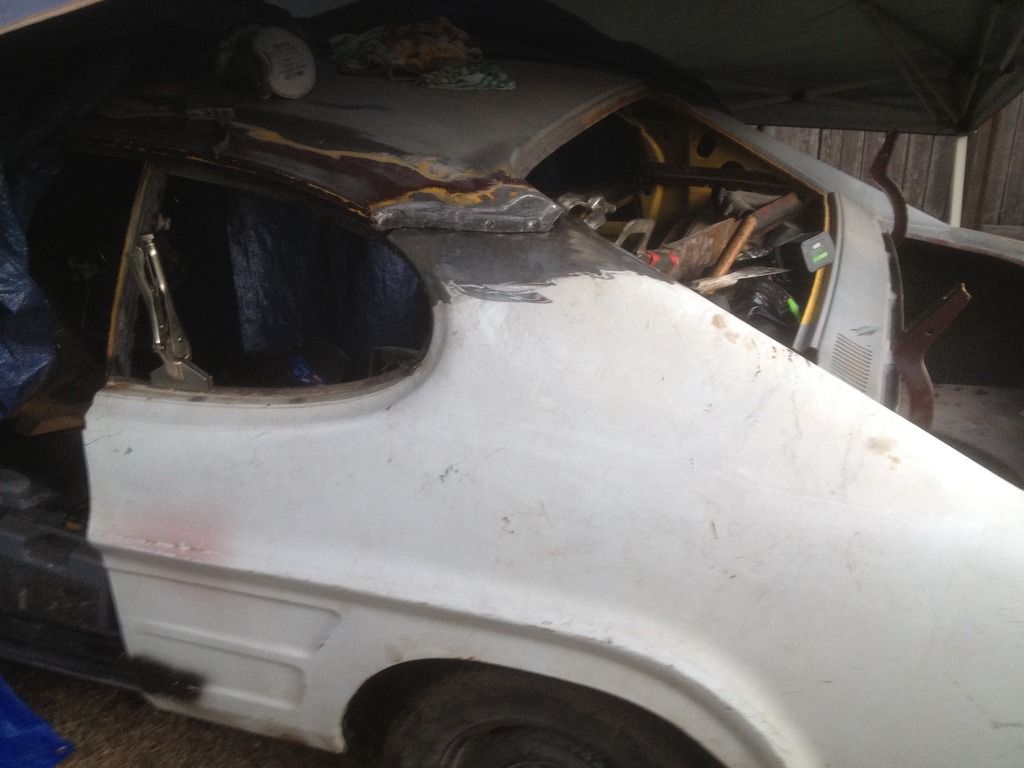 and the beaver panel before i replaced it looks like somebody tried to fit datsun or the old ltd ford lights 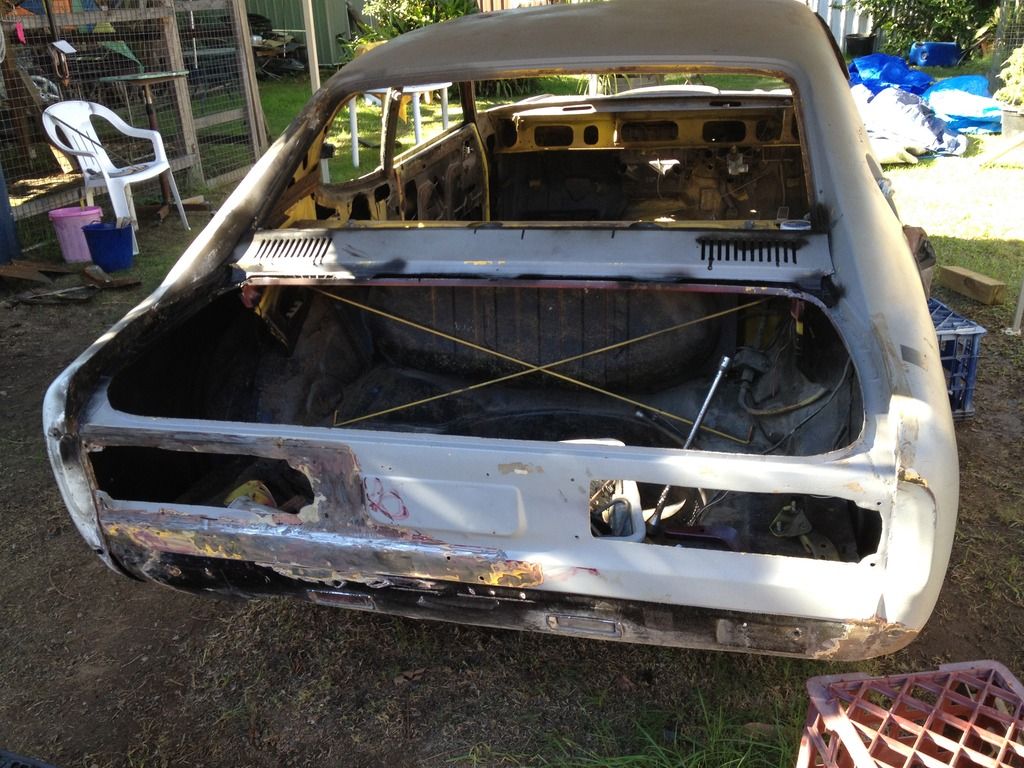
post edited by in rod we trust - 2016/12/10 14:20:28
|
in rod we trust
Aficionado
- Total Posts : 447
- Scores: 4
- Reward points: 1985
- Joined: 2016/02/27 17:13:04
- Status: offline
Re: my capri journey
2016/12/10 13:53:26
(permalink)
lining up new front secondhand fenders and bonnet 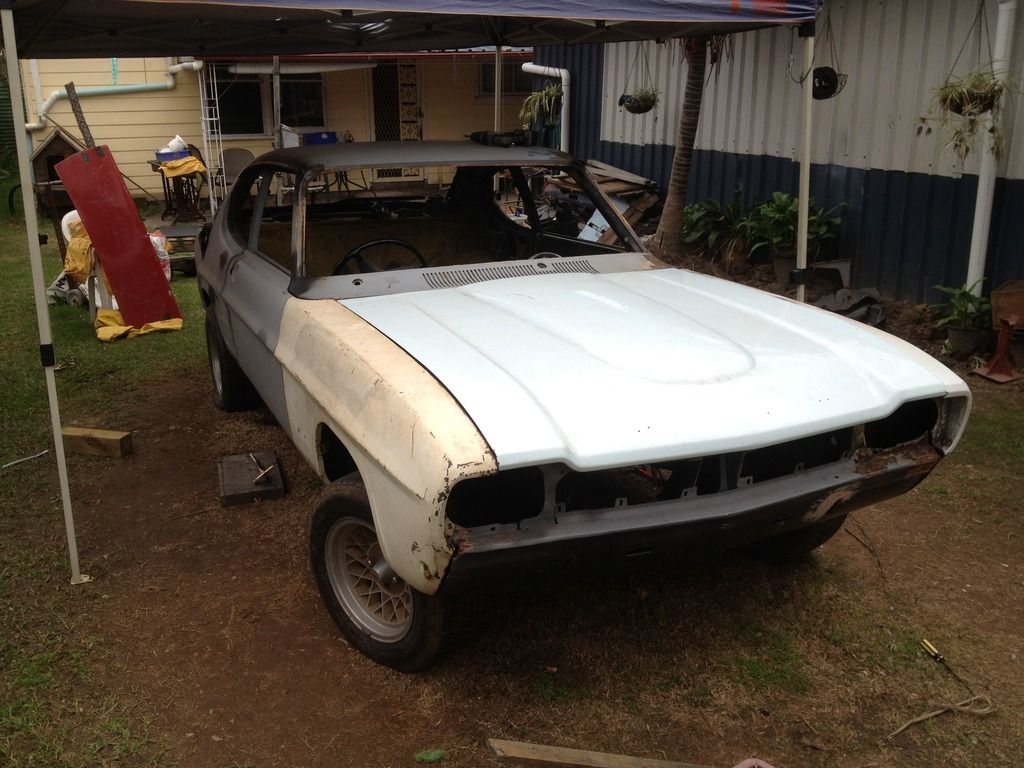
|
Wiggy333
Deity
- Total Posts : 1012
- Scores: 42
- Reward points: 3744
- Joined: 2014/12/01 13:28:20
- Location: Sydney
- Status: offline
Re: my capri journey
2016/12/10 17:38:33
(permalink)
I don't know why anyone would change to larger rear lights. Whenever I see them on a Capri I want to throw up. You've done a great job with the rear quarter. It's funny how many of them are still around. Front valance and guards and bonnets are like Unobtanium. Although expressed steel panel now sell new front guards at 1500 pounds each I think and a hole range of new panels like A pillars.
The real fun now starts for you so hope you enjoy from now on but remember patience as you bolt it all back together.
|
BEE VEE
Scholar
- Total Posts : 1020
- Scores: 17
- Reward points: 3952
- Joined: 2014/01/02 15:53:02
- Location: MORNINGTON PENINSULA, melbourne
- Status: offline
Re: my capri journey
2016/12/10 23:20:31
(permalink)
Well done Rod..........you must have big ones to tackle that without a garage  ............I know I wouldn't! Keep up the good work and photos. All these photos of the Capri in pieces prepares us for when it's our turn ..........in the next life!
"GOOD BETTER BEST: NEVER LET IT REST: UNTIL YOUR GOOD IS BETTER, AND YOUR BETTER, BEST" ( Furphy WW1 HORSE-DRAWN water-tank end-plates)
|
spud15
Supporter
- Total Posts : 1237
- Scores: 36
- Reward points: 5597
- Joined: 2011/08/01 11:02:49
- Location: Melbourne
- Status: offline
Re: my capri journey
2016/12/11 09:31:39
(permalink)
love the colour! They keep popping up (v6 capri's) - another survivor
|
in rod we trust
Aficionado
- Total Posts : 447
- Scores: 4
- Reward points: 1985
- Joined: 2016/02/27 17:13:04
- Status: offline
Re: my capri journey
2016/12/11 10:00:51
(permalink)
BEE VEE
Looking good Rod.............wish I had time to do same to my "Wild Plum" GTV6, but with 19 cars, I have to spread the love very thinly !...........and then there's the wife(#20) that always wants more than a 1/20th !
shhhhhh the misses might be reading the forum ... she has no idea on what i spent on this car shhhhh it only cost me 3gs to build ... if your reading this honey i only spent 3gs... Wiggy333
I don't know why anyone would change to larger rear lights. Whenever I see them on a Capri I want to throw up. You've done a great job with the rear quarter. It's funny how many of them are still around. Front valance and guards and bonnets are like Unobtanium. Although expressed steel panel now sell new front guards at 1500 pounds each I think and a hole range of new panels like A pillars.
The real fun now starts for you so hope you enjoy from now on but remember patience as you bolt it all back together.
cheers yeah i cant understand as well why they would chop the whole back to fit different lights they stuff a perfectly good beaver to fit crapy lights BEE VEE
Well done Rod..........you must have big ones to tackle that without a garage ............I know I wouldn't!
Keep up the good work and photos. All these photos of the Capri in pieces prepares us for when it's our turn ..........in the next life!
cheers i have a garage to do the work but since i was almost going thru every panel and cutting them off , grinding down the old bog etc i just didnt want to fill my garage up with all that dust and crap , i had the gazebo up and always kept the car covered was also lucky that didnt get much rain ill put some more pics up just sorting thru the mountain of them whooligan
Its been really good to see this one come back to life. I'm following my V6 clone being transform (into a V8 weapon) by its new owner. I wish I had the time, money and skills to do a full resto but for now I just have to dabble and try and hold onto my cars for as long as it takes to gain at least one of the above prerequisites.
cheers id love to do a capri v8 perana lookalike never know with all the experience ive had with this one i might just try find a 4cyl ..even a zacspeed id love to build .. considering it will cost me only 3gs ... here that wifey 3gs only spud15
love the colour! They keep popping up (v6 capri's) - another survivor
cheers wasnt really convinced on the yellow before i painted it but since its the original color i had to do it yellow but after it was painted it changed my mind i really like the yellow now
|
in rod we trust
Aficionado
- Total Posts : 447
- Scores: 4
- Reward points: 1985
- Joined: 2016/02/27 17:13:04
- Status: offline
Re: my capri journey
2016/12/11 10:20:34
(permalink)
just on the quater panel if anybody wants to tackle replacing one its not that hard to do
the hardest part was trying to save the scuttle as that is also welded to the quater but once you cut the quater open to reveal where they are welded and get easy access its not that hard joint is stepped so new quater slides under factory joint then weld back on and some lead wipping or plastic filler you wont even notice it has been replaced ..
i had some lead wiping bars laying about so i lead wiped it
wheel arch has couple welds not many and factory seals them and holds them on with some welds and panel glue
which explains why they rust there , id say water gets trap thru some of the parts the panel glue doesnt seal properly
once you cut it open just near where they are welded then its not that bad to get to the welds and grind them off or drill them out just have to go easy and take the time to clean all the old welds
same as the sill its much easier to cut it open to get to the welds easy
did the A post on one side as well that was the first thing i did so trying to find them pics for you boys if that helps some
|
in rod we trust
Aficionado
- Total Posts : 447
- Scores: 4
- Reward points: 1985
- Joined: 2016/02/27 17:13:04
- Status: offline
Re: my capri journey
2016/12/30 20:06:52
(permalink)
well got a bit of time today so decided to fit engine and gearbox in 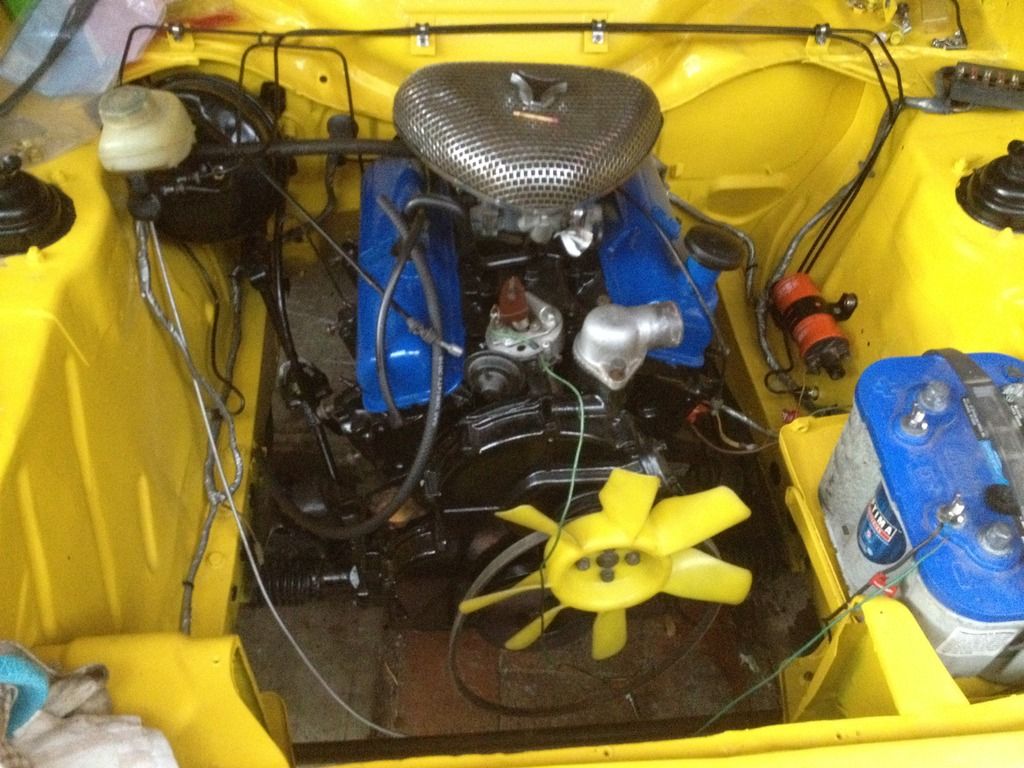
|