79Escort
Aficionado

- Total Posts : 208
- Scores: 10
- Reward points: 4238
- Joined: 2011/08/01 11:02:49
- Location: Adelaide
- Status: offline

DIY anti dive kit - mk2
After talking to a wheel alignment specialist and reading a lot on this forum I am on the hunt for more castor. The way I would like to achieve this is to build an anti-dive kit which would mount to the sway bar bracket holes but also move the sway bar forward. I have a kmac adjustable sway bar now so minute adjustments can be made if my workmanship isnt perfect. The idea of my anti-dive kit is only to move the bar further forwards and perhaps use a clamp in the centre to stop flex. I will use standard width brackets on the outsides but I will drill holes to accomodate double width brackets if I choose to in the future. Here is a design I found which I will pretty much copy and Ive drawn another to the right of how I will go about mounting it further forward. I will weld a steel bar to each side of the kit (maybe 4mm? -Shown in red) and drill holes to attatch it to the car. Please let me know your opinions! Do you think this design will work and how much should I aim to move the bar forward?  Cheers, Ryan
|
Matt75
Deity

- Total Posts : 2185
- Scores: 67
- Reward points: 6533
- Joined: 2011/08/01 11:02:49
- Location: Doncaster Vic Australia
- Status: offline
Re: DIY anti dive kit - mk2
2014/01/06 15:47:58
(permalink)
|
jpayne
Scholar

- Total Posts : 360
- Scores: 19
- Reward points: 2898
- Joined: 2011/08/01 11:02:49
- Location: Melbourne
- Status: offline
Re: DIY anti dive kit - mk2
2014/01/06 16:23:42
(permalink)
I think you might find the front apron will prevent the anti-dive from moving much in the forward direction. I made mine to be pushed as far forward as possible and the apron was in the way, then I biased the bracket bolt holes as far forward as possible too. You can just see what Im talking about here. 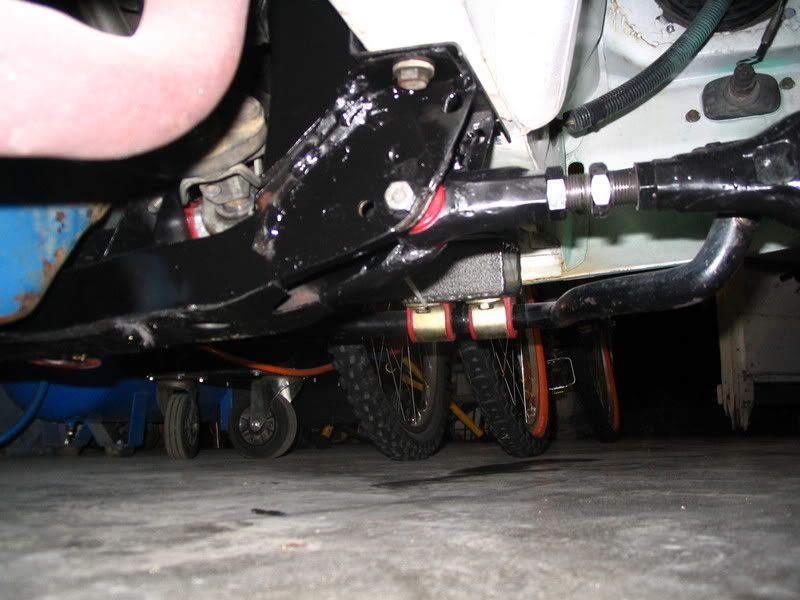 You could make a standard anti dive ans modify the bracket mount positions using 4-5mm steel. Will be heavy though. JP
|
79Escort
Aficionado
- Total Posts : 208
- Scores: 10
- Reward points: 4238
- Joined: 2011/08/01 11:02:49
- Location: Adelaide
- Status: offline
Re: DIY anti dive kit - mk2
2014/01/07 11:06:02
(permalink)
Thanks Matt, I didn't realise I could get one so cheap! I'll give making one a go first as I have two single width outer brackets already so only need to buy one double width bracket. Wont worry about double width on the outside. Also I'm being given the steel so its just a matter of how much the bracket costs.
Thanks JP I'll look out for that, might be a good idea for me to just offset the brackets rather than the whole thing. I'll have to take some measurements and make up a cardboard one to see what room I have at the front.
A bit of added weight is ok with me, its only really a road car so a couple kgs wont mean much to me.
Thanks for your help guys!
Ryan
|
79Escort
Aficionado
- Total Posts : 208
- Scores: 10
- Reward points: 4238
- Joined: 2011/08/01 11:02:49
- Location: Adelaide
- Status: offline
Re: DIY anti dive kit - mk2
2014/01/18 20:13:14
(permalink)
Due to the heat here in Adelaide I havnt started making up the anti dive kit yet, but I have had a closer look at the car. The front apron is approx 1.5 inches below the mounting points for the sway bar. This means providing I make it shallow enough I can push it forward over the front apron. the photo is shocking but you might be able to see. hopefully this week Ill get cracking and Ill keep this updated. Please keep your ideas coming, im open to any constructive criticism also! Ryan 
|
martymexico
Deity
- Total Posts : 2737
- Scores: 445
- Reward points: 6122
- Joined: 2011/08/01 11:02:49
- Location: Adelaide Sth Aust Australia
- Status: offline
Re: DIY anti dive kit - mk2
2014/01/18 20:50:32
(permalink)
Hi, the way I would tackle ...or have on my mk1 is to move the swaybar bolts forward 20-25mm and then make the dive kit to fit.
The way to move the bkt bolts forward is to drill the dimples which releases the swaybar mount plate, you simply move it forwards and weld in place , drill new holes and weld new 10mm nuts on. Its best to do this with the bkts removed from car..
|
79Escort
Aficionado
- Total Posts : 208
- Scores: 10
- Reward points: 4238
- Joined: 2011/08/01 11:02:49
- Location: Adelaide
- Status: offline
Re: DIY anti dive kit - mk2
2014/01/19 21:15:34
(permalink)
That is a good idea, thanks martymexico. Im going to have a look/get some parts off an escort at upullit tomorrow morning so Ill grab the sway bar mounts from that, then Ill be able to change it without mucking up the ones ive got.
That means I can use long bolts for the outside sway bar brackets and connect the anti dive kit directly through those holes just like most other kits around. Will have a play tomorrow.
Cheers
Ryan
|
79Escort
Aficionado
- Total Posts : 208
- Scores: 10
- Reward points: 4238
- Joined: 2011/08/01 11:02:49
- Location: Adelaide
- Status: offline
Re: DIY anti dive kit - mk2
2014/01/24 19:58:45
(permalink)
After a few days stressing over cutting up my sway bar mount plates I was lucky enough to be given some by a nice guy who I bought some parts from. Plan is to cut out the section where the original nuts are and weld in a piece of thicker steel with the holes moved forward. This seems like the simplest way to go as on a mk2 you can't move the plate forward, it is located by two bolts through the side and one at the front.  As I will be cutting it up I thought it would be a good move to strengthen it as much as possible, so I welded some of the seams. Welds started really bad but ended up ok and they seemed to penetrate enough for me to be happy with them.  first weld...   So I am slowly getting there. Should finish these on sunday then start the actual anti dive kit next week. Ryan
|
Drewdog
Deity
- Total Posts : 1070
- Scores: 174
- Reward points: 5601
- Joined: 2013/03/06 22:31:01
- Status: offline
Re: DIY anti dive kit - mk2
2014/01/24 23:36:27
(permalink)
Good work Ryan, keep the pics coming, nice to see home engineering at it's best.....
GT Cortina Project "The Ugly Duckling"
|
jpayne
Scholar
- Total Posts : 360
- Scores: 19
- Reward points: 2898
- Joined: 2011/08/01 11:02:49
- Location: Melbourne
- Status: offline
Re: DIY anti dive kit - mk2
2014/01/25 21:56:43
(permalink)
which U-Pull-it has an escort. did you see and or remember what the front bulkhead wheel arches were like. the round bulbs near the accelerator and mirrored on other side? Cheers JP
post edited by jpayne - 2014/01/25 22:01:43
|
79Escort
Aficionado
- Total Posts : 208
- Scores: 10
- Reward points: 4238
- Joined: 2011/08/01 11:02:49
- Location: Adelaide
- Status: offline
Re: DIY anti dive kit - mk2
2014/01/26 17:48:26
(permalink)
Thanks Drewdog, not sure about enginnering at its best but its definitely some form of it haha.
More pics coming later on, about to go and have another crack.
Well as for upullit, the story goes like this. There was a 75 mk2 listed at elizabeth. I went there on monday, walked around for 20 mins then asked about it and aparently there was a mix up with the listing and they are going to try to sell the whole car. Not sure why it was listed as it wasnt even out for sale yet. So sorry about that JP.
Thats why I had to hunt down some mounts from another car. Wasnt very happy about driving all the way out there for nothing but at east they gave me a toyota badge for free...couldnt leave without anything.
Ryan
|
jpayne
Scholar
- Total Posts : 360
- Scores: 19
- Reward points: 2898
- Joined: 2011/08/01 11:02:49
- Location: Melbourne
- Status: offline
Re: DIY anti dive kit - mk2
2014/01/26 20:18:14
(permalink)
no problems mate, I took a punt and went to Elisabeth today to no avail, its always fun to have a look around too, N11 pulsars have a similar shaped wheel well.
But I have a lead on a couple of options before I resort to slow nissan parts
JP
|
79Escort
Aficionado
- Total Posts : 208
- Scores: 10
- Reward points: 4238
- Joined: 2011/08/01 11:02:49
- Location: Adelaide
- Status: offline
Re: DIY anti dive kit - mk2
2014/01/26 22:06:28
(permalink)
Yea it is a lot of fun. So I went out and built this bracket. I thought I did a pretty good job for a first try but because I rushed it, for some unknown reason, I used the exact measurements from the original one to drill the holes in the new one. That means the piece I welded on is in the wrong spot so I cant even drill new holes, got to start from scratch. Im pretty disappointed in myself but I can only smile and do it right tomorrow. This is what I did anyway Chopped up the bracket  Lined up a new piece of steel  Welded in place  Finished the welding and cleaned up all my mess  View from the inside. Pardon my messy welds  Nuts on  Finished Product. Or so I thought haha   I did end up with a really strong bracket though which is a good sign Cheers Ryan
|
79Escort
Aficionado
- Total Posts : 208
- Scores: 10
- Reward points: 4238
- Joined: 2011/08/01 11:02:49
- Location: Adelaide
- Status: offline
Re: DIY anti dive kit - mk2
2014/01/27 19:17:20
(permalink)
Fixed the bracket today, sucked having to cut it up but got it sorted in the end. Here are some pictures. The photos show when it was just tacked in place. It is now all welded up and strong     Cheers
|
79Escort
Aficionado
- Total Posts : 208
- Scores: 10
- Reward points: 4238
- Joined: 2011/08/01 11:02:49
- Location: Adelaide
- Status: offline
Re: DIY anti dive kit - mk2
2015/10/23 20:48:40
(permalink)
I should put some photos up of the finished product. I had forgotten about this post.  Dont judge the welds. They dont look too good but do the job. These coupled with the Kmac swaybar gives me a touch over 4 deg castor
|