Go back to home

Rally Mk1 Project

Page: 123 > Showing page 1 of 3 - Powered by APG vNext Trial
Author
PaulMk1
Enthusiast
  • Total Posts : 128
  • Scores: 4
  • Reward points: 5077
  • Joined: 2011/08/01 11:02:49
  • Location: Perth WA Australia
  • Status: offline
2010/11/30 23:11:01 (permalink)
0

Rally Mk1 Project

My first Mk1 was built supposedly as a Sunday driver and maybe a bit of track use. Since completion it's really only seen track use but is really a bit of a compromise. I now want a rollcage, coilover turreted rear suspension, etc

I bought this for the bonnet, doors, wipers, and a few extras:


But it was really in too good shape to cut up. So after 6months of sitting in the corner a fully "Rally build" has commenced. Hopefully will be a bit quicker and a lot better than the first build.

Sunday arvo was off with the doors, then this evening off with the front guards


A few nastys but a much better shell to start with than last time:


#1


31 Replies Related Threads

    ITGRIPS
    Enthusiast
    • Total Posts : 173
    • Scores: 0
    • Reward points: 2337
    • Joined: 2011/08/01 11:02:49
    • Location: Perth WA Australia
    • Status: offline
    RE: Rally Mk1 Project 2010/01/12 11:23:17 (permalink)
    0
    awesome!

    quite a few Mk1's seem to be popping up lately! would love to see them all on the road together!
    #2
    PaulMk1
    Enthusiast
    • Total Posts : 128
    • Scores: 4
    • Reward points: 5077
    • Joined: 2011/08/01 11:02:49
    • Location: Perth WA Australia
    • Status: offline
    RE: Rally Mk1 Project 2010/05/12 14:15:10 (permalink)
    0
    I spent most of Saturday building a spit to mount the shell - the local scrap merchant had a load of 75mm square galv tube which proved useful. I'll need to go back and get another length as I would like to add a bit more bracing to the uprights.


    The shell is now pretty much bare:


    Does anyone need 1600 suspension or diff (in Perth) - otherwise it'll be dumped next weekend!


    #3

    PaulMk1
    Enthusiast
    • Total Posts : 128
    • Scores: 4
    • Reward points: 5077
    • Joined: 2011/08/01 11:02:49
    • Location: Perth WA Australia
    • Status: offline
    RE: Rally Mk1 Project 2010/12/12 19:18:05 (permalink)
    0
    Still moving forward with this one, even with Xmas parties, B-day parties, concerts and other distractions.

    Once on the spit I gave is a good degrease and removed all the years of dirt and grime:


    Unfortunately both front floors and drivers side inner sill needed replacing:


    and then the big tunnel:


    Trying not to upset the neighbours too much I went back to cleaning this morning:


    But then decided to make my own diff tunnel (so back out with the grinder) :


    This is how it sits this evening (3 weekends work so far)


    #4
    luigi
    Enthusiast
    • Total Posts : 74
    • Scores: 0
    • Reward points: 1405
    • Joined: 2011/08/01 11:02:49
    • Location: perth w.a. Australia
    • Status: offline
    RE: Rally Mk1 Project 2010/12/12 22:05:19 (permalink)
    0
    sms sent
    #5
    PaulMk1
    Enthusiast
    • Total Posts : 128
    • Scores: 4
    • Reward points: 5077
    • Joined: 2011/08/01 11:02:49
    • Location: Perth WA Australia
    • Status: offline
    RE: Rally Mk1 Project 2010/12/15 23:32:43 (permalink)
    0
    I'm trying to keep the momentum going - but next week is a sea of parties so it's going to grind to a screaming halt soon.

    I've removed the rusty old rear arches:


    Due to the rusty rear window lip there's a fair bit of corrosion inside that'll need attention before welding the new outer tubs in.

    I also got the 4 link boxes dropped into place (no welding yet as I think they are still too high at the back)


    and here's the tube for the rollcage - all CAMS spec CDS:
    #6

    PaulMk1
    Enthusiast
    • Total Posts : 128
    • Scores: 4
    • Reward points: 5077
    • Joined: 2011/08/01 11:02:49
    • Location: Perth WA Australia
    • Status: offline
    RE: Rally Mk1 Project 2010/12/19 22:00:57 (permalink)
    0

    Saturday was spent on rust and body repairs:

    First was the getting rid of the rest of the underseal:

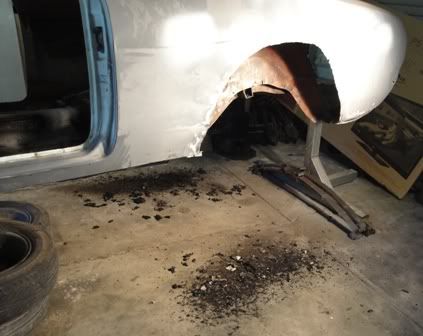
    (That's three dustpan loads)

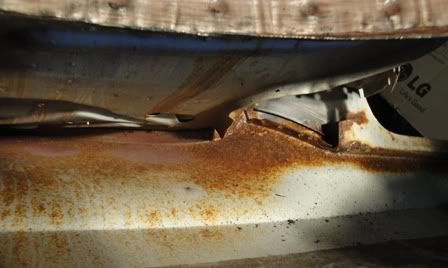
    This is the rust I spotted when I cut out the rear arches (this is the inside of the C-pillar):


    This is my DIY sandblast unit:


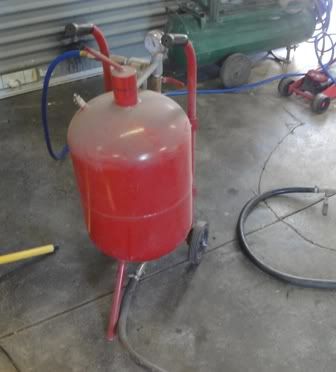
    10 minutes later (and a lot of mess):


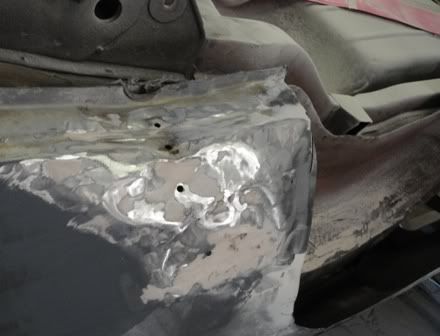
    Next was the jacking points. Both had been bent seriously out of shape and at some stage filled with bog. The main problem for me was this stoped the bubble arches from fitting the body:


    A DIY slidehammer:


    A bit of heat and 30 minutes of bashing and it's back into shape:


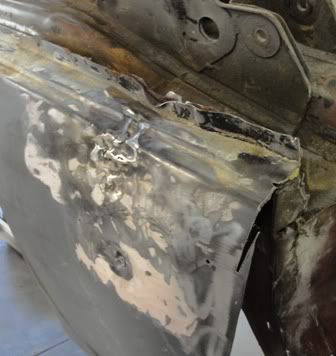
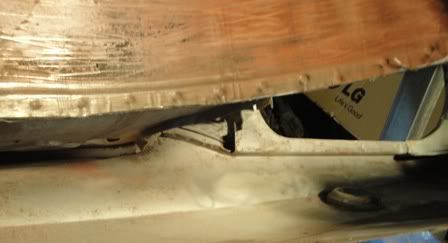
    The passenger side wasn't as bad but after a tap with the hammer a big lump of bog fell out revealing:

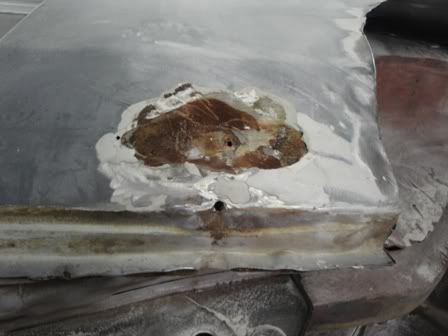
    (I wish people would treat rust prior to filling)

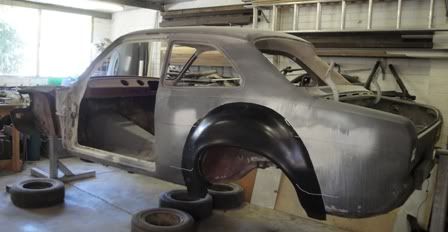
    Anyhow thats all fixed now. As of Saturday night it looked like:


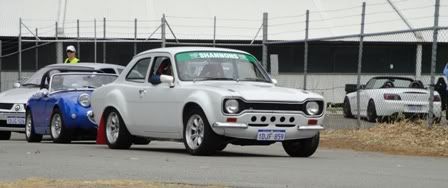
    Then Sunday was the "Last Blast" Superkhana - So I took the white one out to remind myself why i'm doing this:


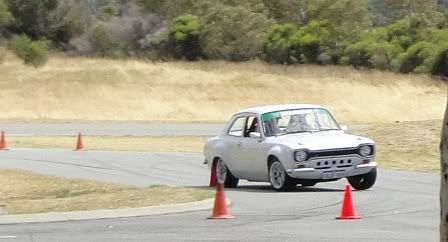
    I really really need to get a decent LSD, and a better engine, and better gear ratios, and better seats, and...
    #7
    krt10
    Scholar
    • Total Posts : 663
    • Scores: 21
    • Reward points: 3808
    • Joined: 2011/08/01 11:02:49
    • Location: adelaide sa Australia
    • Status: offline
    RE: Rally Mk1 Project 2010/12/19 22:05:07 (permalink)
    0
    coming along very nicely. love seeing a bubble arched mk1.
    #8
    PaulMk1
    Enthusiast
    • Total Posts : 128
    • Scores: 4
    • Reward points: 5077
    • Joined: 2011/08/01 11:02:49
    • Location: Perth WA Australia
    • Status: offline
    RE: Rally Mk1 Project 2010/12/30 22:14:25 (permalink)
    0
    Rust repairs - the ongoing saga:


    Boot wells:


    Turrets mounted:


    and aligned:


    Stitched welded the chassis rails:


    and front suspension:


    and started playing with the roll cage:


    Happy new years for Saturday!

    Paul.
    #9
    martin mk2
    Enthusiast
    • Total Posts : 12
    • Scores: 0
    • Reward points: 0
    • Joined: 2011/08/01 11:02:49
    • Location: perth Australia
    • Status: offline
    RE: Rally Mk1 Project 2010/12/30 23:07:47 (permalink)
    0
    nice work there mate!!
    #10
    harrier
    Aficionado
    • Total Posts : 255
    • Scores: 6
    • Reward points: 4247
    • Joined: 2011/08/01 11:02:49
    • Status: offline
    RE: Rally Mk1 Project 2010/12/31 17:41:09 (permalink)
    0
    I like the look of the bends on the cage, any chance of some closer photos of the bends themselves ? I didn't think the little hydraulic benders were capable of turning out goo bends without loads of crush.
    #11
    Phil
    Supporter
    • Total Posts : 1786
    • Scores: 35
    • Reward points: 4581
    • Joined: 2011/08/01 11:02:49
    • Location: Sydney NSW Australia
    • Status: offline
    RE: Rally Mk1 Project 2010/12/31 20:28:00 (permalink)
    0
    Great work Paul Gotta love a fast paced build thread
    #12
    Paul Dunstan
    Supporter
    • Total Posts : 1378
    • Scores: 35
    • Reward points: 4790
    • Joined: 2011/08/01 11:02:49
    • Location: Adelaide SA Australia
    • Status: offline
    RE: Rally Mk1 Project 2011/01/01 16:37:50 (permalink)
    0
    quote:
    Originally posted by Phil

    Great work Paul Gotta love a fast paced build thread


    You dropping a subtle hint Phil....[8~2]
    #13
    PaulMk1
    Enthusiast
    • Total Posts : 128
    • Scores: 4
    • Reward points: 5077
    • Joined: 2011/08/01 11:02:49
    • Location: Perth WA Australia
    • Status: offline
    RE: Rally Mk1 Project 2011/03/01 14:41:14 (permalink)
    0
    More rust - this is the rear of the roof once the headlining was removed:


    I've chopped the worst of it out and given it a quick blast - its still going to be tricky to fix:


    The normal door pillar rust:


    I've now got the outer arches welded back in so decided it was time to seal it all up. I gave the bottom another wire brushing, followed by scotch bright and rust converter, then prep sol, then a heavy coat of etch primer:


    The inside got a similar treatment except I ended up sandblasting most of the floors:


    It's alway amazing how good they look once you get a single color back on them.
    #14
    luigi
    Enthusiast
    • Total Posts : 74
    • Scores: 0
    • Reward points: 1405
    • Joined: 2011/08/01 11:02:49
    • Location: perth w.a. Australia
    • Status: offline
    RE: Rally Mk1 Project 2011/03/01 18:05:26 (permalink)
    0
    Hi PAUL LOOKING REALLY GOOD did u get my last sms. news years day saw me start my twin cam restor,started welding now i have kevins welder [forcefeed v6capri] at the rear panels ps need more practice welding.[8~2]
    #15
    Page: 123 > Showing page 1 of 3 - Powered by APG vNext Trial
    Jump to:
    © 2025 APG vNext Trial Version 5.1