chobis
Enthusiast

- Total Posts : 26
- Scores: 0
- Reward points: 0
- Joined: 2011/08/01 11:02:49
- Status: offline

RE: Mk 2 Cortina Rat Rod...PROJECT FINISHED! - page 3!
2009/06/18 10:35:44
(permalink)
Hehe.... I'm having an "I Hate Work" moment and thought I'd have a quick look at some of the forums I used to haunt when I seemed to have so much more time. What can I say..... will be great to welcome a ratter Mk2 Sporty to the streets of Ideal-Aid (Adelaide for those more sane than I). Gotta say that the rat look is a hell of a lot of fun. You can pretty much look at anyhting off an old car and think.... can I adapt that to my project? Or, you go for the period accessory route...... or a nice mix of both. Good to see the front mudflaps in play. They are cool and not hugely embraced, even among the accessory gurus. Big fan of the look you have invisioned. The single silver scallop would look mad. My two cents so far...... not too sure about the idea of laying lines in the celtic style on this ride. I think the scallop would look awesome and the pinstripping might be overkill........ also I think it's that style of pinstripping is getting a bit played out, but thats just my opinion (Of course if you can get the Doggy to do something for you then all bets are off.... that would be unreal). I would be yanking the window tint too..... but again thats just my style.... I don't like tint on classics...... so 80's. You need a leather stitch on steering wheel cover too. Should be able to grab one off eBay. Some things I love about this car - It's a column auto....... that's so freakin cool! Low line bucket seats...... sweeeeeet! Over-riders for front and back...... DAMN YOU.... I only have rear ones..... [8~2] Good natural progression to crappy paint.... very important in the rat world not to fake this look.....front side mudflaps..... awesome... love 'em except due to lowness they start to rip off as mine have done......and thank god you took that "Select" sticker off the windscreen.  Also..... just a tip..... be careful calling this a rat rod in certain circles. I simply call mine a ratter because rat rod has certain connotations and on hot rod forums they ger very "flamey" about what a rat rod is. Anyhow I don't want you to cop a shot in the back with a musket. [B)]
|
v4capmad
Aficionado

- Total Posts : 337
- Scores: 8
- Reward points: 2028
- Joined: 2011/08/01 11:02:49
- Location: newcastle nsw Australia
- Status: offline
RE: Mk 2 Cortina Rat Rod...PROJECT FINISHED! - page 3!
2009/06/18 19:55:22
(permalink)
hey racin jason, i have a sterring wheel cover you can for the postage, is a black fake leather ( very 70's ) if your keen. i can post pics if you like. Owen
|
racin jason
Enthusiast
- Total Posts : 204
- Scores: 0
- Reward points: 766
- Joined: 2011/08/01 11:02:49
- Location: Adelaide South Australia Australia
- Status: offline
RE: Mk 2 Cortina Rat Rod...PROJECT FINISHED! - page 3!
2009/06/18 21:37:51
(permalink)
Sweeeeeet dude, post a pic and fire me an email...I might have something to trade you for it!
I'm glad you guys like the car, as I was originally going to bung on a set of Lotus Steels, lower it an flog it off. The alure of the Rat was too hard to ignore, and the opportunity to live out an auto passion too hard to pass up...so THE GREEN HORNET was born.
I was/am thinking about some Rat Rod stripping, and I feel some grey/red/black striped around the boot lock and centre of the bonnet will be a good and correct addition to the car.
One thing I am being careful about is not 'overdoing' the car. I guess it's all a test and try scenario and you never know what works until it's fitted.....so I'm testing the waters with a few items.
I really need the following;
1 - rear window ventitian
2 - Front screen sunvisor
3 - Head light eye brows
4 - a good set of 13 inch radial tyres
I'm hoping to crank hard on it this weekend and have my home made wheel spats in place! As Bauldrick would say.....'I have a cunning plan'
Stay tuned more rat updates as they happen.
RJ
|
v4capmad
Aficionado
- Total Posts : 337
- Scores: 8
- Reward points: 2028
- Joined: 2011/08/01 11:02:49
- Location: newcastle nsw Australia
- Status: offline
RE: Mk 2 Cortina Rat Rod...PROJECT FINISHED! - page 3!
2009/06/18 22:29:49
(permalink)
here's the pic, it fits a mk1 capri wheel, witch im sure is the same size as a mk1 esky. O. pm me if ur keen 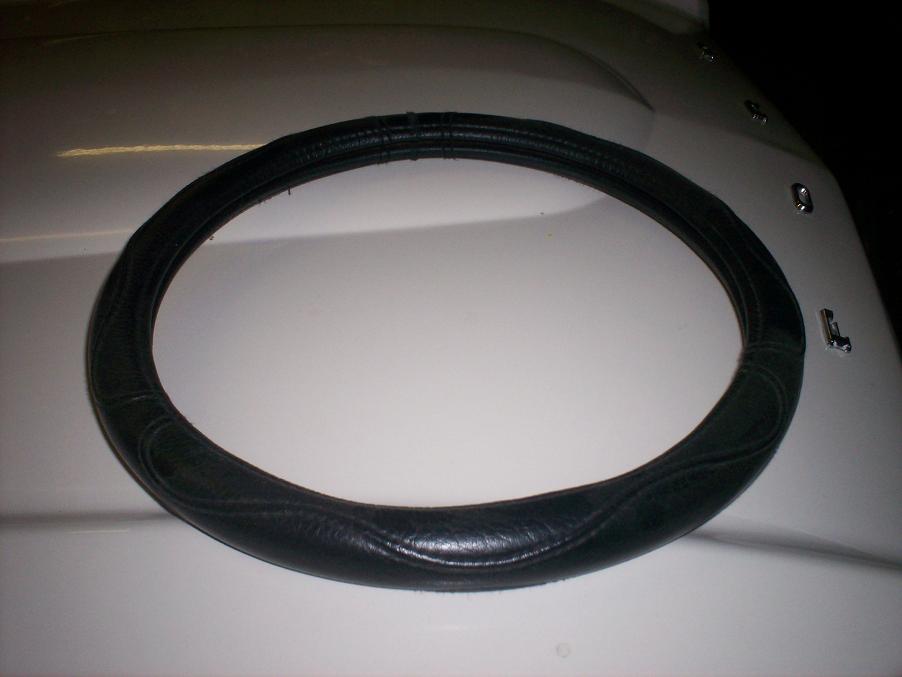
|
David W
Supporter
- Total Posts : 220
- Scores: 0
- Reward points: 1802
- Joined: 2011/08/01 11:02:49
- Location: Sunshine Coast Qld Australia
- Status: offline
RE: Mk 2 Cortina Rat Rod...PROJECT FINISHED! - page 3!
2009/06/19 18:54:42
(permalink)
Don't forget the fluffy dice off the rear vision mirror & dice caps for the tyre valve (try a push bike shop).
What about a couple of dabs of 'primer'?
Hot Dog exhaust?
|
DRS 02L
Enthusiast
- Total Posts : 172
- Scores: 0
- Reward points: 0
- Joined: 2011/08/01 11:02:49
- Location: wollongong
- Status: offline
RE: Mk 2 Cortina Rat Rod...PROJECT FINISHED! - page 3!
2009/06/22 06:18:13
(permalink)
very very cool 
|
racin jason
Enthusiast
- Total Posts : 204
- Scores: 0
- Reward points: 766
- Joined: 2011/08/01 11:02:49
- Location: Adelaide South Australia Australia
- Status: offline
RE: Mk 2 Cortina Rat Rod...PROJECT FINISHED! - page 3!
2009/06/22 20:13:31
(permalink)
Hi Guys, I have been working away on the car and progress is steady. I have managed to get the 'dual note' horns working and am thinking of externally mounting a pair of them...under the front bumper by the over-riders. On a side note, I have been playing with the old photochop program. I have messed around with the stripes and would like your thoughts; Silver highlight; 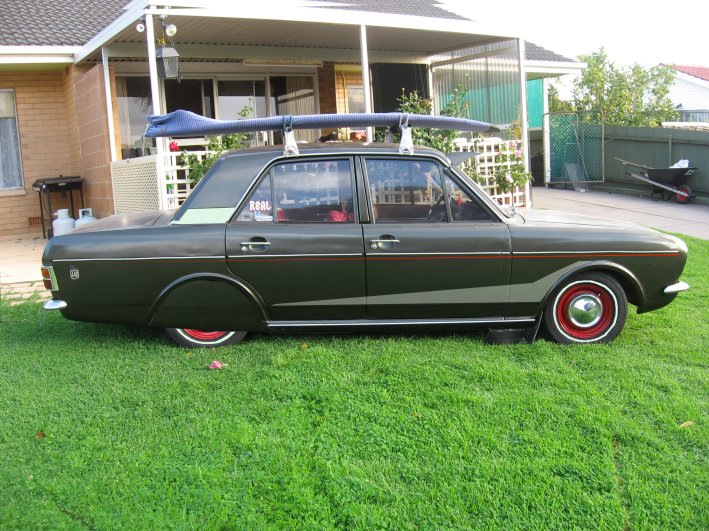 Red flash; 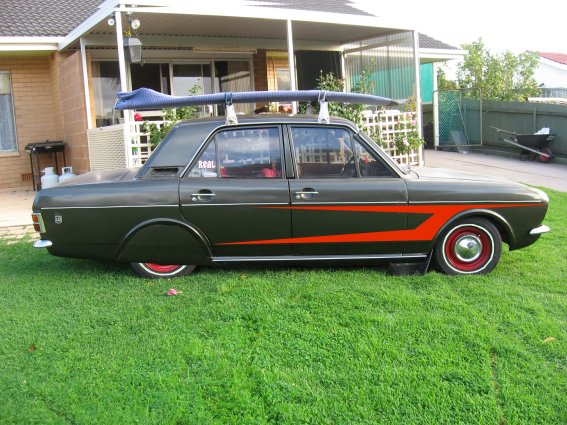 White blaster; 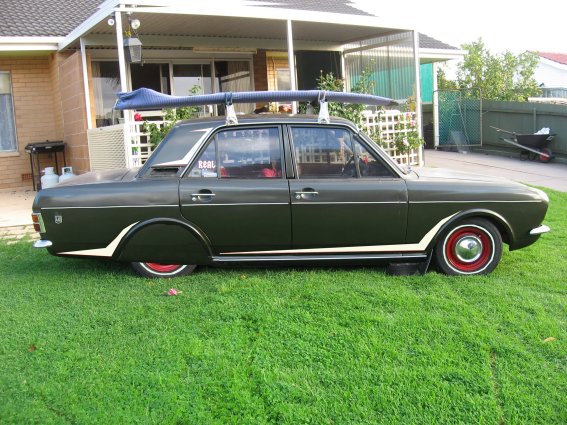 Silver enhancer; 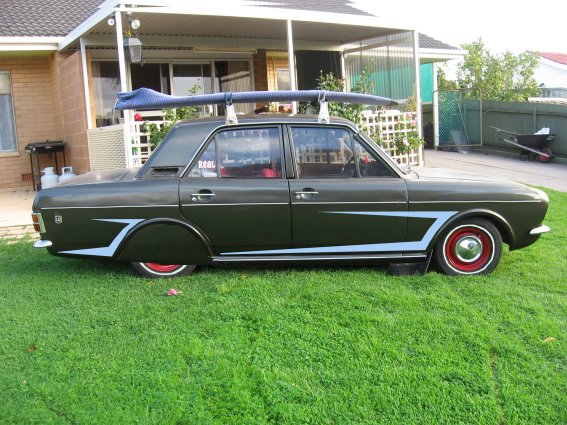 I'm keen to hear what you all think. RJ
|
Phil
Supporter

- Total Posts : 1786
- Scores: 35
- Reward points: 4581
- Joined: 2011/08/01 11:02:49
- Location: Sydney NSW Australia
- Status: offline
RE: Mk 2 Cortina Rat Rod...PROJECT FINISHED! - page 3!
2009/06/22 20:21:45
(permalink)
|
chobis
Enthusiast
- Total Posts : 26
- Scores: 0
- Reward points: 0
- Joined: 2011/08/01 11:02:49
- Status: offline
RE: Mk 2 Cortina Rat Rod...PROJECT FINISHED! - page 3!
2009/06/22 21:45:36
(permalink)
quote:
Originally posted by Phil
I vote pic 1[%]
x2
|
cosmic
Enthusiast
- Total Posts : 96
- Scores: 0
- Reward points: 2851
- Joined: 2011/08/01 11:02:49
- Location: sydney NSW Australia
- Status: offline
RE: Mk 2 Cortina Rat Rod...PROJECT FINISHED! - page 3!
2009/06/23 13:21:58
(permalink)
i like the red as it matchs the rest
have you got the spats and where do you get them from?
|
DRS 02L
Enthusiast
- Total Posts : 172
- Scores: 0
- Reward points: 0
- Joined: 2011/08/01 11:02:49
- Location: wollongong
- Status: offline
RE: Mk 2 Cortina Rat Rod...PROJECT FINISHED! - page 3!
2009/06/23 14:29:09
(permalink)
|
chobis
Enthusiast
- Total Posts : 26
- Scores: 0
- Reward points: 0
- Joined: 2011/08/01 11:02:49
- Status: offline
RE: Mk 2 Cortina Rat Rod...PROJECT FINISHED! - page 3!
2009/06/23 15:19:42
(permalink)
The danger with using red on the side is that it needs to then be the same red as the rims and then the danger is that it is too much red. If you use a different red it looks like you were simply unable to match it. I think it is safest to go a universal colour that will go with anything else you do to the car. Hence the silver works well, or perhaps the white. Maybe even a more subtle gunmetal grey.
|
240corty
Enthusiast
- Total Posts : 122
- Scores: 0
- Reward points: 833
- Joined: 2011/08/01 11:02:49
- Location: Clarkson WA Australia
- Status: offline
RE: Mk 2 Cortina Rat Rod...PROJECT FINISHED! - page 3!
2009/06/23 15:24:44
(permalink)
i had a mesh sunvisor that ended up in the back of the shed it got bent so i chucked it out, i have found a supplier of new ones the mesh type is $175
http://www.autocables.com.au/
go red
|
racin jason
Enthusiast
- Total Posts : 204
- Scores: 0
- Reward points: 766
- Joined: 2011/08/01 11:02:49
- Location: Adelaide South Australia Australia
- Status: offline
RE: Mk 2 Cortina Rat Rod...PROJECT FINISHED! - page 3!
2009/06/23 20:09:16
(permalink)
I'm spoilt for choice aren't I! I guess that's the cool thing about Rat Rods......anything goes, and you never make mistakes....UNLESS! You do too much....and then it looks like your trying too hard.
The colour matching should be easy, as the wheels are a temp colour I had lying around, so the final paint should be easy to match....Thank you Super Cheap!
The wheel spats are my feeble attempt at photochopping, but I am making my own spats from Brownbuilt shelves! I found a bunch of them rusting away behind the shed, so they are being rescued and put to good use.....more on them as the happen!
Finally, I have a mate making a bonnet emblem for me....and it looks stunning. It's probably too good to put on the car, but I will use it as he has put in so much effort. It's going to be a 'Hornet' in flight mode....and this dude is machining it from a steel ingot! How lucky am I.
More soon.
RJ
|
racin jason
Enthusiast
- Total Posts : 204
- Scores: 0
- Reward points: 766
- Joined: 2011/08/01 11:02:49
- Location: Adelaide South Australia Australia
- Status: offline
RE: Mk 2 Cortina Rat Rod...PROJECT FINISHED! - page 3!
2009/07/19 22:22:51
(permalink)
Hi all, Have been a little side tracked with things, but have found time to sort some more on the Green Hornet! Big thanks to the following people; Brenton (AKA Chobis) - Free all steel sunvisor! Richie at Wheelworx - Free billet steel Hornet bonnet emblem!!!![:u] Graham from Woodside[;^)] - Free headlight trims, indicators and wicked and very old roof rack! I have done mainly little things since I posted last, so I will let the pics do the talking; 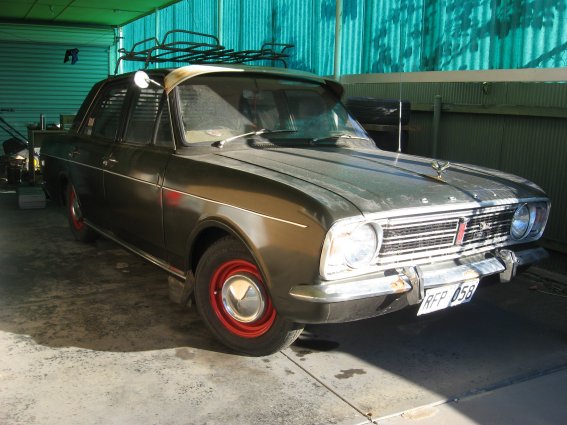 This pic gives you an idea of how low the beast is now....2 inch blocks and reversed leaf springs for the WIN! 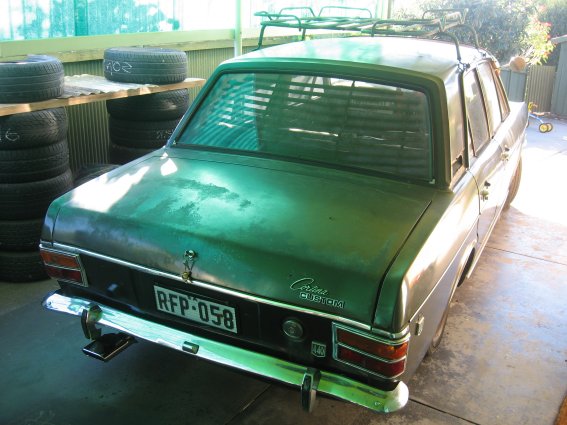  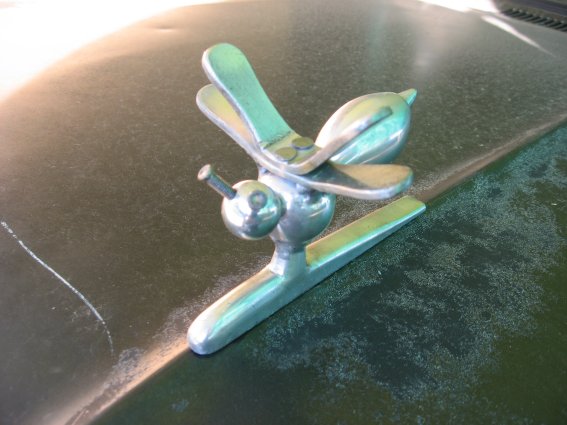 Cheers, RJ
|