Paul Dunstan
Supporter

- Total Posts : 1378
- Scores: 35
- Reward points: 4790
- Joined: 2011/08/01 11:02:49
- Location: Adelaide SA Australia
- Status: offline

RE: my rs restoration
2008/03/22 22:25:29
(permalink)
Due to popular request I have added images in this topic in the body shell section  http://classic-ford.org/forum/topic.asp?TOPIC_ID=14780
|
Jason How
Enthusiast

- Total Posts : 87
- Scores: 0
- Reward points: 0
- Joined: 2011/08/01 11:02:49
- Location: Adelaide SA Australia
- Status: offline
RE: my rs restoration
2008/03/25 21:13:18
(permalink)
up it goes got a few tweaks to make (still a little bottom heavy) but up she goes now to find me a welder!! Download Attachment: roll over.jpg roll over.jpg97.24 KB
|
lucas
Aficionado

- Total Posts : 639
- Scores: 2
- Reward points: 1452
- Joined: 2011/08/01 11:02:49
- Location: Adelaide SA Australia
- Status: offline
RE: my rs restoration
2008/03/25 22:38:30
(permalink)
good job mate as long as it does its job cant go wrong.
|
Paul Dunstan
Supporter
- Total Posts : 1378
- Scores: 35
- Reward points: 4790
- Joined: 2011/08/01 11:02:49
- Location: Adelaide SA Australia
- Status: offline
RE: my rs restoration
2008/03/26 22:51:20
(permalink)
Great work!
That design looks familiar [:x)]
We found that rolling the car to work on a parallel surface at a sensible height was worth the hassle of making the jig. I still have some small spots on the floor to do where some aftermarket seats were fitted [:(!] but I can get to it from the inside easy enough.
Best of luck and keep the pics coming.
|
510pom
Enthusiast
- Total Posts : 124
- Scores: 0
- Reward points: 1286
- Joined: 2011/08/01 11:02:49
- Location: brisbane qld Australia
- Status: offline
RE: my rs restoration
2008/03/28 21:04:16
(permalink)
how do you get the car up high enough to getit on the spit ???? block and tackle ??
|
Paul Dunstan
Supporter
- Total Posts : 1378
- Scores: 35
- Reward points: 4790
- Joined: 2011/08/01 11:02:49
- Location: Adelaide SA Australia
- Status: offline
RE: my rs restoration
2008/03/29 00:10:35
(permalink)
1 person and a trolley jack with a heap of travel or 2 people and brute effort - I did mine either way.
|
Jason How
Enthusiast
- Total Posts : 87
- Scores: 0
- Reward points: 0
- Joined: 2011/08/01 11:02:49
- Location: Adelaide SA Australia
- Status: offline
RE: my rs restoration
2008/03/29 10:31:12
(permalink)
yeah same as paul i just used a jack and a couple of blocks you just have to get up and down from the ground a lot!
|
Scott
Enthusiast
- Total Posts : 289
- Scores: 0
- Reward points: 2184
- Joined: 2011/08/01 11:02:49
- Location: Perth
- Status: offline
RE: my rs restoration
2008/04/19 01:53:28
(permalink)
I still remember this car from when Mike owned it.
I kinda recall vaugely that an engine in it was blown and was changed for the one that was in my RS, so there is a chance you may the original motor from mine. But I cant remember 100% if its true or not.
I shall be watching this thread.
|
Jason How
Enthusiast
- Total Posts : 87
- Scores: 0
- Reward points: 0
- Joined: 2011/08/01 11:02:49
- Location: Adelaide SA Australia
- Status: offline
RE: my rs restoration
2008/04/19 18:53:40
(permalink)
the original motor had thrown a rod thats when mike sold it to me and i the bought a second two door for the engine to get mine going the shell was up at mikes farm i then got another original bore block from Quickco and had miltons build me up an engine using some bits i had from swapmeets my mate did a little head work for me unfortunatly i only just run it in and the diff blew driving home from work that was the last time i drove it 5 years ago  it used to give me a real buzz driving it though much better than driving the 3 cyl charade ive got now (OH THE SHAME)
|
Jason How
Enthusiast
- Total Posts : 87
- Scores: 0
- Reward points: 0
- Joined: 2011/08/01 11:02:49
- Location: Adelaide SA Australia
- Status: offline
RE: my rs restoration
2008/04/19 20:31:47
(permalink)
well ive got a little done over the last few weeks. the heater bubble is off with no real issues just some dirt and surface rust Download Attachment: resizeheate1.jpg113.94 KB Download Attachment: resizeheater2.jpg113.69 KB Download Attachment: resizeheater3.jpg63.01 KB Download Attachment: resizeheater4.jpg69.96 KB this was a bit of a surprise i found on the base of the RH pillar Download Attachment: RH pillar base.jpg104.2 KB
|
Jason How
Enthusiast
- Total Posts : 87
- Scores: 0
- Reward points: 0
- Joined: 2011/08/01 11:02:49
- Location: Adelaide SA Australia
- Status: offline
RE: my rs restoration
2008/04/23 22:00:54
(permalink)
first batch of bits to get powdercoated Download Attachment: pc bits 1.jpg86.47 KB thanks to Rhys for the x-member i modded it a bit but it came out nicely Download Attachment: xmember.jpg74.56 KB i am on the look out for a good single phase welder but i have to do some fundraising. has anyone done the seam welding from the rally prep book? if so what are peoples thoughts. i just want a nice stiff shell to work with or is that too much for a fast road/track day project?
|
Jason How
Enthusiast
- Total Posts : 87
- Scores: 0
- Reward points: 0
- Joined: 2011/08/01 11:02:49
- Location: Adelaide SA Australia
- Status: offline
RE: my rs restoration
2008/06/24 19:11:49
(permalink)
just an update i have hurt my back so i have some time at the moment as all i can do is stand and walk so i'm doing all the slow annoying jobs 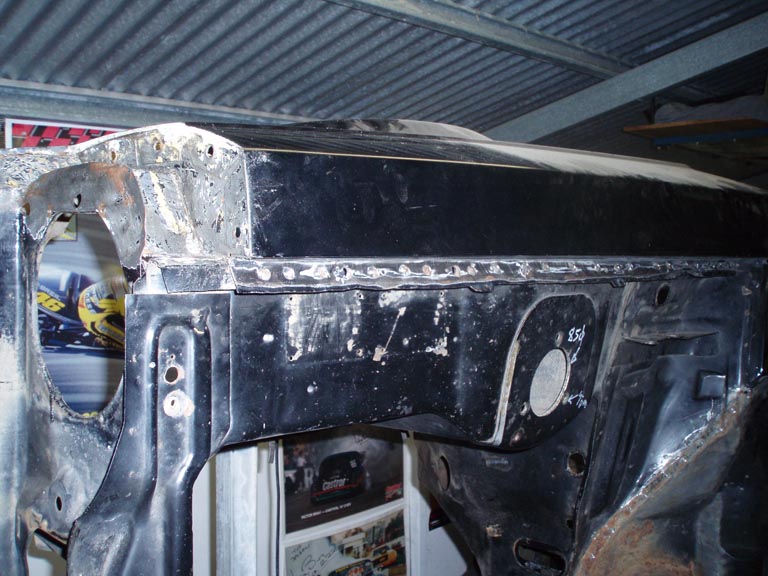 getting stuck into the under seal on the car and slowly removing the R/H guard the spot welds inside look challenging 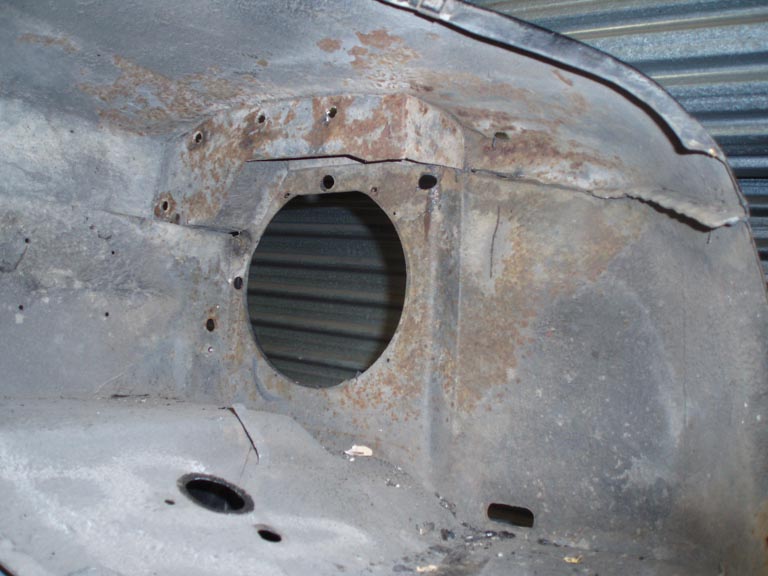 i'm using paint stripper, scraping, wire brush then power wire brush its slow and my shed is not that well ventilated but i'm getting to know all my old cd's again  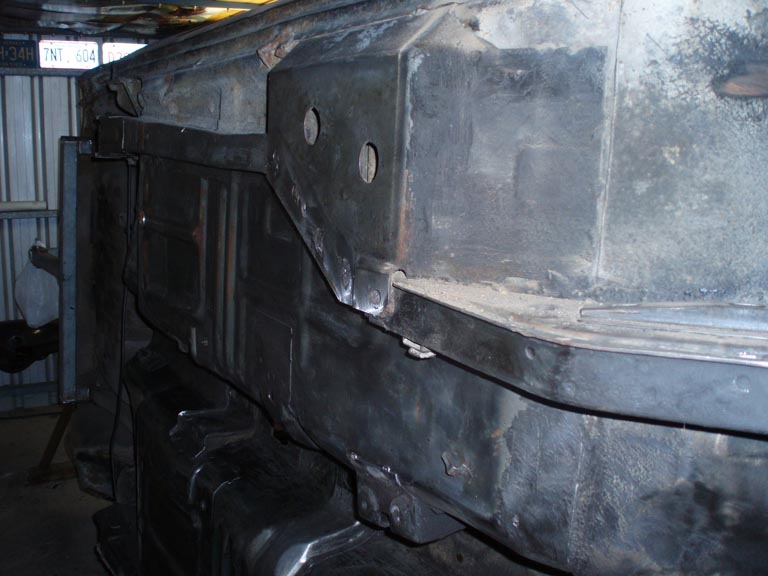 and i have sorted out the linkages on the carbs aswell (thank you smcka) it looks like the acc pedal needs modding but i dont have to do that for a while 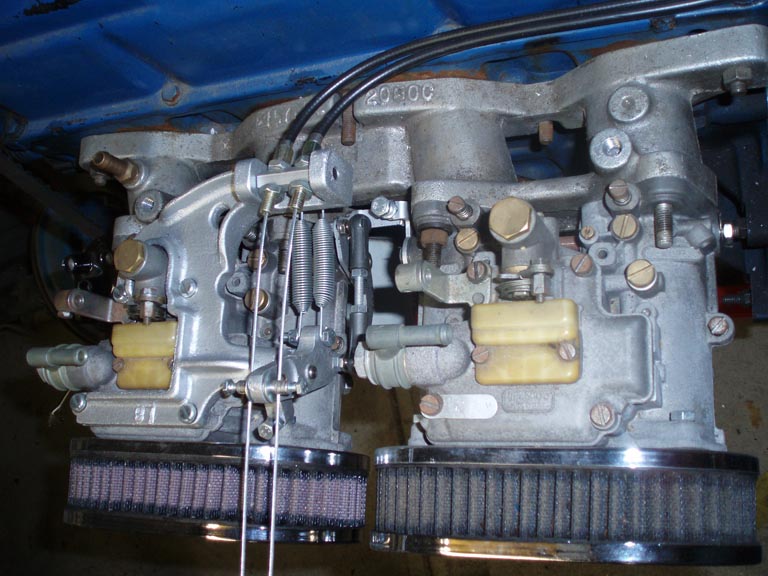
|
Jason How
Enthusiast
- Total Posts : 87
- Scores: 0
- Reward points: 0
- Joined: 2011/08/01 11:02:49
- Location: Adelaide SA Australia
- Status: offline
RE: my rs restoration
2008/08/31 23:38:01
(permalink)
Another update  I have got my welder and have started to do the stitch welding i have done the left side strut tower and left side of the chassis rails will do the other side this week The shed fills up with fumes quickly causes bad photos 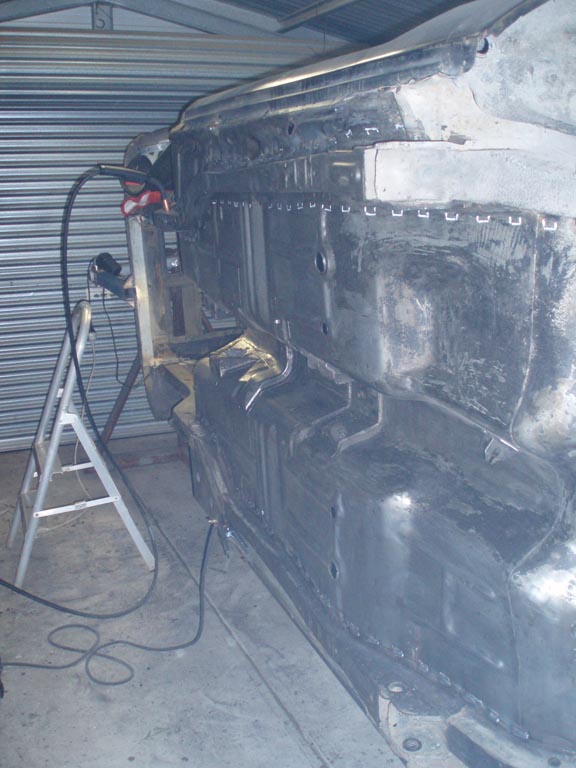 gussets are in they just needed a little trimming to get the gaps a bit smaller 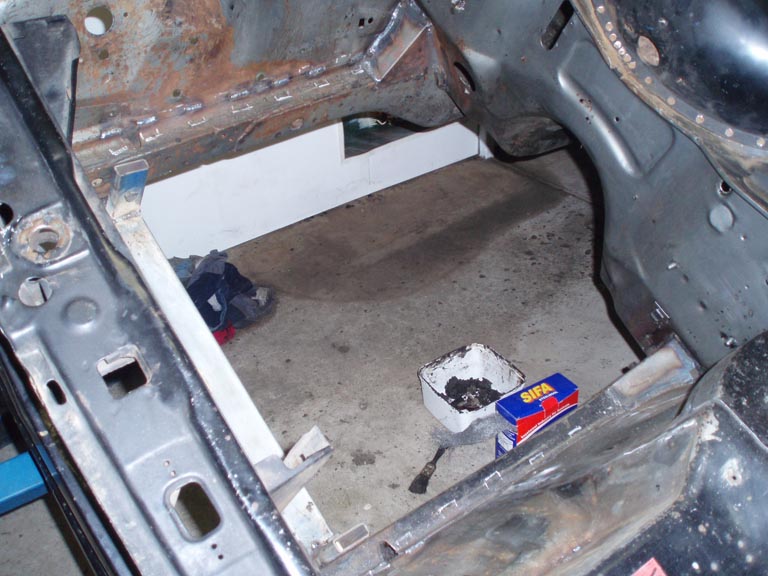 will also fit the chassis mount brackets for the radius rods this week Jason
|
SaggaRS
Enthusiast
- Total Posts : 231
- Scores: 5
- Reward points: 2969
- Joined: 2011/08/01 11:02:49
- Location: Adelaide SA
- Status: offline
RE: my rs restoration
2008/09/16 21:16:14
(permalink)
Looking good Jase Now you've got to tell me more about the carb linkage on your Dellortos. Where, what, how[?] Pm me if you want.
|
Jason How
Enthusiast
- Total Posts : 87
- Scores: 0
- Reward points: 0
- Joined: 2011/08/01 11:02:49
- Location: Adelaide SA Australia
- Status: offline
RE: my rs restoration
2008/09/17 16:48:46
(permalink)
Hi Shaul
I bought the linkage kit from smcka's web site a little while ago.
Don't think he has the same ones anymore. But i would recommend this design as it has a great action and looks very tidy.
would pay to ask the man himself and see if he can get some more of them.
And if you get K&N filters get the deeper ones mine are a too small
Jason
|