nigel mk1
Enthusiast

- Total Posts : 284
- Scores: 0
- Reward points: 2995
- Joined: 2011/08/01 11:02:49
- Location: Melbourne Victoria Australia
- Status: offline

RE: Nigels mk1 cosworth project
2008/06/25 23:47:51
(permalink)
I have been 2 pack priming everything and so far it seems as long as you get the ratios right, its no harder to spray than acrylic, infact i find it easier to control. The same goes for top coats, they have turned out great straight off the gun. Just gota make sure you wear the right protection, and this isnt cheap! 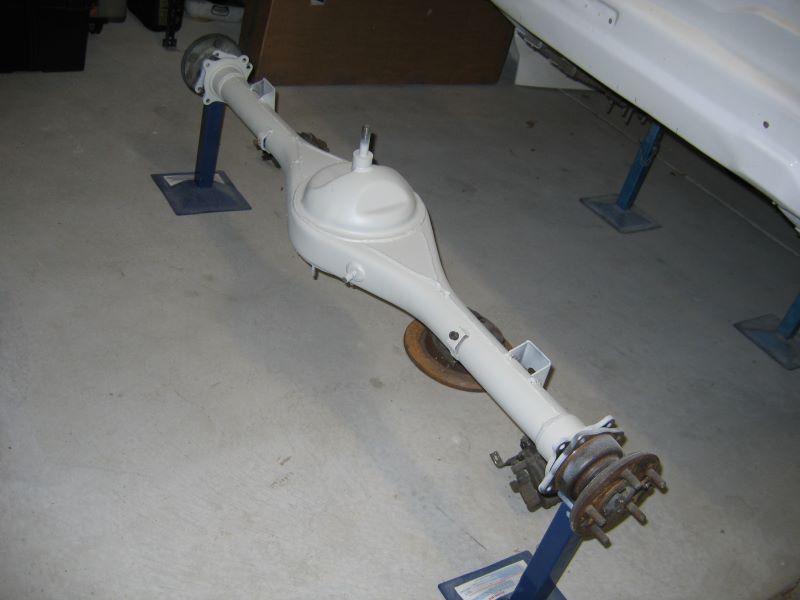
|
nigel mk1
Enthusiast
- Total Posts : 284
- Scores: 0
- Reward points: 2995
- Joined: 2011/08/01 11:02:49
- Location: Melbourne Victoria Australia
- Status: offline
RE: Nigels mk1 cosworth project
2008/06/25 23:54:51
(permalink)
|
nigel mk1
Enthusiast
- Total Posts : 284
- Scores: 0
- Reward points: 2995
- Joined: 2011/08/01 11:02:49
- Location: Melbourne Victoria Australia
- Status: offline
RE: Nigels mk1 cosworth project
2008/06/26 00:13:55
(permalink)
So after a fair while of making big holes in the car, i felt a need to fill in some of these. I had some .8 mild steel cut up into 300x2400 sections to make things easier. I spent a fair while massaging the inner arch to get a nice arc, then self tappered the tub into place. It was clear that the body outer skin was trimmed too much, although this trim line was necessary to remove the bad job that the previous owner did in trying to fit the fibreglass flares. I then stiched along the seam. Not sure if stitching was the right way to go here, but the tub was strong enough to hang off, so i think its ok! Once welded in i removed the self tappers and welded those holes.  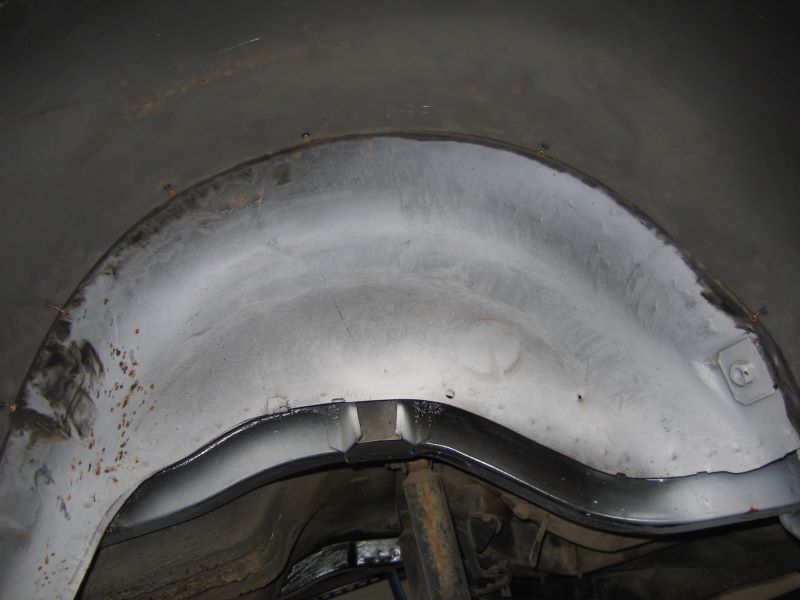 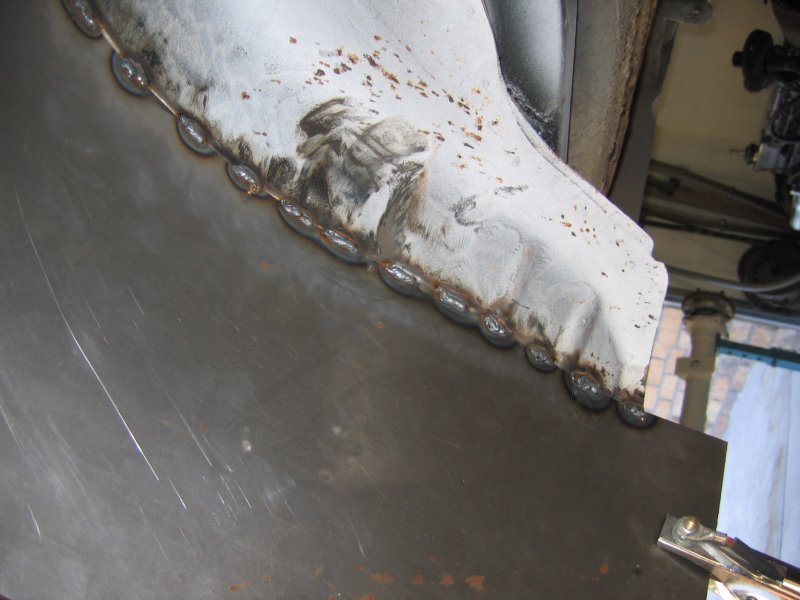 Once in i trimmed the excess leaving about 10-15mm I will use this to fold an edge.  
|
nigel mk1
Enthusiast
- Total Posts : 284
- Scores: 0
- Reward points: 2995
- Joined: 2011/08/01 11:02:49
- Location: Melbourne Victoria Australia
- Status: offline
RE: Nigels mk1 cosworth project
2008/06/26 00:22:21
(permalink)
|
nigel mk1
Enthusiast
- Total Posts : 284
- Scores: 0
- Reward points: 2995
- Joined: 2011/08/01 11:02:49
- Location: Melbourne Victoria Australia
- Status: offline
RE: Nigels mk1 cosworth project
2008/06/26 00:28:57
(permalink)
|
maxrs
Scholar

- Total Posts : 1334
- Scores: 1
- Reward points: 4483
- Joined: 2011/08/01 11:02:49
- Location: Mango hill Queensland Australia
- Status: offline
RE: Nigels mk1 cosworth project
2008/06/26 00:28:57
(permalink)
[:x)]Sic Nigel  The Beamer looks a treat with the new wheels.
|
nigel mk1
Enthusiast
- Total Posts : 284
- Scores: 0
- Reward points: 2995
- Joined: 2011/08/01 11:02:49
- Location: Melbourne Victoria Australia
- Status: offline
RE: Nigels mk1 cosworth project
2008/06/26 00:37:56
(permalink)
Thanks Mark, its meant to be the daily driver that doesnt get modified, i must have missed that bit[(#)]
|
nigel mk1
Enthusiast
- Total Posts : 284
- Scores: 0
- Reward points: 2995
- Joined: 2011/08/01 11:02:49
- Location: Melbourne Victoria Australia
- Status: offline
RE: Nigels mk1 cosworth project
2008/06/26 22:58:53
(permalink)
Disc brake setup on the hilux uses r31 calipers and maxima rotors. This was chosen as i can retain the toyota/facon 5 stud pattern with an off the shelf rotor. 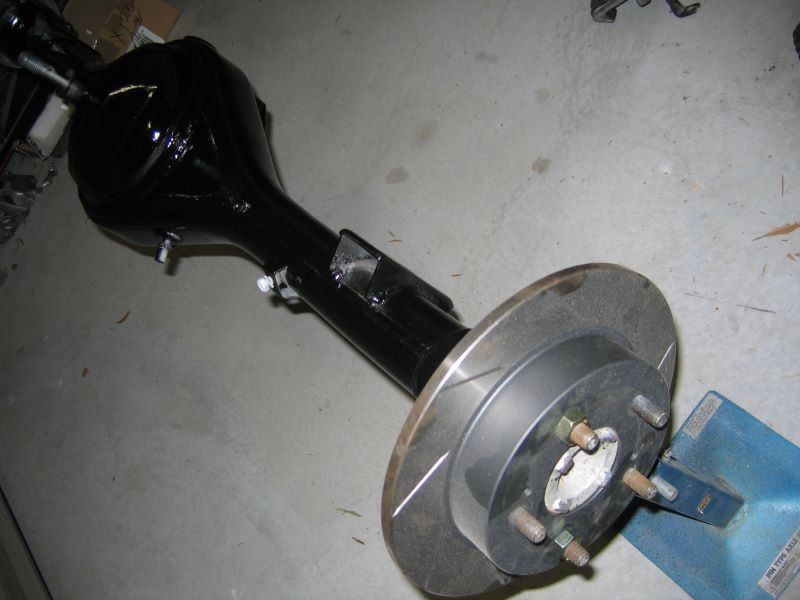 I have also made some progress on the rear wheel tubs. I folded the edge of the tub to meet the body, then welded along the seam. 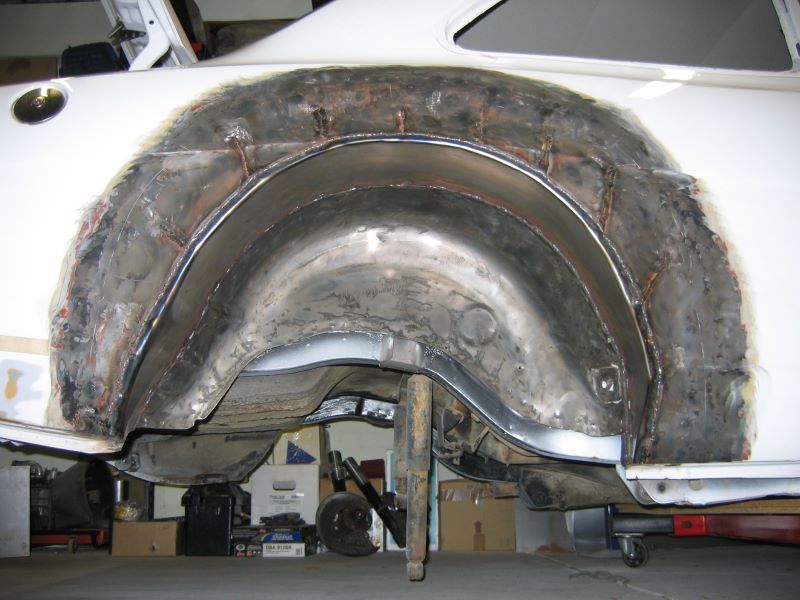 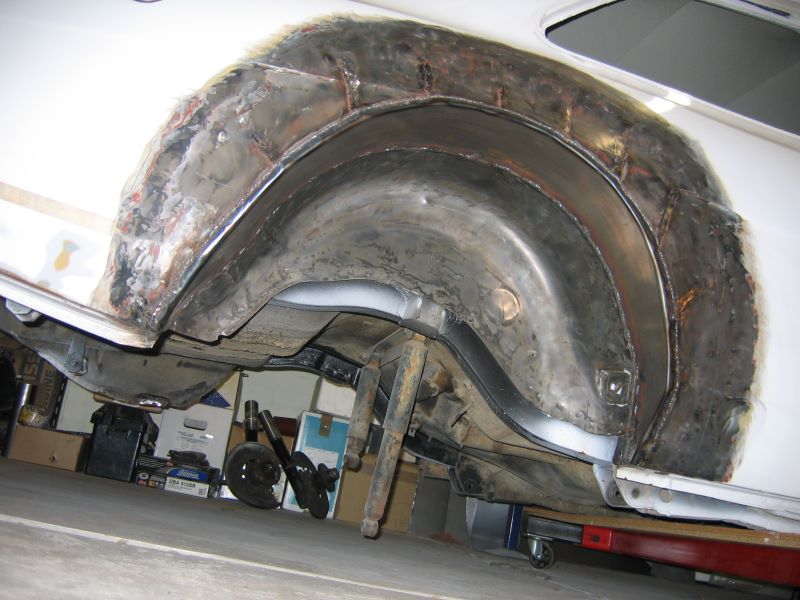
|
nigel mk1
Enthusiast
- Total Posts : 284
- Scores: 0
- Reward points: 2995
- Joined: 2011/08/01 11:02:49
- Location: Melbourne Victoria Australia
- Status: offline
RE: Nigels mk1 cosworth project
2008/06/26 23:10:13
(permalink)
With the drivers side arch fully closed out, i needed the car on the other side of the garage to work on the passenger side. I lowered the chassis onto the engine crane base and pushed it across. Placed some wheels under it again for more inspiration[:p] 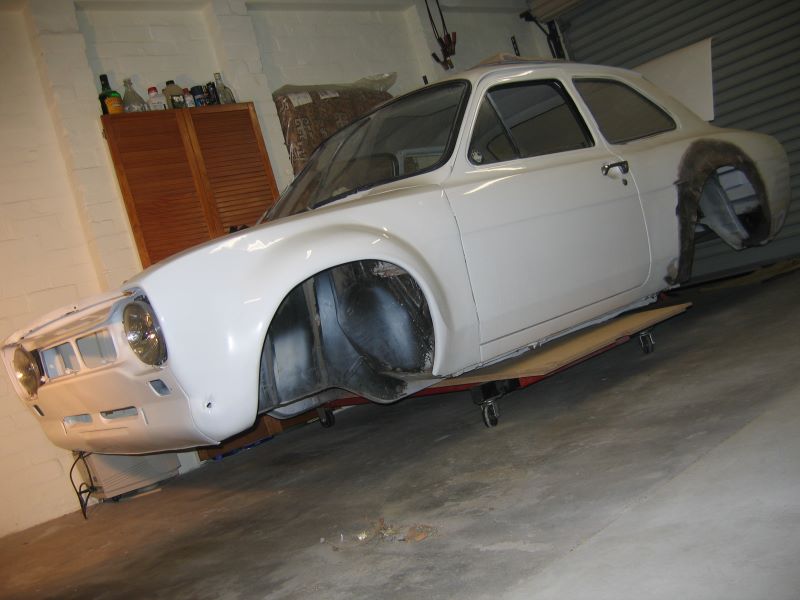 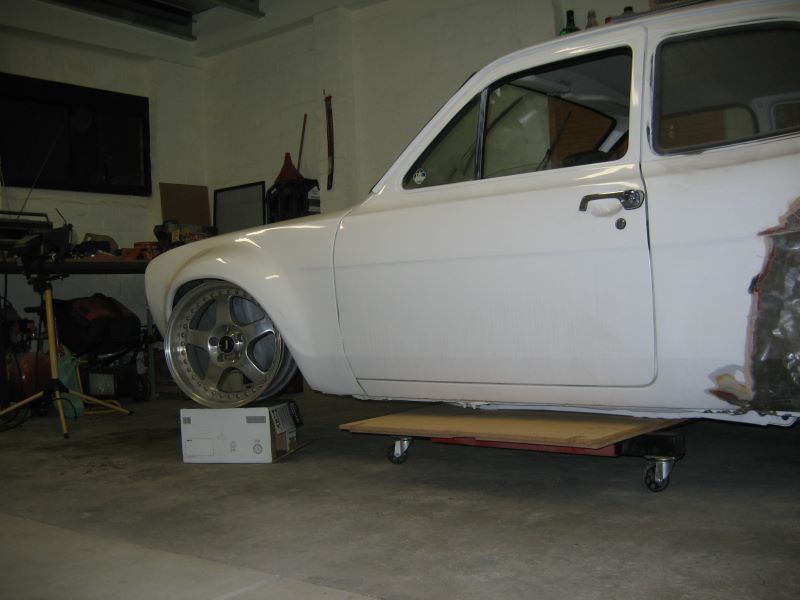 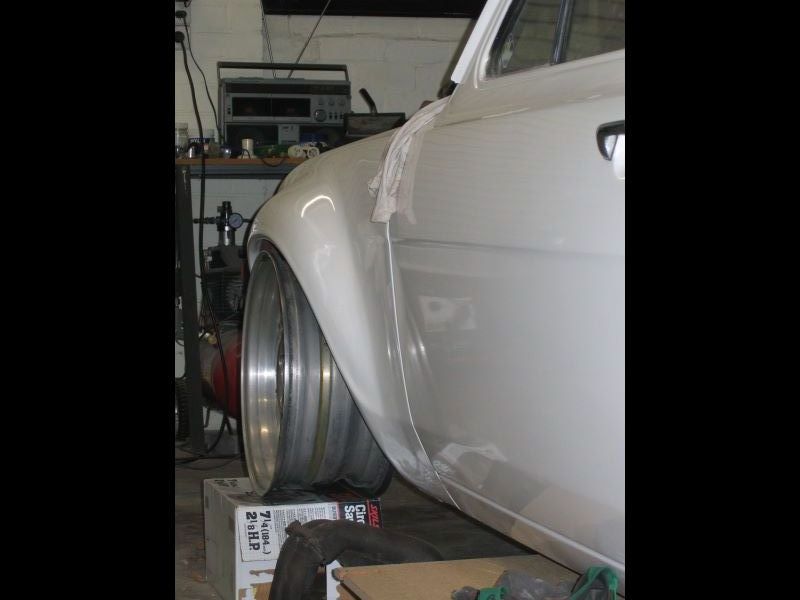
|
nigel mk1
Enthusiast
- Total Posts : 284
- Scores: 0
- Reward points: 2995
- Joined: 2011/08/01 11:02:49
- Location: Melbourne Victoria Australia
- Status: offline
RE: Nigels mk1 cosworth project
2008/06/26 23:15:02
(permalink)
|
nigel mk1
Enthusiast
- Total Posts : 284
- Scores: 0
- Reward points: 2995
- Joined: 2011/08/01 11:02:49
- Location: Melbourne Victoria Australia
- Status: offline
RE: Nigels mk1 cosworth project
2008/06/26 23:35:55
(permalink)
|
nigel mk1
Enthusiast
- Total Posts : 284
- Scores: 0
- Reward points: 2995
- Joined: 2011/08/01 11:02:49
- Location: Melbourne Victoria Australia
- Status: offline
RE: Nigels mk1 cosworth project
2008/06/27 00:00:02
(permalink)
|
hak073
Supporter
- Total Posts : 559
- Scores: 18
- Reward points: 6038
- Joined: 2011/08/01 11:02:49
- Location: Tapitallee NSW Australia
- Status: offline
RE: Nigels mk1 cosworth project
2008/06/27 09:00:05
(permalink)
That looks excellent with the wheel there. Is that how its going to sit when done? Super fabrication skills there too. And I'm diggin your 323i even more now, those wider wheels are fantastic!
|
Luke
Supporter

- Total Posts : 435
- Scores: -1
- Reward points: 6018
- Joined: 2011/08/01 11:02:49
- Location: Australia
- Status: offline
RE: Nigels mk1 cosworth project
2008/06/27 09:57:57
(permalink)
Hi mate nice work getting those tubs made up been having fun myself doing that.Are you going to stitch the arches on aswell or have you got other ideas.
Cheers
|
Jason How
Enthusiast
- Total Posts : 87
- Scores: 0
- Reward points: 0
- Joined: 2011/08/01 11:02:49
- Location: Adelaide SA Australia
- Status: offline
RE: Nigels mk1 cosworth project
2008/06/27 10:37:44
(permalink)
that's looking mean
i like it
and your wheel choice definitely suits those arches
|