bennymac24
Enthusiast

- Total Posts : 50
- Scores: 1
- Reward points: 1746
- Joined: 2012/01/21 16:02:30
- Status: offline

Re:Mk2 Panny Van Resto
2013/03/19 20:35:21
(permalink)
A little update. I removed my heater bubble and found the factory rust section around the fan, it is quite bad but i have a good section out of the parts car i had that i can weld in once i strip the interior. 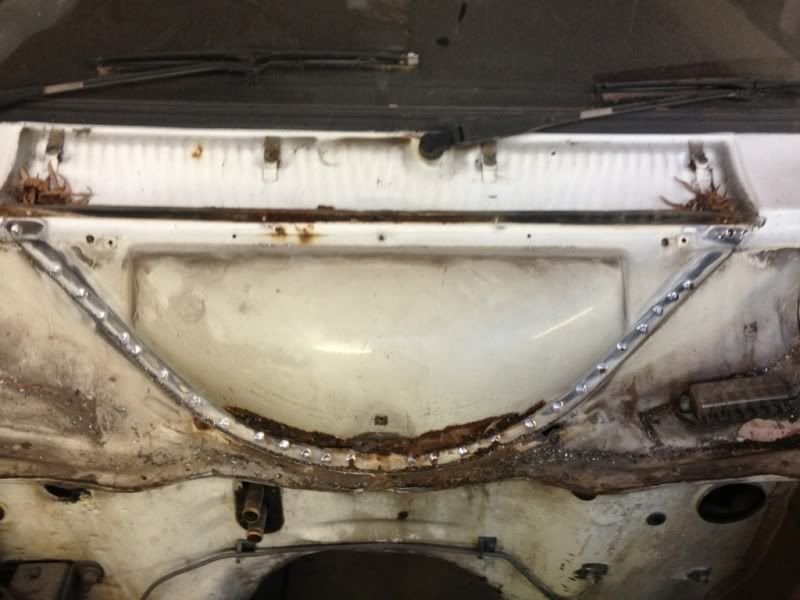 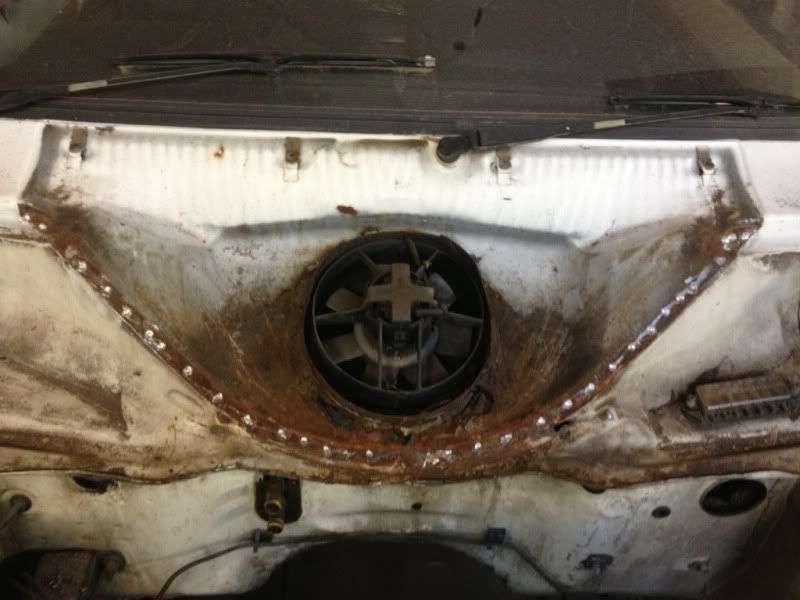 I also stripped a bit more out of the engine by, like the fuse box and brake lines. I also started stripping the paint back only to find another dodgey repair covered in bog. Lucky i still have the front off of the parts car as well. 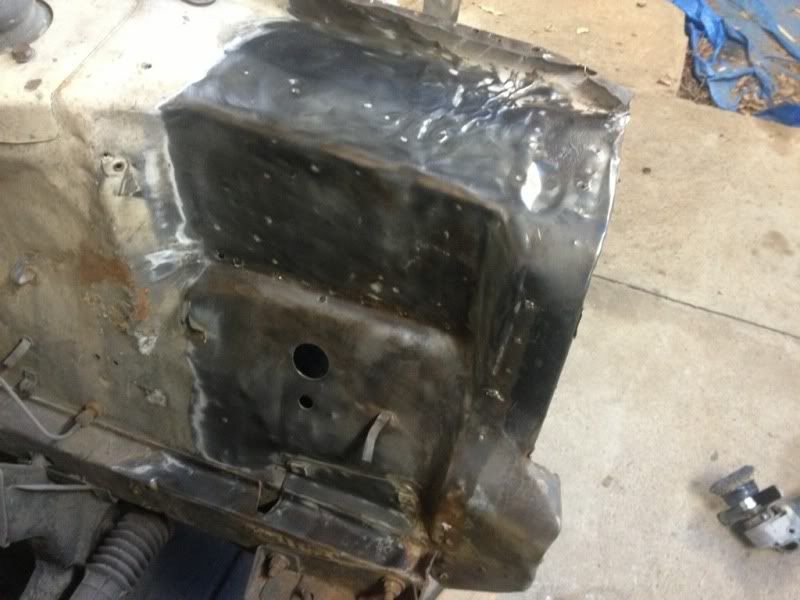  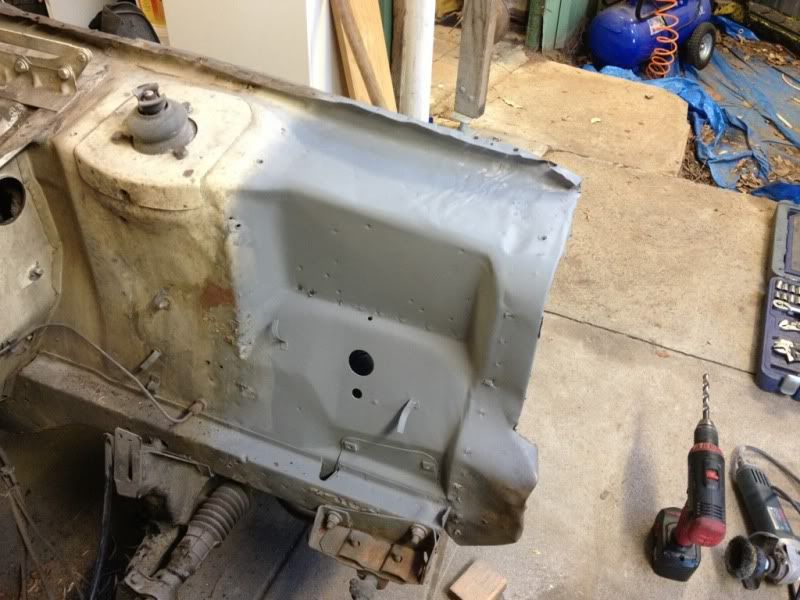  I chucked a bit of primer on just to stop any surface rust forming in case i get sidetracked and leave the engine bay for a little. Haha. The reason the brake booster is still in there is because i also went to the wreckers and got this off an au2 falcon, its about 75mm bigger in diameter, i may have to re fit the engine just to check my clearances before i pull the bracket out, i don't want to have to do any modifying after its painted. Ah well. 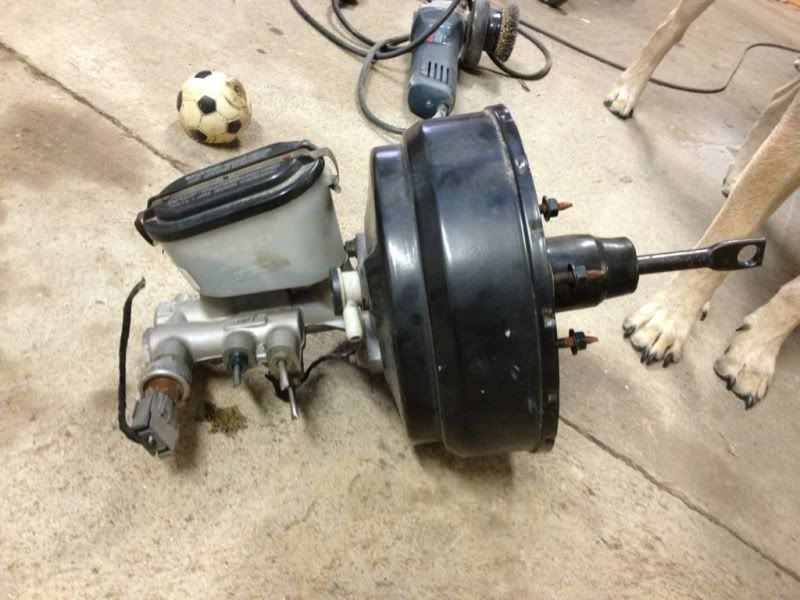 . Have to re arrange my shed so i have some where to store my interior when i hopefully pull it out this weekend. Cheers. Benny
|
bennymac24
Enthusiast
- Total Posts : 50
- Scores: 1
- Reward points: 1746
- Joined: 2012/01/21 16:02:30
- Status: offline
Re:Mk2 Panny Van Resto
2013/03/23 10:45:50
(permalink)
Well had a pretty productive night last night with huge thanks to a couple of mates. Got the doors off and majority of interior stripped. Here's a few pics. 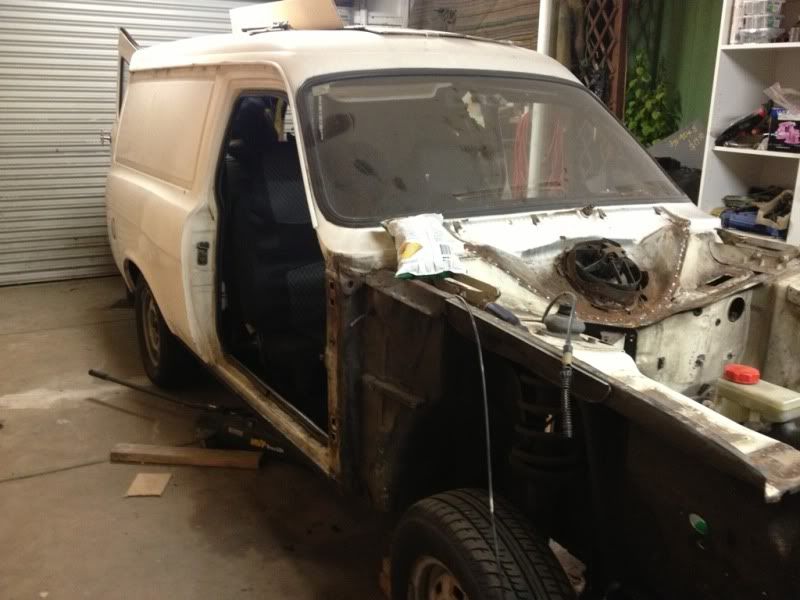 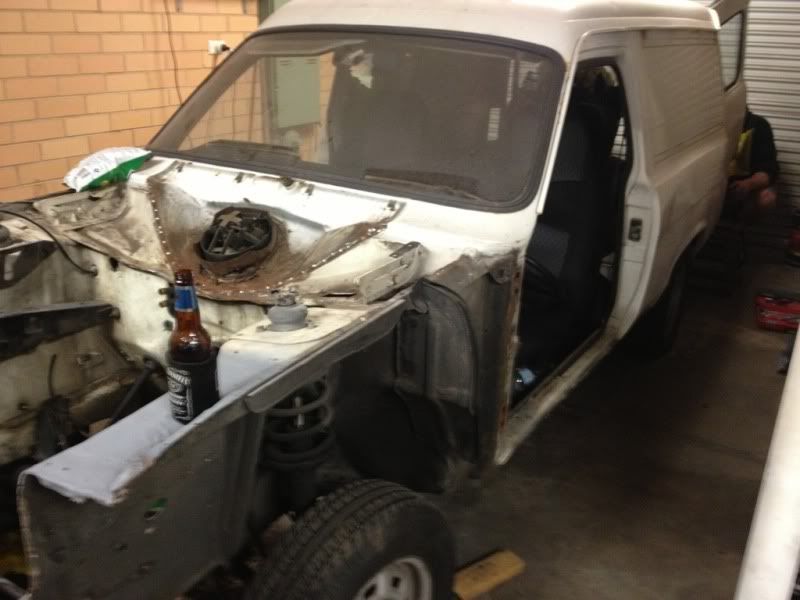 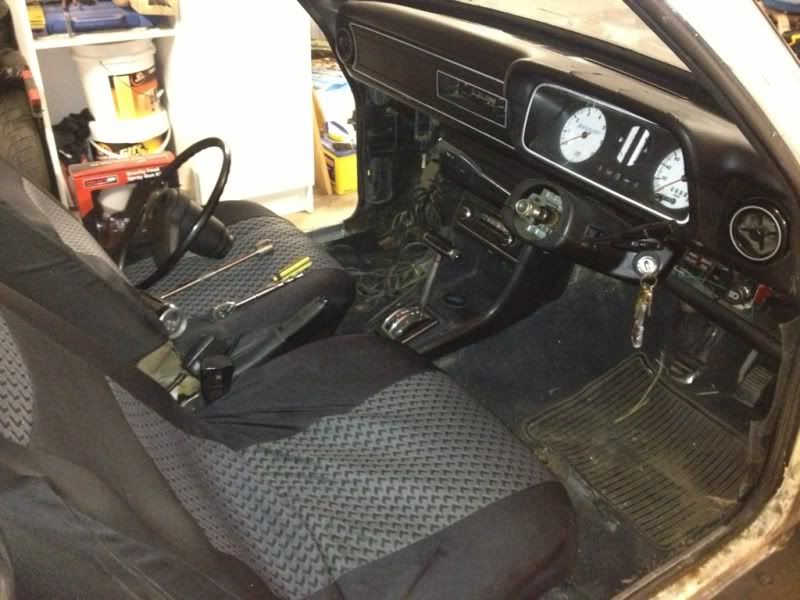 I have some more photos to come. More so of the rust that the carpet was hiding. Cheers Benny Mac
|
bennymac24
Enthusiast
- Total Posts : 50
- Scores: 1
- Reward points: 1746
- Joined: 2012/01/21 16:02:30
- Status: offline
Re:Mk2 Panny Van Resto
2013/03/23 19:38:39
(permalink)
Here are some more pics of last nights work. Firstly had to make a bit of room in what is now the parts storage shed so everything i pull off doesn't clog my working area. So my Moke needed to be moved out of the way:lol 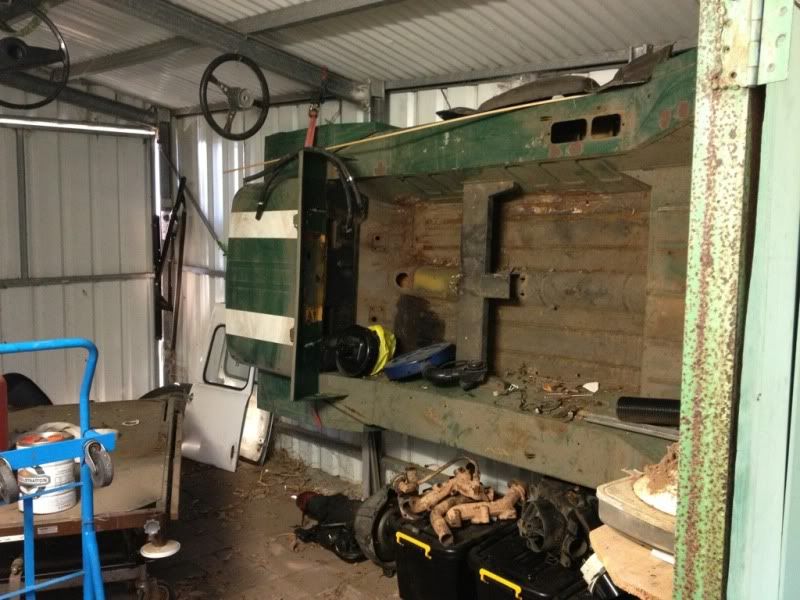 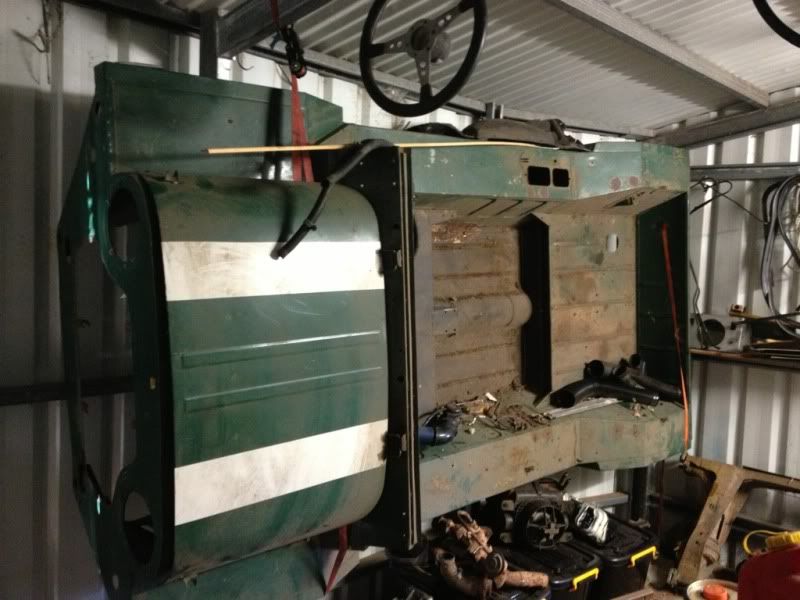 It was a bit tricky to get there but boy has it givin me plenty of room. Over the last week or two i have hung all me panels on the wall to also clear some clutter, i think it looks cool. 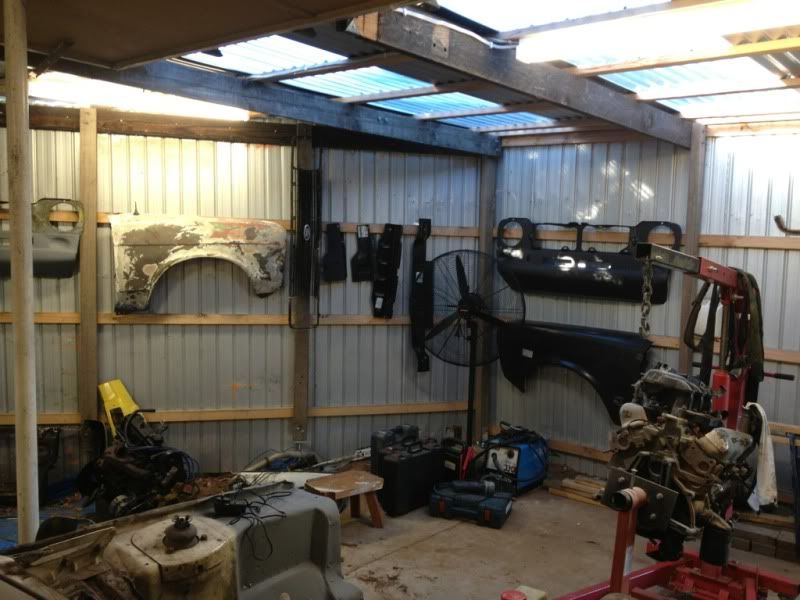 Pics of the roof scoop thats getting deleted 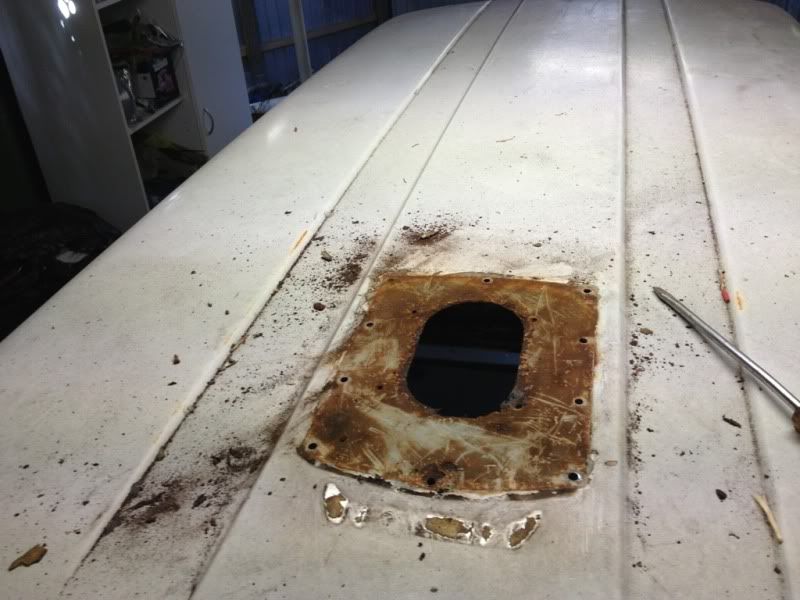 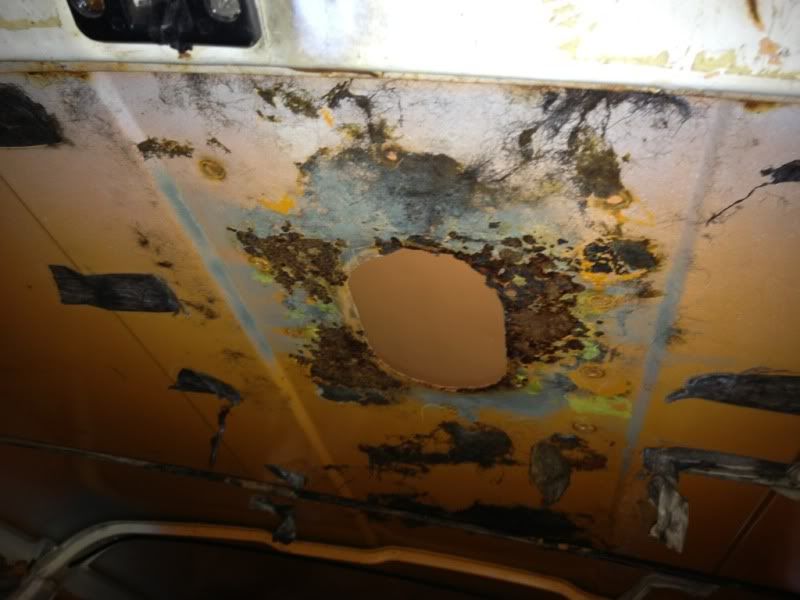 Pics of how the interior is now. 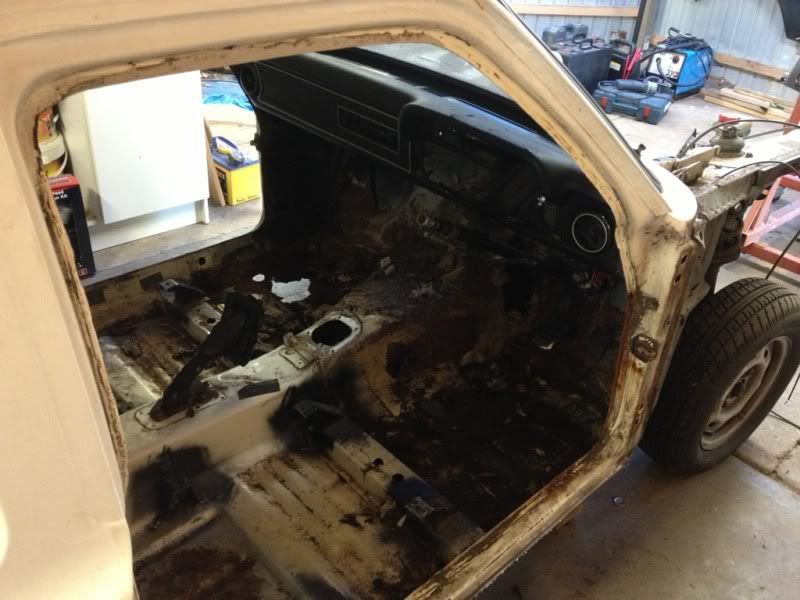 Rear of the PV 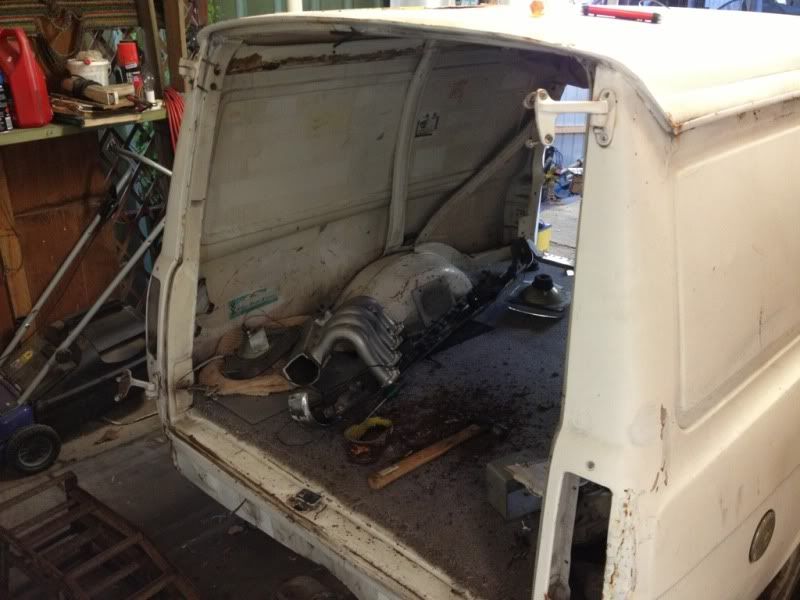 Pics of the floor pan  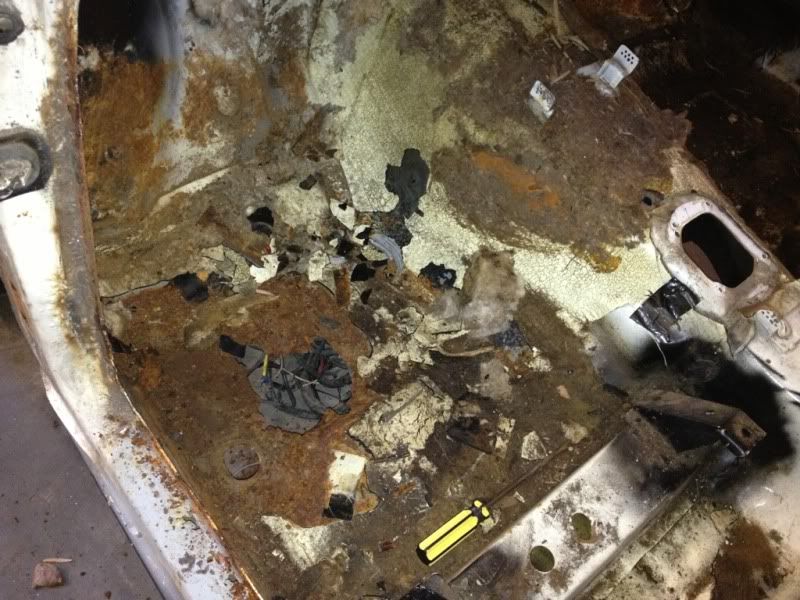 Pics of how it sits now. 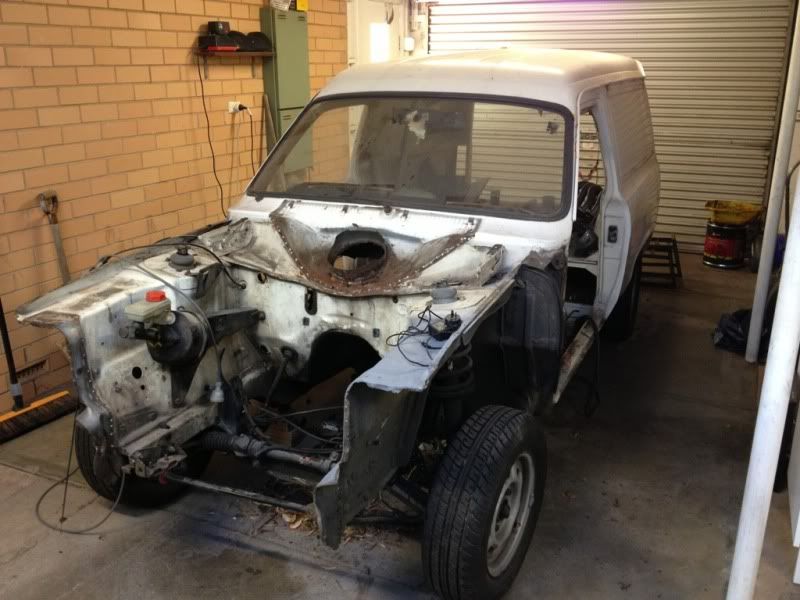 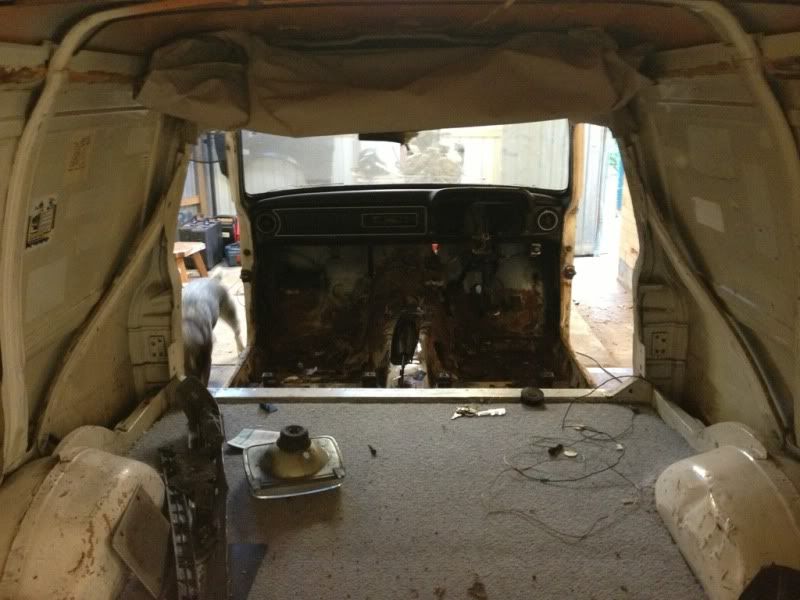 I'm pretty happy with the rust i found, i knew there was a hole in the passenger side foot well and i also knew the heater bubble was rusted. The only extra spot I have found that i didnt know about is a spot on the trans tunnel that will need cutting out and welding. There is rusty parts on the floor pan there but they should clean up and be fine if i clean and treat them properly. OK so next on the list is to finish stripping the last little bit of interior and then remove all the sound deadner off the floor so i can see if there is any more rust hiding. Then start heavily working on the front of the car again. If i can have the front done by mid april ,i'm on track and might actually have the car done by my deadline. Fingers crossed. Cheers Benny Mac
|
bennymac24
Enthusiast
- Total Posts : 50
- Scores: 1
- Reward points: 1746
- Joined: 2012/01/21 16:02:30
- Status: offline
Re:Mk2 Panny Van Resto
2013/03/25 22:09:16
(permalink)
Tried to see if I could fit the falcon booster and master cylinder tonight but have come to the conclusion that the booster is just too big to fit in the engine bay. So looks like I'll just be using the falcon master cylinder with the original escort booster, it should work pretty easily. I dummied it up to the booster just to check it out. 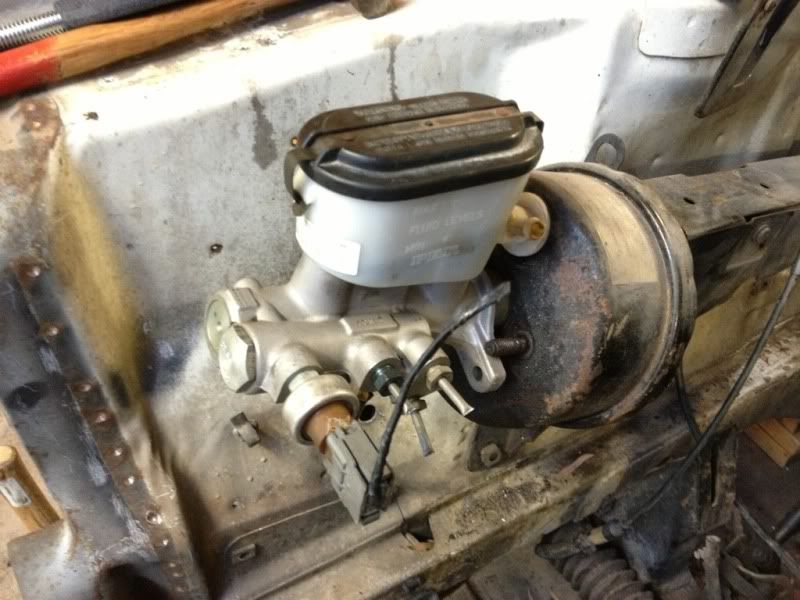 I also started making a cardboard template for the crushed section where the lower apron meets the inner wings. But I got carried away with hanging the front panel for measurements and just quickly chucked on a couple of other panels just to remind me of what the front looks like again, haha. 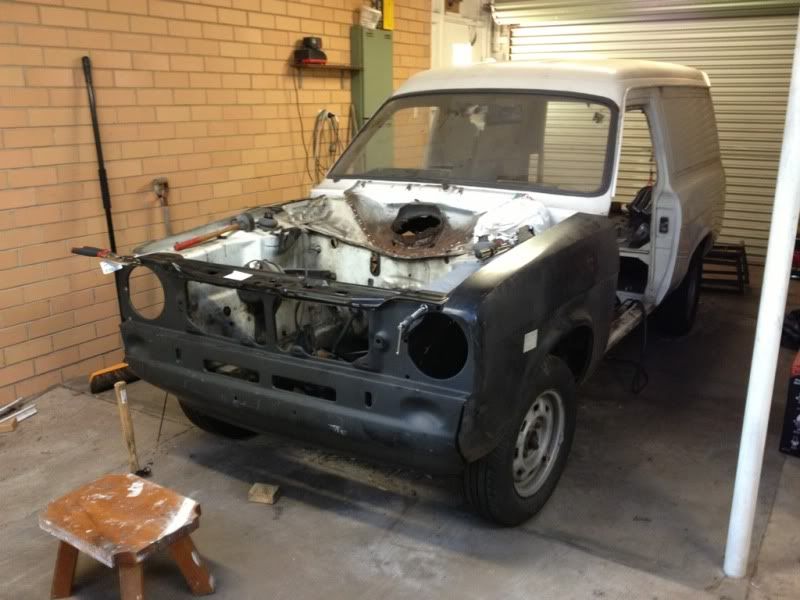 Cheers.
|
martymexico
Deity

- Total Posts : 2765
- Scores: 456
- Reward points: 6177
- Joined: 2011/08/01 11:02:49
- Location: Adelaide Sth Aust Australia
- Status: offline
Re:Mk2 Panny Van Resto
2013/03/26 11:31:34
(permalink)
Why not notch out the inner wing to suit, you've gone this far! Also if I'm mistaken you will have fun pushing the brake pedal down being of 1in bore as to 17mm , if your fitting Falcon calipers fruition front and rear or similar all will fine . Just Thort I give you the heads up on this...I did the same thing 15 yrs ago and the pedal didn't even move !!
|
bennymac24
Enthusiast
- Total Posts : 50
- Scores: 1
- Reward points: 1746
- Joined: 2012/01/21 16:02:30
- Status: offline
Re:Mk2 Panny Van Resto
2013/03/26 18:34:33
(permalink)
I did plan on cutting the inner guard out but the clearance issue is with the motor. The booster is 75mm bigger in diameter than the escort one, and I only have about 25mm clearance between the booster and the motor. I thought if I could extend the bracket a bit, the booster would sit in front of the motor but I just run out of room on the rad support.
But it should be fine as I will be running pbr twin piston calipers on the front and a shortened ef/el falcon diff in the rear complete with brake set up. So it pretty much is a falcon system. Another good thing is it has the pressure differential valve and switch in the master cylinder already, so no extra brake lines or separate ugly valve in the engine bay.
Cheers
|
bennymac24
Enthusiast
- Total Posts : 50
- Scores: 1
- Reward points: 1746
- Joined: 2012/01/21 16:02:30
- Status: offline
Re:Mk2 Panny Van Resto
2013/03/26 21:53:03
(permalink)
|
bennymac24
Enthusiast
- Total Posts : 50
- Scores: 1
- Reward points: 1746
- Joined: 2012/01/21 16:02:30
- Status: offline
Re:Mk2 Panny Van Resto
2013/03/30 11:03:33
(permalink)
|
bennymac24
Enthusiast
- Total Posts : 50
- Scores: 1
- Reward points: 1746
- Joined: 2012/01/21 16:02:30
- Status: offline
Re:Mk2 Panny Van Resto
2013/03/31 22:21:31
(permalink)
Got out in the shed today but not for long. Swapped out the crumpled top inner guard with a section I had off the parts car but couldn't finish welding because my helmet was playing up. I also started cleaning up the the heater fan area ready to cut out and weld a new section in. 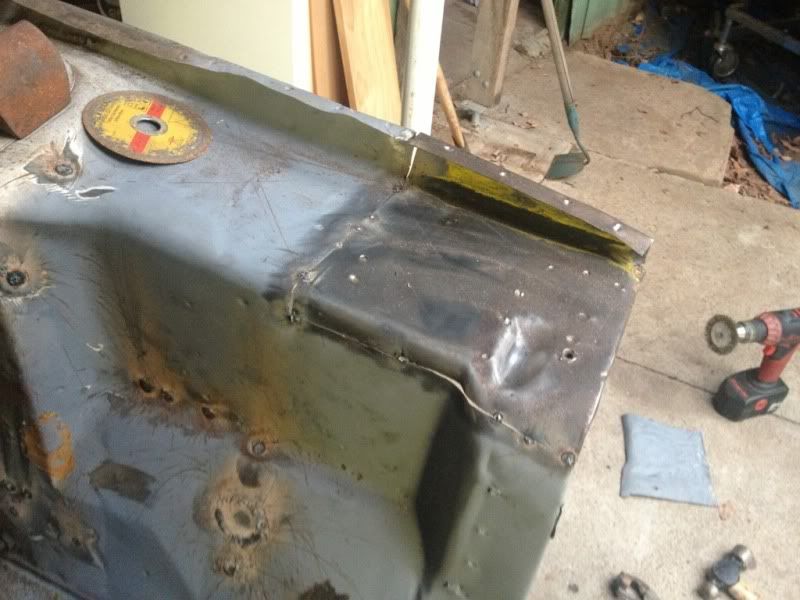 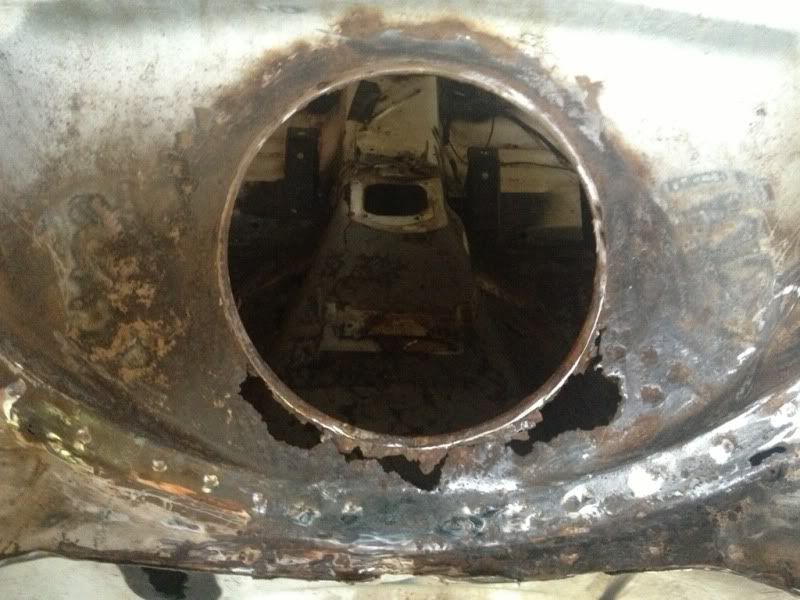 Cheers Benny Mac
|
bennymac24
Enthusiast
- Total Posts : 50
- Scores: 1
- Reward points: 1746
- Joined: 2012/01/21 16:02:30
- Status: offline
Re:Mk2 Panny Van Resto
2013/04/01 21:49:25
(permalink)
Went and got a new welding helmet today, my other one was blinding me randomly and had me seeing spots all over. I didn't finish welding the top section today tho, instead i spent a lot of time looking at the car and thinking, WOAH, what have i done, i'm not a panel beater, i think i'm in over my head, i may have bitten off more than i can chew, i'm not going to get the paint done in 6 months let alone the engine conversion........ blah blah blah. But i then thought, if dont keep trying to get it done for my wedding, it will probably just sit in the state its in now for god knows how long. Nothing like a deadline to help keep you motivated, haha. Plus hopefully when its done, i'll get satisfaction in knowing that i did most, if not all of it myself, with the help of a few friends of course. So with that in the back of my mind, i soldiered on. I got the lower apron mounting points welded on and adjusted so the new apron sits exactly where it should. Pretty happy with how it sits, it was very stressfull putting cross members and rad supports on and off what seemed like 20 times, and the apron as well and hoping that what i'm doing isn't just going to turn to complete crap. It does play on your mind a little to think that you have to weld all the pieces back on, and what happens if somewhere along the line you get something wrong and you dont notice till your giving the last panel fit before paint. I don't know what i'd do, probably break down and cry, haha:doh Any way, enough yap, here are a few pics, probably dont look like much but heaps better than what i cut off and replaced, i was pretty happy with the outcome. Also i haven't finished clean them up yet, i ran out of linishing discs. 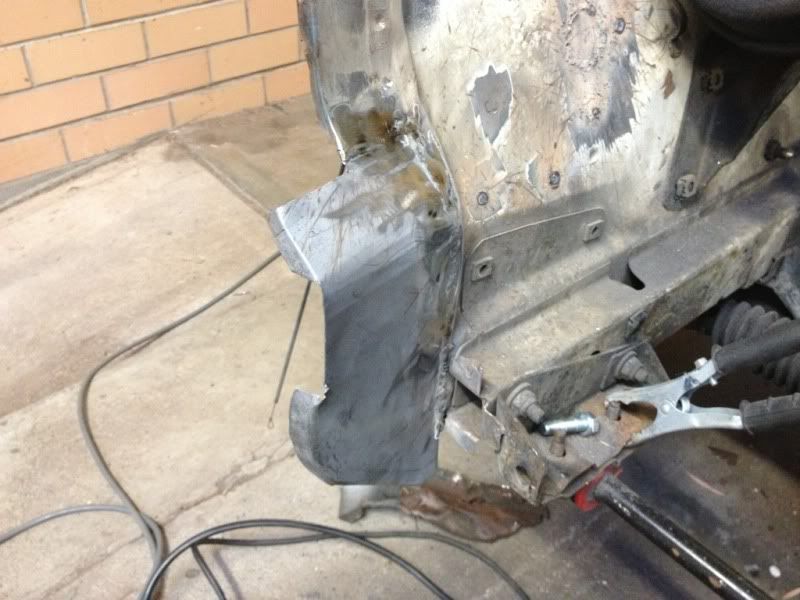 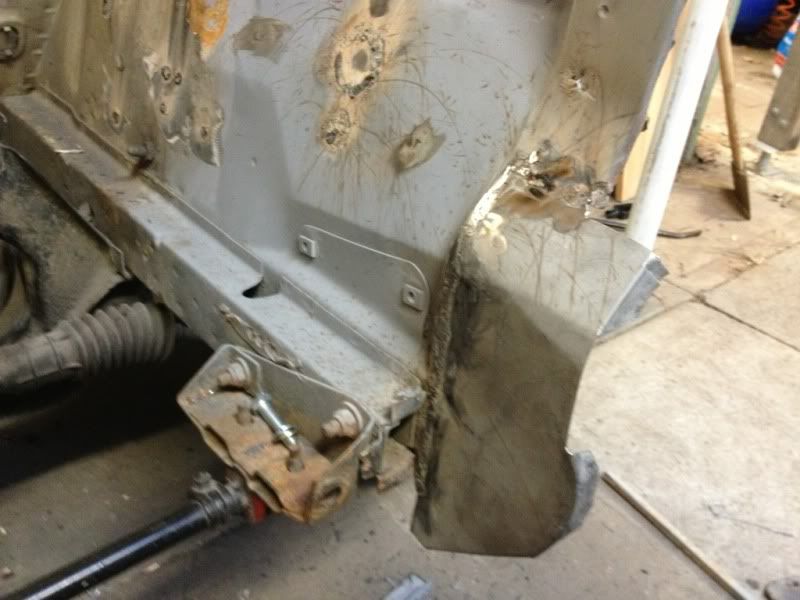 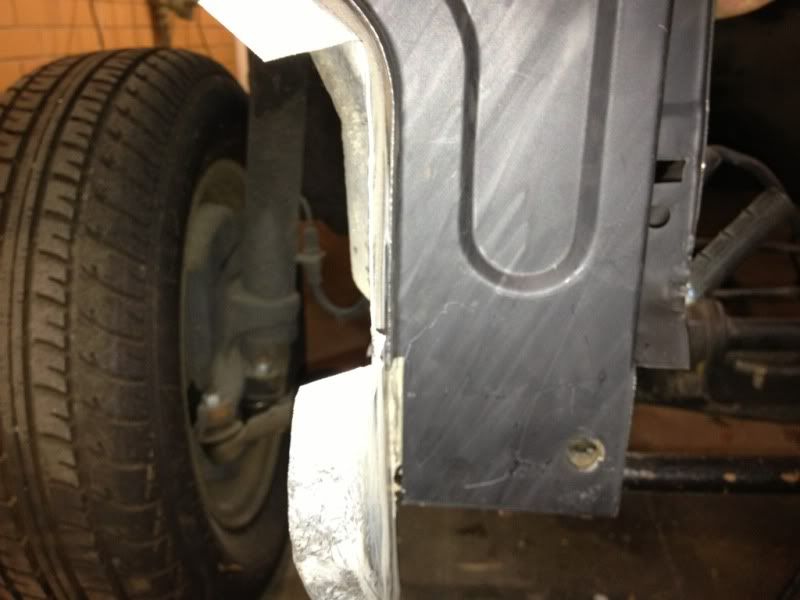 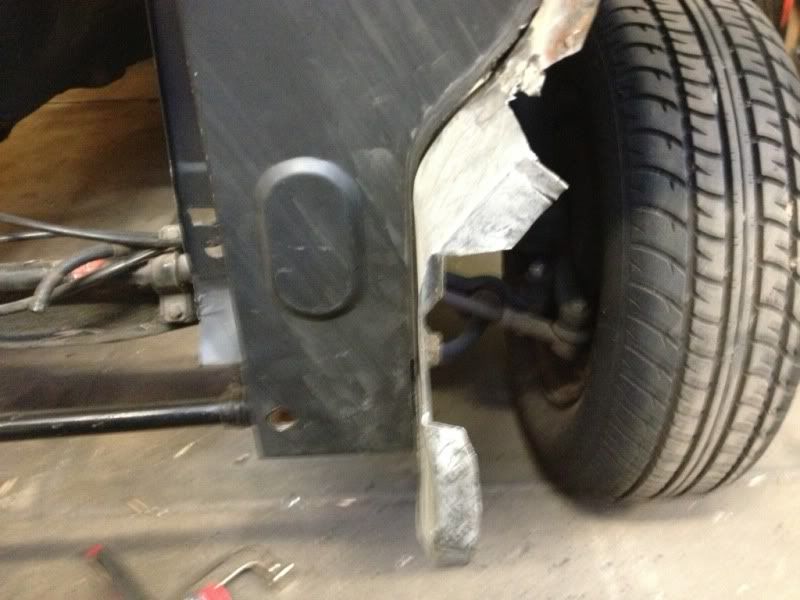 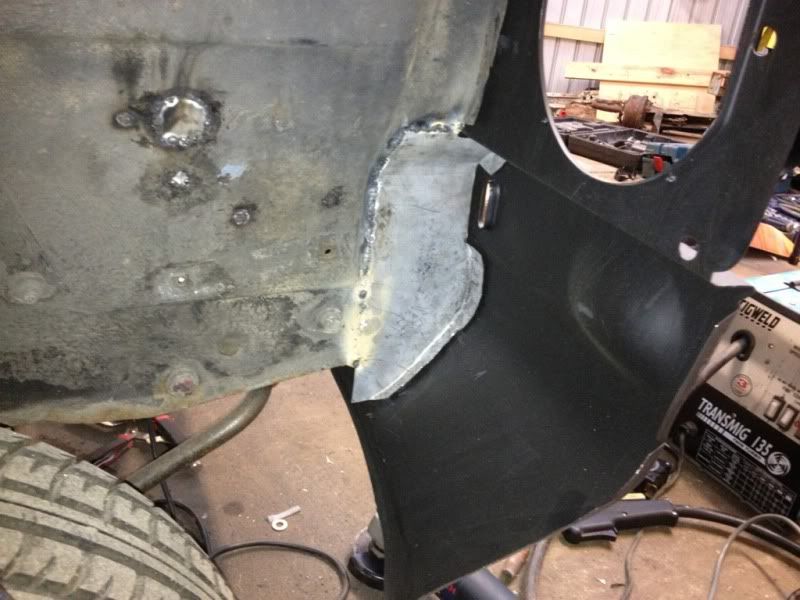 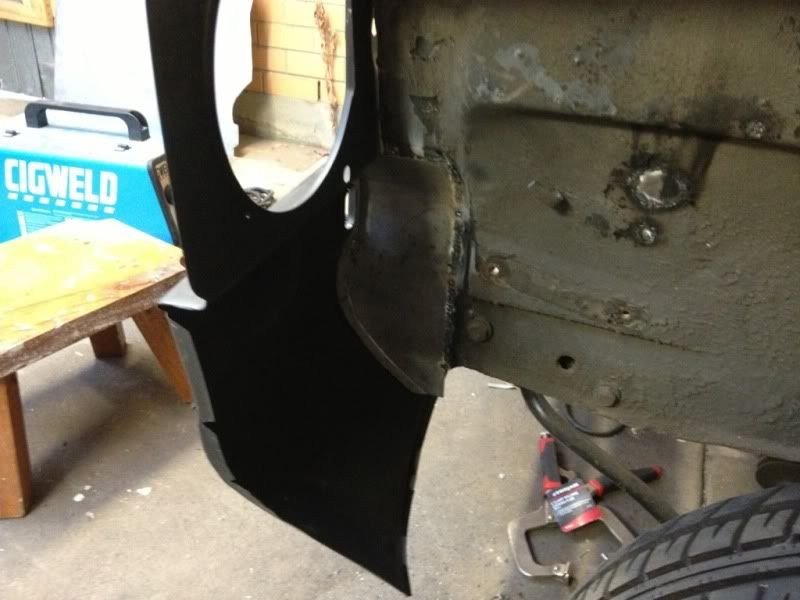 Cheers
|
phoenix 13918
Enthusiast
- Total Posts : 187
- Scores: 4
- Reward points: 1705
- Joined: 2012/05/17 17:44:08
- Location: Adelaide
- Status: offline
Re:Mk2 Panny Van Resto
2013/04/02 15:20:40
(permalink)
Some great progress happening there mate, and quickly too. Well done!!
|
bennymac24
Enthusiast
- Total Posts : 50
- Scores: 1
- Reward points: 1746
- Joined: 2012/01/21 16:02:30
- Status: offline
Re:Mk2 Panny Van Resto
2013/04/03 21:38:47
(permalink)
Cheers mate, and yeah, I try and spend every minute I have to spare in the shed, which thanks to work isn't as much as I'd like.
|
Mk2_2dr_2L
Supporter

- Total Posts : 528
- Scores: 2
- Reward points: 4877
- Joined: 2011/08/01 11:02:49
- Location: Toowoomba QLD Australia
- Status: offline
Re:Mk2 Panny Van Resto
2013/04/04 11:25:53
(permalink)
Not messing around there!
Keep the pics coming.
|
bennymac24
Enthusiast
- Total Posts : 50
- Scores: 1
- Reward points: 1746
- Joined: 2012/01/21 16:02:30
- Status: offline
Re:Mk2 Panny Van Resto
2013/04/04 21:05:33
(permalink)
Cheers, and yeah, plenty of pics. Not only should I have a good scrap book at the end but it also helps me remember how things went.
|
Matt75
Deity
- Total Posts : 2185
- Scores: 67
- Reward points: 6533
- Joined: 2011/08/01 11:02:49
- Location: Doncaster Vic Australia
- Status: offline
Re:Mk2 Panny Van Resto
2013/04/05 09:32:27
(permalink)
Great to see it coming together quickly. There are many on here (myself included) who admire your dedication.
Keep at it.
Matt
|