rudeboy
Enthusiast

- Total Posts : 107
- Scores: 0
- Reward points: 2514
- Joined: 2011/08/01 11:02:49
- Status: offline

RE: my Moonstone Sierra RS Cosworth ...
2011/04/16 20:10:13
(permalink)
OK I have now removed everything that I need to ... the offending water pump is out ready for the new one, I've taken out the thermostat for a clean up and a newy. I've removed all the hoses around the turbo (in and out) for a clean up and for access ... now was a good time to check that it was in good nic to Some dirty bits ... 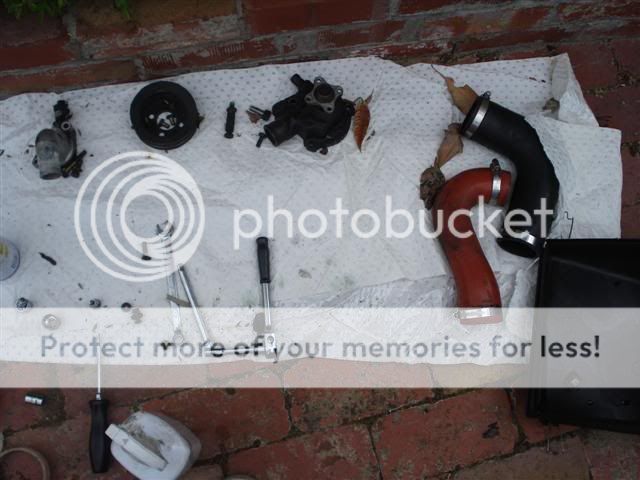 and this is not quite the extent of the bay strip down (since this pic the airbox came right out to give me access for another job ... photos later). I was going to remove the alternater for a clean and a respray but I soon discovered that the lower mount bolt is to long to come out without removing the radiator fans ... I'll just have to save this job for when I 'overhaul' the cooling system 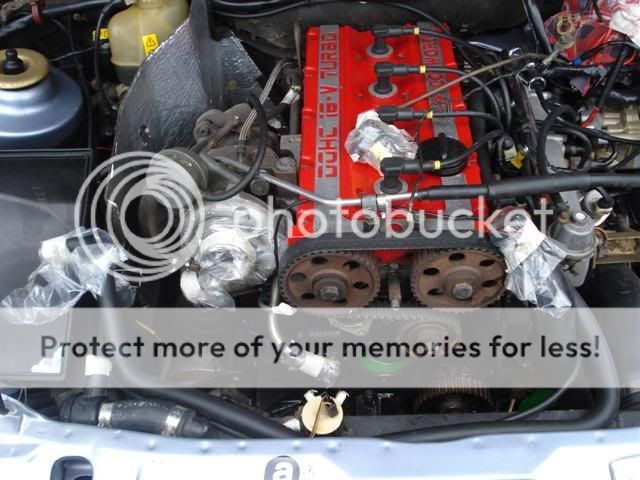 Good news is the turbo compressor blades look good to me ... 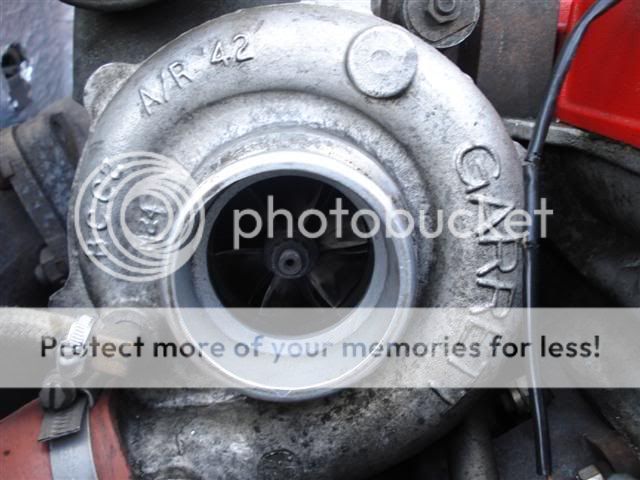 ... and if there is one thing I've seen a few of in my time are compressor blades (although on a slighty larger scale!)  Heres my makeshift spray booth in use again ... this time for the water pump pulley and bolt heads and I thought I'd give the lifting eyes the once over. You'll see one of the bonnet catch screws from the slam panel there ... I have repainted those and the alarm sensor mount at the front of the bay ... so everything is the colour it is meant to be 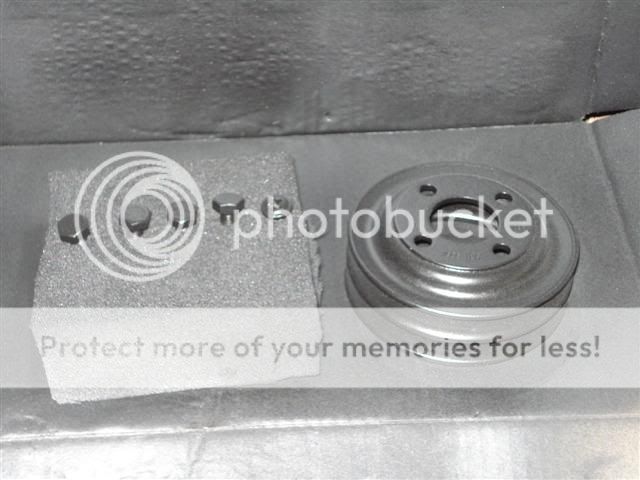 
|
rudeboy
Enthusiast

- Total Posts : 107
- Scores: 0
- Reward points: 2514
- Joined: 2011/08/01 11:02:49
- Status: offline

RE: my Moonstone Sierra RS Cosworth ...
2011/04/16 20:16:29
(permalink)
I must say that I was more than impressed with the condition of the cooling system on my cos (except of course the water pump which had decided to drop its guts) The coolant was clean, the components weren't rotten and the hoses were in pretty good condition. I got a new water pump sent out with new bolts from the UK ... although only one of the three bolts were correct so I went to a local engineering joint and put the old bolts on the bench ... and he came back with new identical bolts (same head markings) for the total sum of f@#k all! I think next time I'll just source bolts locally and not get so hung up on 'Ford originals'. Anyway here's the new pump and new hardware ready to go on plus a Cometic reuseable gasket ... and the pump was cheaper than my TX3's (who said Cosworths were expensive ... or that Lasers were cheap ?!) 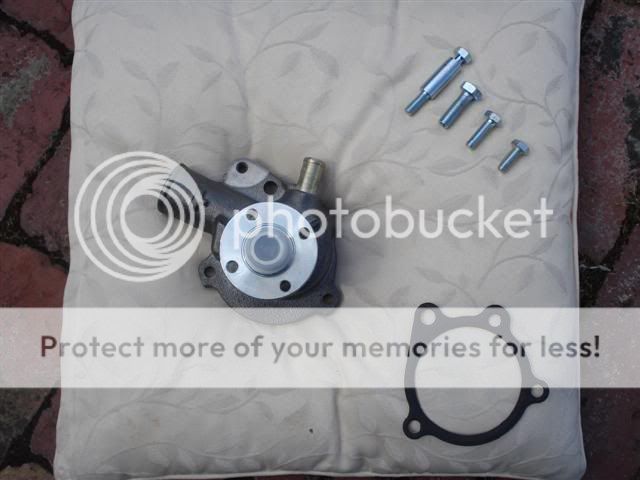 ... and all bolted up ... 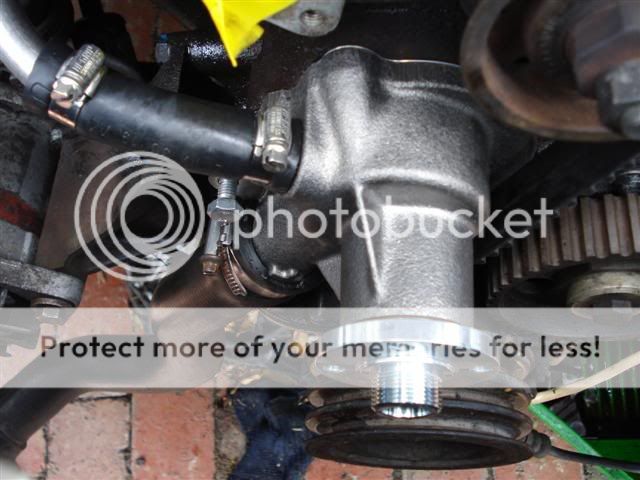 all ready for a set of new belts to drive it 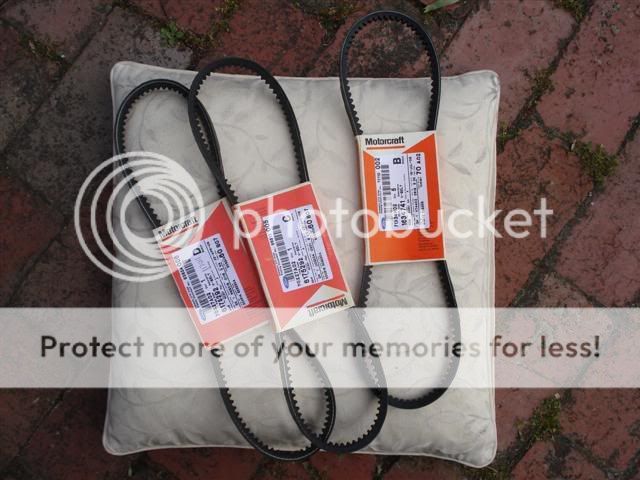
|
rudeboy
Enthusiast

- Total Posts : 107
- Scores: 0
- Reward points: 2514
- Joined: 2011/08/01 11:02:49
- Status: offline

RE: my Moonstone Sierra RS Cosworth ...
2011/05/12 14:32:25
(permalink)
So when I peeked down behind the lower airbox I could see the wiring harness had seen better days ... so now was the time to get in there so I took the airbox right out so I could have a proper look. I'm not an electrician but I've seen a few electrical cable runs before and I hate messy wiring [:(!] (and I know that sort of frustrating issues it can cause) With the airbox out I was faced with this, pretty good really as all the wiring and insulation was in good condition it was just the harness protection that had fallen away ... it was a fabric type material and clearly couldn't handle its environment , and it was time for better (oh and furtunately the inner wing was in good nic to). 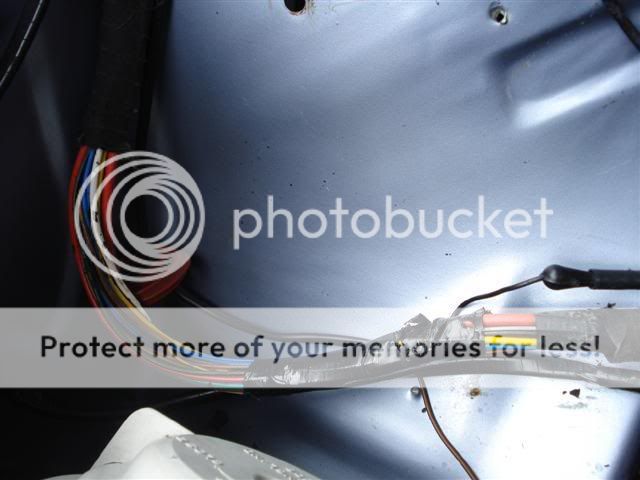 I had been recommended to (find and) use this stuff by a sparky at work (he use to use it on Navy Helicopters), Scotch Tape 23 ... it sh#ts on PVC tape. When you stretch it, then wrap it, it sticks (fuses  ) to itself. It lasts longer and offers far greater protection than vinyl tape (although it is quite thick) ... 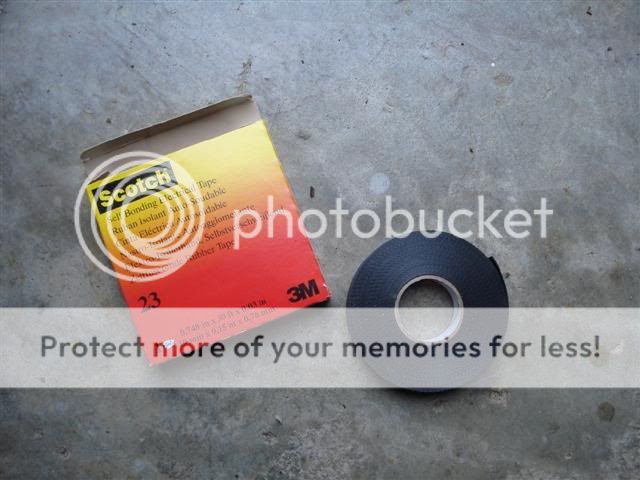 which gave these results ... 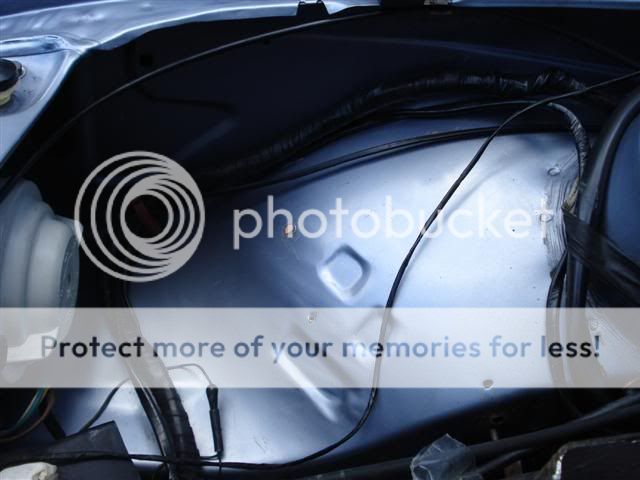 then I realised that someone (surely Ford wouldn't [:0] ) had decided that a bit of gaffer tape to the strut was good enough to hold the harness ... not good enough for me though ... I had to do this properly. Results: 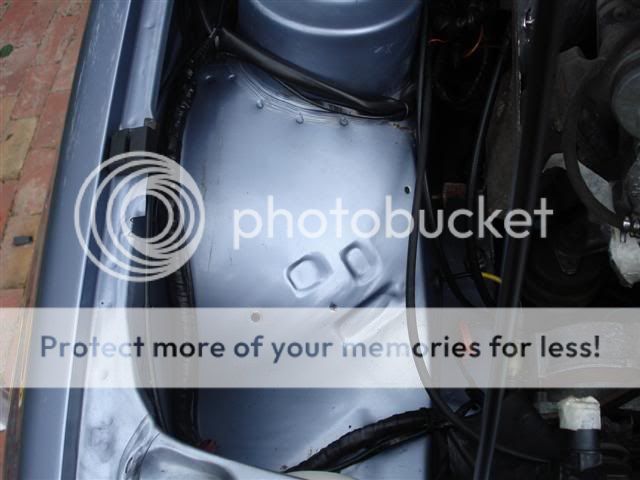
|
rudeboy
Enthusiast

- Total Posts : 107
- Scores: 0
- Reward points: 2514
- Joined: 2011/08/01 11:02:49
- Status: offline

RE: my Moonstone Sierra RS Cosworth ...
2011/05/12 14:35:19
(permalink)
Now that I was happy with the electrical harness, the airbox got a good clean, some Autoglm vinyl protector, a new decal and some new shiny hardware (sourced locally this time [%] ) oh and a spanking new K&N panel filter ... stock looks remember  ready to go ... 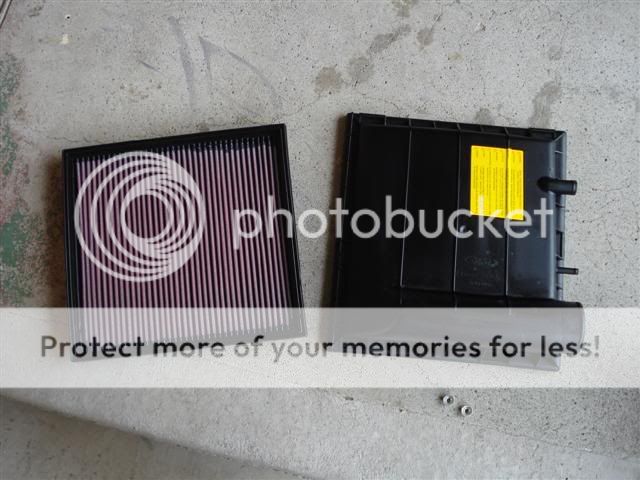 ... and all bolted up 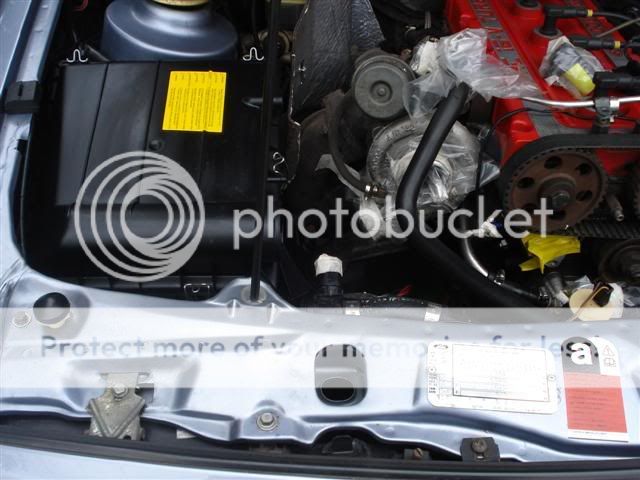 ... oh and I couldn't help myself [:o)] with a trial picture with the header tank and its new decal and black cap put in postion (details) ... 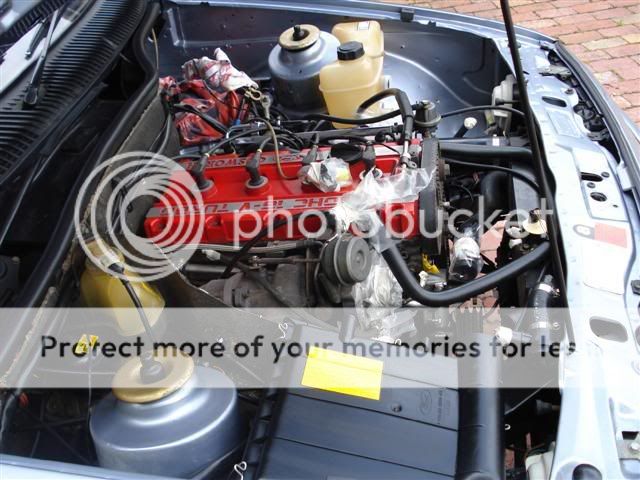 
|
rudeboy
Enthusiast

- Total Posts : 107
- Scores: 0
- Reward points: 2514
- Joined: 2011/08/01 11:02:49
- Status: offline

RE: my Moonstone Sierra RS Cosworth ...
2011/05/12 14:42:04
(permalink)
When I walked out to my car and found the puddle of coolant under it the first place I could find that was wet was the thermostat elbow ... so I thought the gasket had let go. After I got the car home I took off the cam belt cover off and saw that the water pump was leaking and the cam belt/pulleys had thrown the coolant back up onto the thermostat elbow even though it (probably wasn't) leaking but I had already decided to take it apart and change/reseal it anyway so here we go ... heres the old one taken off ... 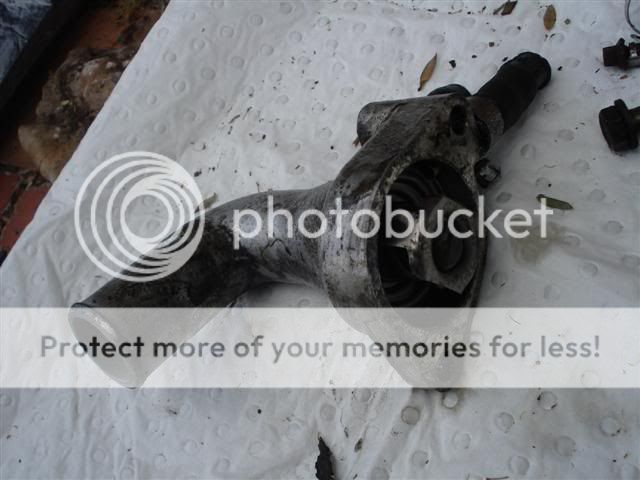 Pretty cruddy. When I had ordered the pump from the UK I had also orded the theromostat (and new seal and retaining ring) ... just as well 'cause I had a right pain of a time getting the old one out. After 25 years it was proper stuck [:(!] On the outide I was surprised how good it looked but when I tried to take out the retaining ring ... oh my god ... the seal under the thermostat had swollen and hardened and I couldn't get the ring out. I took it to work and got the assistance of an extra pair of hands, a heat gun and a couple of screwdrivers plus a pair of pliers ... and finally got out the retaining ring. Long story short ... I cleaned up the thermostat housing inside and out, and got it ready for new seals and a splash of paint ... 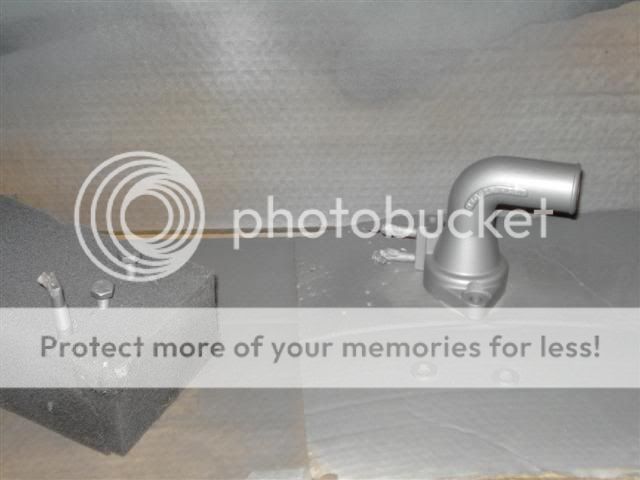 Then I got all the new bits together (seal, ring thermostat and bolts) ... 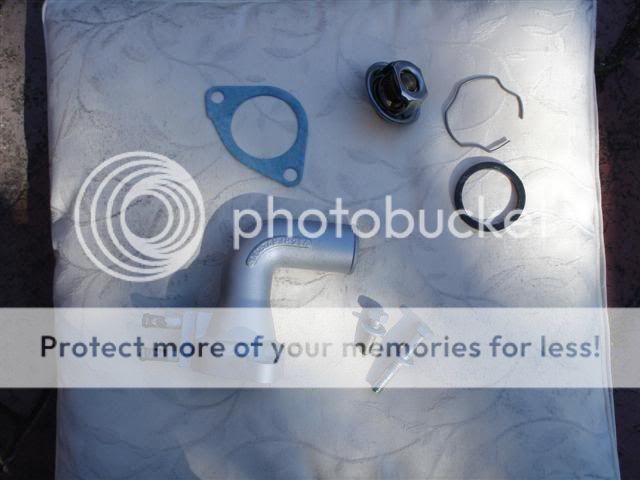 ... and assembled it 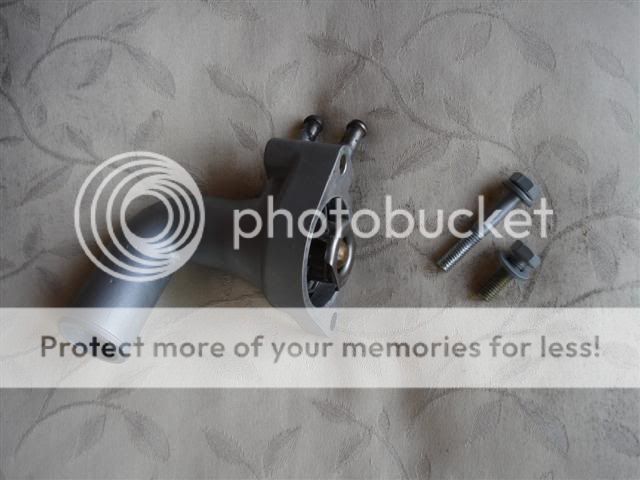 Here she is, bolted up with some paint-on 'Hylomar' instant gasket. How long do you think those belts will stay lined up [x2x] Note the new coolant hose, clamps and bleed plug (no clamp on this yet ... I'll do this after I've bleed the coolant system when I first run it 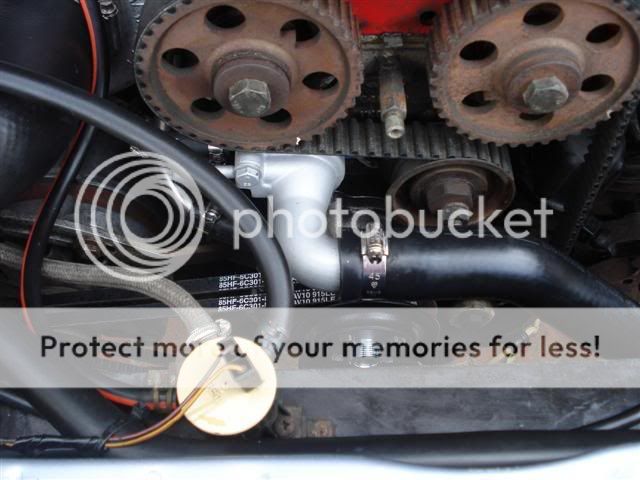 Oh my those pulleys [V] ... a job for another day ...
|
TCR
Enthusiast

- Total Posts : 179
- Scores: 0
- Reward points: 1314
- Joined: 2011/08/01 11:02:49
- Location: Brisbane Australia
- Status: offline

RE: my Moonstone Sierra RS Cosworth ...
2011/05/12 15:06:29
(permalink)
Good to see some more progress. I'm hoping to embark on my first bit of DIY on my car tonight :)
Where do you get the decals from?
What sort of bettery do you have? Been thinking about getting one but can't for the life of me find any white batteries that are suitable?
|
rudeboy
Enthusiast

- Total Posts : 107
- Scores: 0
- Reward points: 2514
- Joined: 2011/08/01 11:02:49
- Status: offline

RE: my Moonstone Sierra RS Cosworth ...
2011/05/12 20:37:56
(permalink)
Thanks Paul, unfortunately this thread is very far behind ... 2007 in fact! The cars actually on the roads and ready for its next job.
I got the engine bay decals from eBay UK, the seller has changed his name a couple of times but has been very good to deal with. I'll try to find his name, although I haven't seen them for sale for a while I wouldn't mind grabbing another set.
I no longer have a white battery installed ... just the biggest (European style) battery I could get (black). I used a place in Mel called the Battery Stop, I'm sure you'll have battery specialsists your way, but don't like the chances of finding a white one!
Oh ... get a project thread going mate, sounds like your doing a 'tidy up' like mine.
|
TCR
Enthusiast

- Total Posts : 179
- Scores: 0
- Reward points: 1314
- Joined: 2011/08/01 11:02:49
- Location: Brisbane Australia
- Status: offline

RE: my Moonstone Sierra RS Cosworth ...
2011/05/12 21:04:57
(permalink)
Ah,ok  I've found a place in the UK called Tremona Garage that does the decals. I sent them an email today and got this response: For your vehicle we do a full under bonnet decal set including battery decals for £30.00 but would have to confirm postage etc
The decal set consists of : battery decals(front and top),50/50% antifreeze,abestoes,abs warning for air box/front panel,warning for front of cambelt cover,check oil daily,various yellow warning for fuse box/abs pump,coil decal from memory thats about it i think.http://www.tremonagarage.com/
|
rudeboy
Enthusiast

- Total Posts : 107
- Scores: 0
- Reward points: 2514
- Joined: 2011/08/01 11:02:49
- Status: offline

RE: my Moonstone Sierra RS Cosworth ...
2011/05/12 22:55:28
(permalink)
I think I bought mine off 'rs-auction' ... gents name is David and has been v good to deal with on several occasions. Easy to deal with from AUS.
I keep an eye on what he has as I found clips and stuff, although more expensive than Ford Parts UK, his postage is far cheaper and so works out for the better in the long run for small orders.
I haven't seen engine bay stickers for a while ... and when I bought them I din't get battery stickers or a coil sticker so your getting a couple extra with Tremona ...
|
rudeboy
Enthusiast

- Total Posts : 107
- Scores: 0
- Reward points: 2514
- Joined: 2011/08/01 11:02:49
- Status: offline

RE: my Moonstone Sierra RS Cosworth ...
2011/05/13 14:40:45
(permalink)
Well, flashback to the end of 2007 ... and the start of correcting electrical issues! Well firstly my daily driver finally let me down it burst a coolant hose whilst I was driving home from nightshift ... so the worst has happened ... both my two cars are both off the road at the same time [:(!]. On a lighter note ... I've had heaps of fun buying tools for this job, heres a selection that I've used on the following wiring repairs 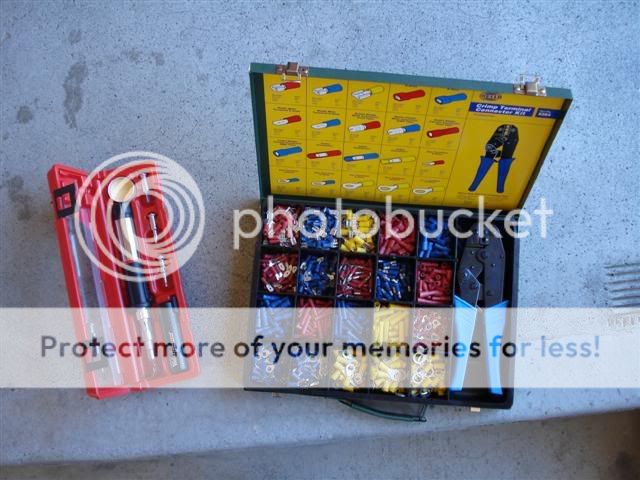 that butane powered pyropen rocks[}:)]. Anyway the water pump and thermostat are in, the power steering hoses are replaced so now I am up to sorting wiring. The first place I started was with the wiring going to the bonnet sensor (at the slam panel) for the alarm ... this is what I started with, bad tapeing and a dodgy join ... 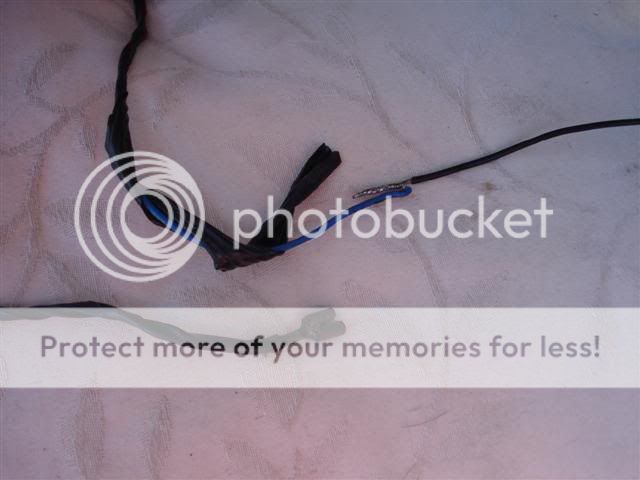 so I took out the sensor components and cleaned/painted them (half of the screw sensor so I knew where to adjust it to and cut out the old wiring. I then used new wire, protected it with heat shrink and cooked it on with my pyropen [:p] and crimped on (with my new kit) the correct terminals 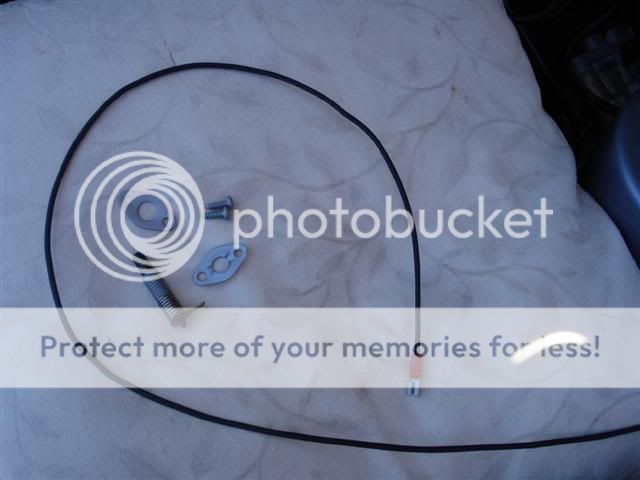 Heres the sensor remounted on the slam panel and the wiring tucked up and hidden along the inner wing nice and neat. Note I've already reprotected the washer bottle harness with Scoch 23. 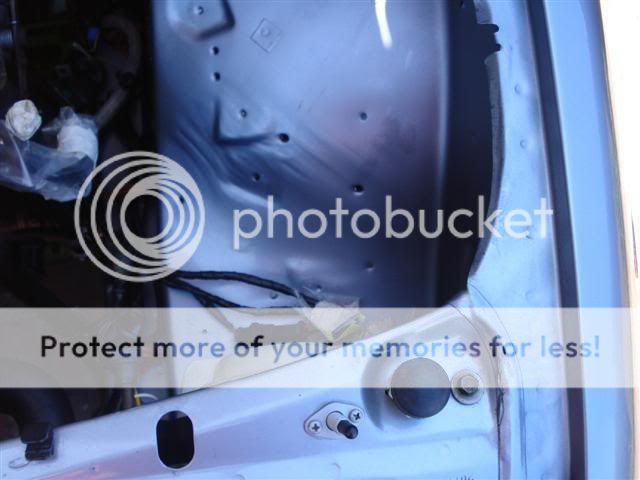 Whilt I was working on the alarm it was time to clean the alarm's siren and remount it neatly and tidy its wiring to ... 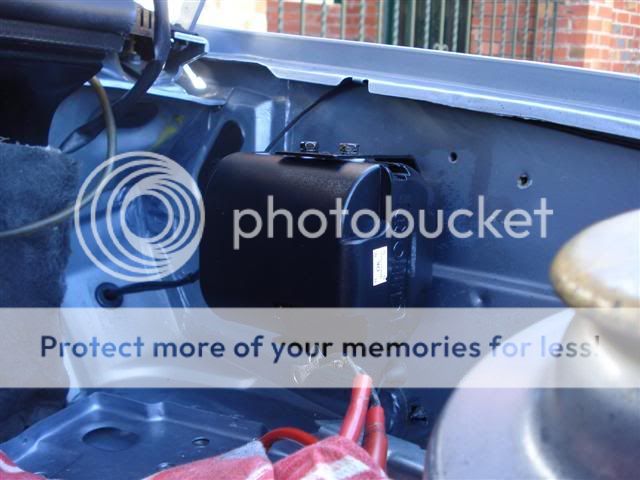
|
rudeboy
Enthusiast

- Total Posts : 107
- Scores: 0
- Reward points: 2514
- Joined: 2011/08/01 11:02:49
- Status: offline

RE: my Moonstone Sierra RS Cosworth ...
2011/05/13 14:47:17
(permalink)
Looking down the inner wing along the chassis leg I saw this (which I had already cleaned up/degreased previously) ... 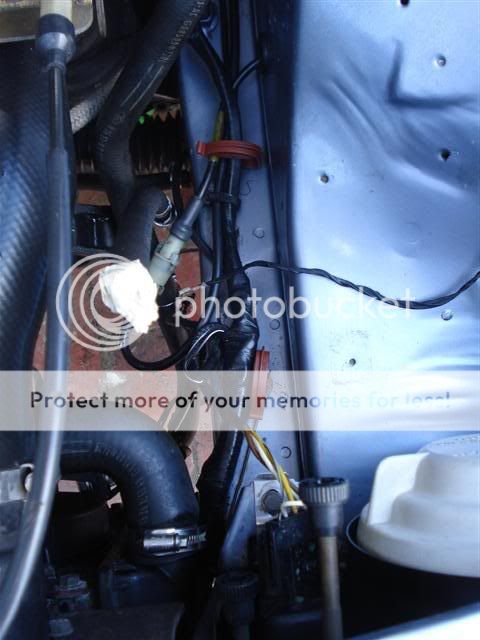 so some more cleaner, some rubber fusing tape and a little force resulted in this ... 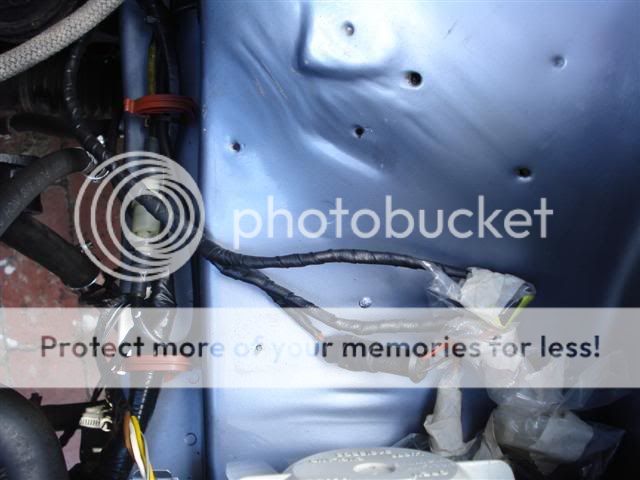 The worst of it can't be seen ... there were two main positive leads that ran along the chassis leg (up in the photo) which had no harness protection (just insulation) so with a heavy application of rubber tape they came up well  Now I/m getting somewhere ... MAP sensor and bracket installed and PAS bottle bracket on ... 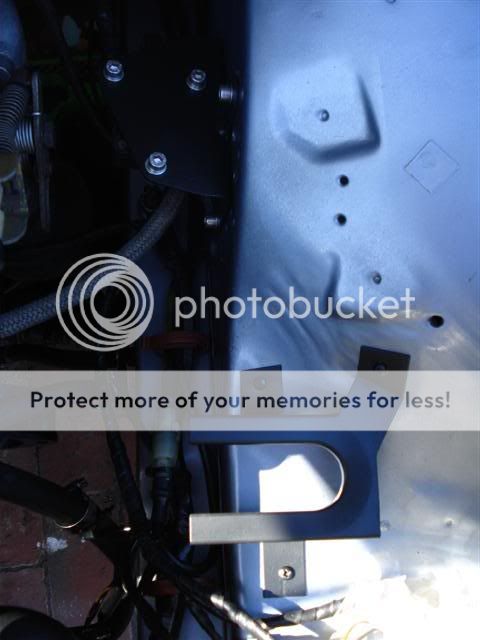 here's to the reason why I started to tidy the wiring, what I was faced with at the battery conections, what a mess (standard Ford from what I've seen!) ... 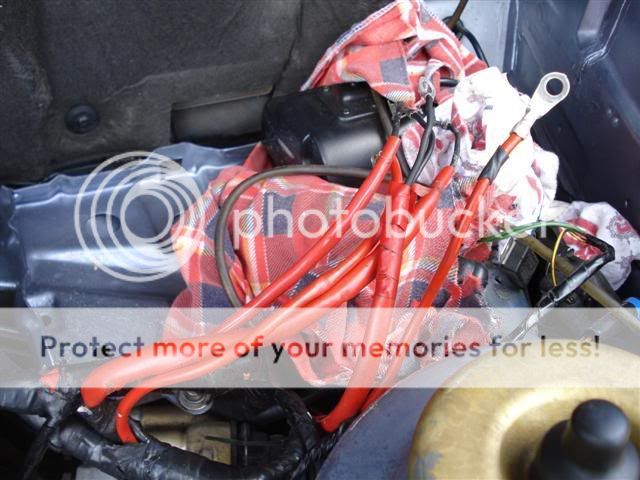 to start with I dropped the battery (new) into place (with the most powerful CCA battery I could find ... for ballsy starts  ) I was surprised it filled the tray ... not much room between it and the alarm siren. Here I have already started to reroute the wiring ... 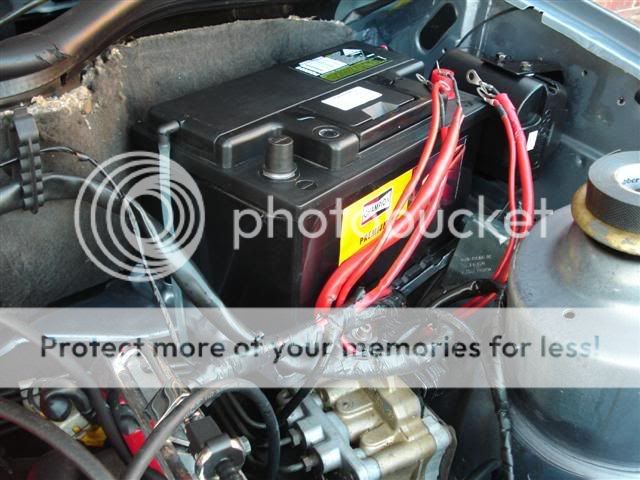 I have taken out the main earth lead and found it to be badly chaffed ... but I was shocked when I removed the main positive lead to the starter it was TERRIBLE [:0] (photos later) but I have a plan ...
|
rudeboy
Enthusiast

- Total Posts : 107
- Scores: 0
- Reward points: 2514
- Joined: 2011/08/01 11:02:49
- Status: offline

RE: my Moonstone Sierra RS Cosworth ...
2011/05/22 20:08:02
(permalink)
Well at the battery here is what I was faced with ... fuse wires everywhere. 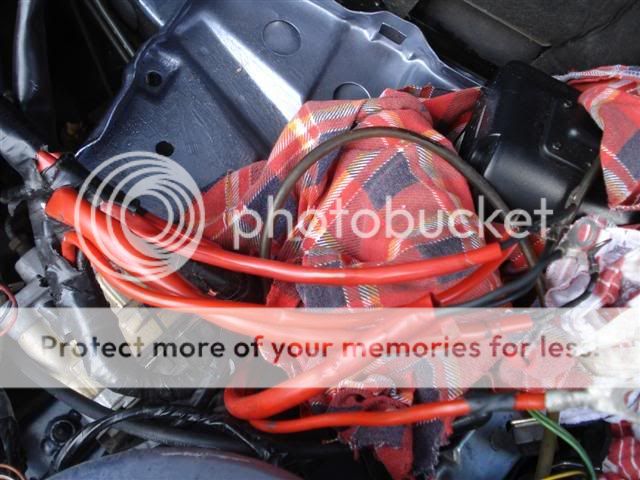 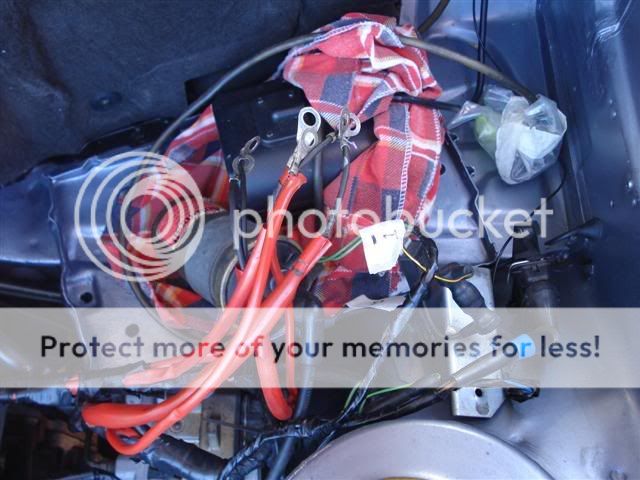 I have decided to replace all the end terminal fittings, reprotect the wiring with red heatshrink and wrap the harness in black rubber tape this way the wiring will get more protection and hopefully the black wiring (with black hoses) wont stand out so much in the engine bay for a neater, standard looking finish. Sorry for a lot of photos for the one job but it took me ages to do and I thought it was worth sharing seeing that I've read cosworths have wiring/electrical issues ... remember I want to build a realiable car here [%] So first I laid out my wiring (I would love to have cut this out of the main harness and lined it all up vertically with the batterys postive terminal ... but that seemed a little drastic [}:)]) ... 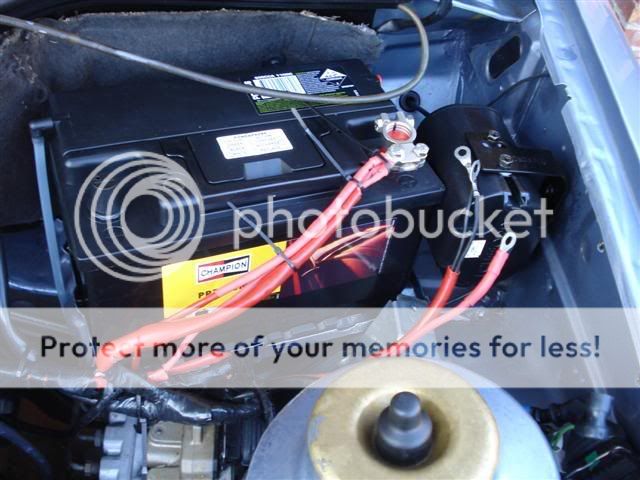 Heres a work in progress photo ... I had to cut off each wires terminal because the exposed wiring was showing signs of corrosion (a little restance goes a long way  ) ... so I exposed some new wire, cleaned it and crimped on a new ring terminal for my new battery terminal connection ... 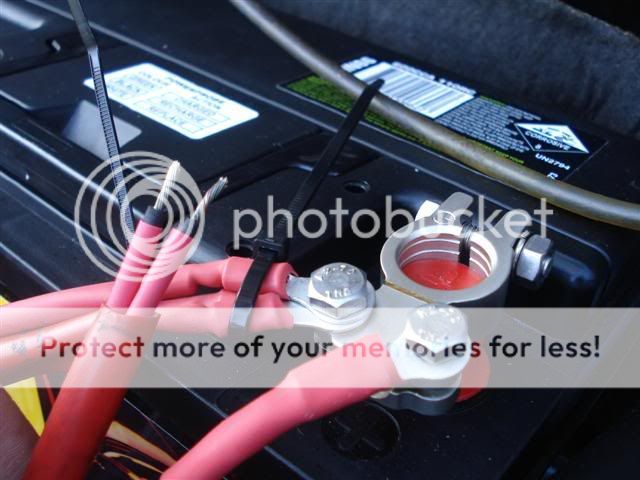 I decided to 'black out' the wiring, but I left the terminal connectors red heatshrink exposed so if someone else (other than me) disconnects anything they know what is positive ... 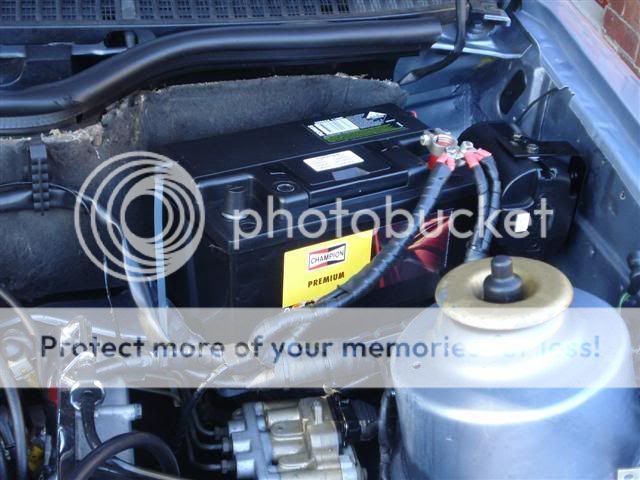 heres a distant shot ... even thought there is still heaps of harness wiring hopefully it looks neater ... 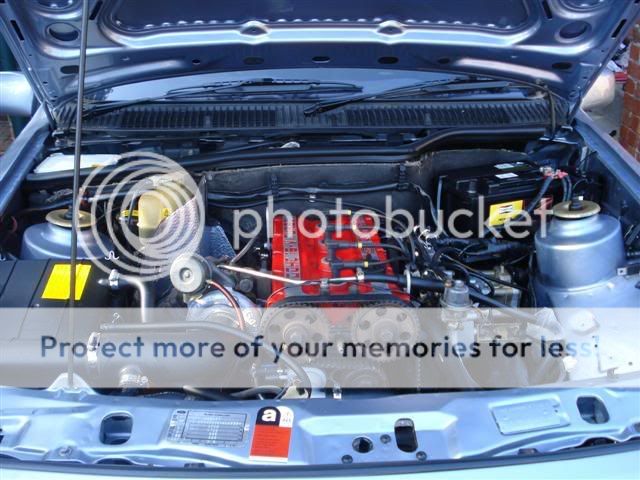
|
rudeboy
Enthusiast

- Total Posts : 107
- Scores: 0
- Reward points: 2514
- Joined: 2011/08/01 11:02:49
- Status: offline

RE: my Moonstone Sierra RS Cosworth ...
2011/05/22 20:15:08
(permalink)
A while ago I had issues starting my car ... turn the key and nothing, no power, no cranking ... and then it would work. Anyway time for some carnage shots [:0] After a search on PF I cleaned the electrical contacts on the starter solenoid (one of which is the main positive lead from the battery ...) and starts have been good since. One of the recommendations i read was to also clean the main earth connection, the lead that goes down from the battery to the transmission housing ... I didn't need to but I noticed the wiring was in pretty bad nic and had chaffed through to expose wiring this is one of the jobs I wanted to do now whilst I was cleaning up the wiring I decided to remove and inspect the main positive lead that had been the cause of my first problem and ... .... and oh my god 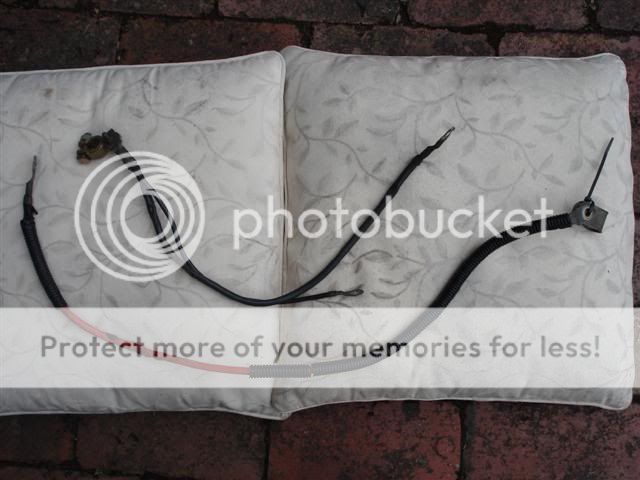   Like I said, the main earth wasn't to much better ... [:u] 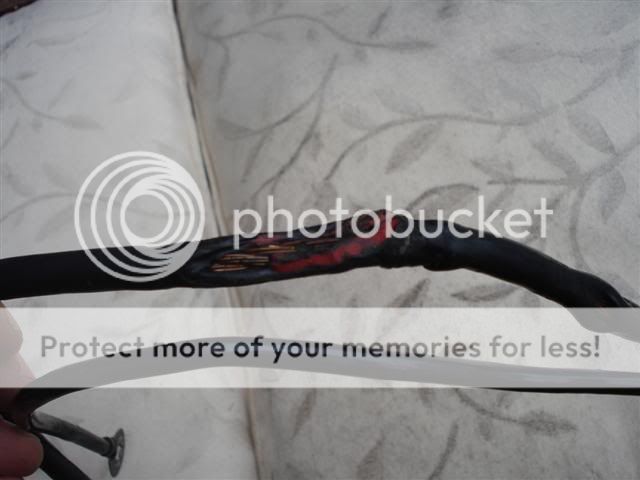 and I wasn't happy with the 'piggyback' battery terminals ... 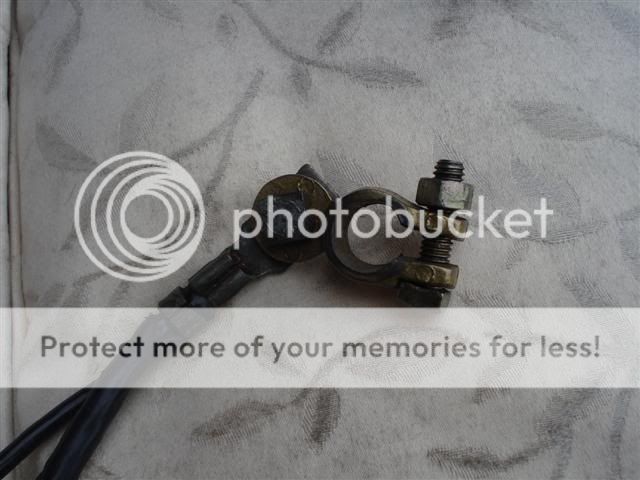 So for the postive lead I'm making a new one with this little lot ... 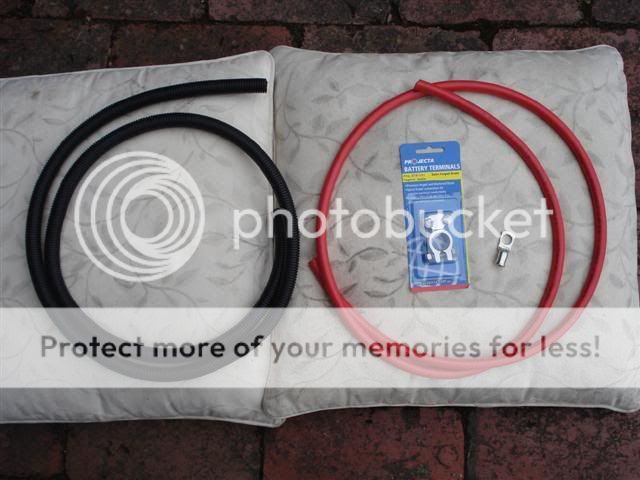 New condiut (extra wire protection), better quality cable for super strong starts And new uprated earth leads for the battery ... slight modification needed to the premade cable but it will come up well 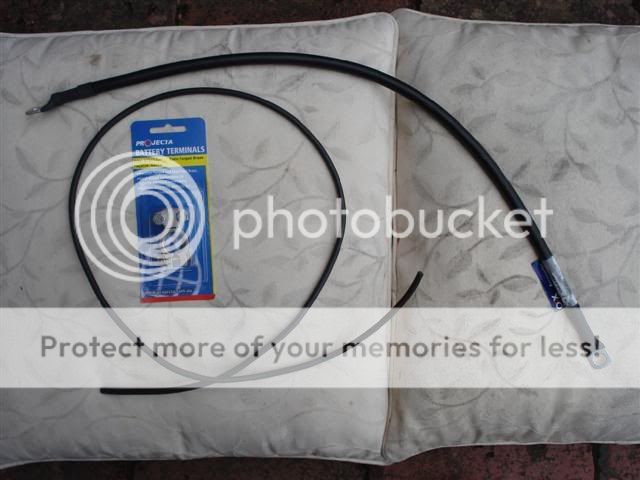
|
rudeboy
Enthusiast

- Total Posts : 107
- Scores: 0
- Reward points: 2514
- Joined: 2011/08/01 11:02:49
- Status: offline

RE: my Moonstone Sierra RS Cosworth ...
2011/05/22 20:19:30
(permalink)
Whilst I was doing wiring this lead from the bonnet to the firewall always annoyed me the worst thing about it was the rusty staple being used to tighten the outer plastic (may not see in the photo) ... 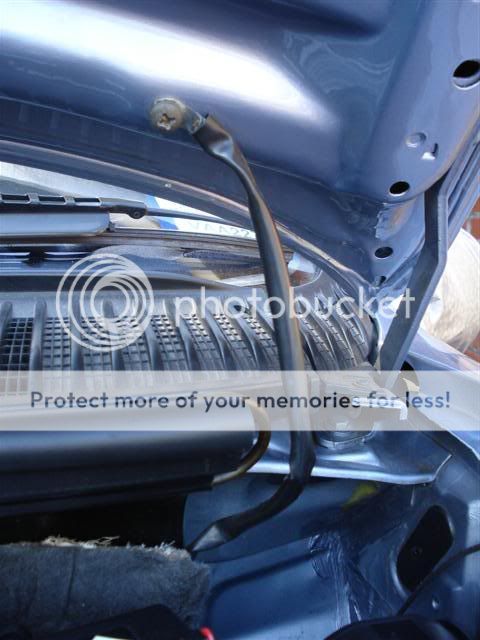 so with some spare wire, some ring terminal ends from my kit and some black heat shrink I made a newy ... 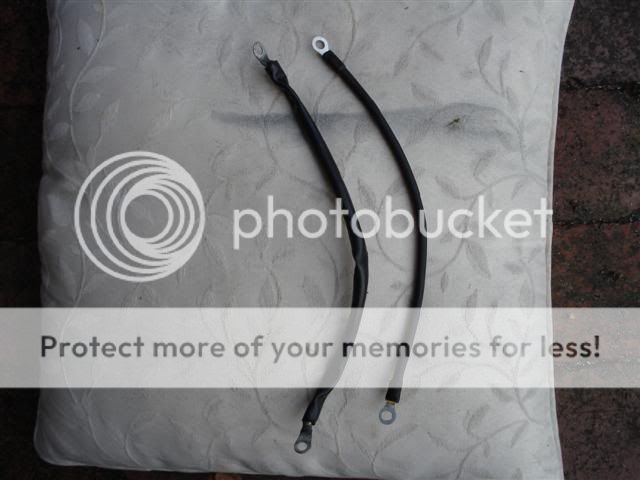 ... and installed it nice and neatly 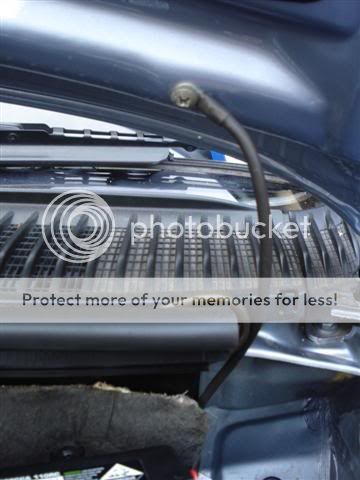
|
rudeboy
Enthusiast

- Total Posts : 107
- Scores: 0
- Reward points: 2514
- Joined: 2011/08/01 11:02:49
- Status: offline

RE: my Moonstone Sierra RS Cosworth ...
2011/05/22 20:27:33
(permalink)
Well with my main earth lead (new parts illustrated earlier ) I cut the end of the prefabricated lead and stripped it for the battery terminal to clamp onto ... hint after I had stripped it I used a little solder to hold the exposed wires together (and in shape) so that the clamping of the terminal doesn't 'spray' the wires everywhere . Then this little lot is threaded through the plastic flexible condiut ... not stock but I felt it was neccessary after the damage I found on the old one this then got bolted onto the tranmission case. Then I made up (just like above) a smaller black lead to go down to the battery tray from the terminal ... I didn't take a photo of it not installed but here it all is in position ... 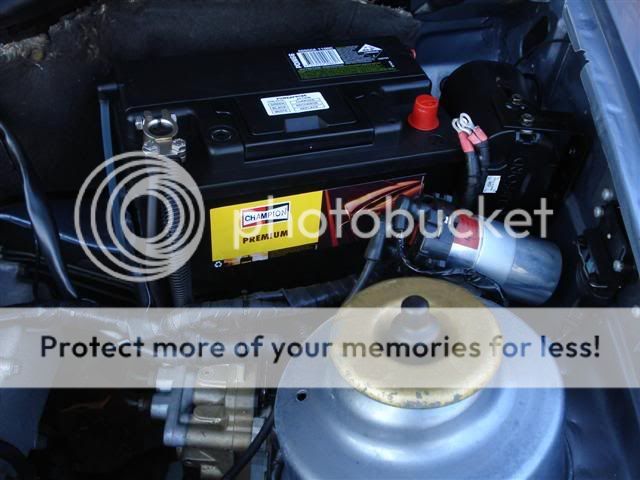 The above photo is responsible for me realising that my harness wiring could be neater ... and those who know me will not be surprised that I have gone back and done it all again ... this time I joined the fuse wires together where possible, extended them and reprotected them. I have chosen to keep them red this time to look a little more 'factory' Oh and it took me AGES [:(!] Here is some work in progress shots of the fuse wires being joined and extended (cable tyes hold everything in place whist I'm working ) and when I joined two wires together I went up in wire size to be safe to make it neat I simply looped the top bunch of wires under the main harness and lead them up to the battery 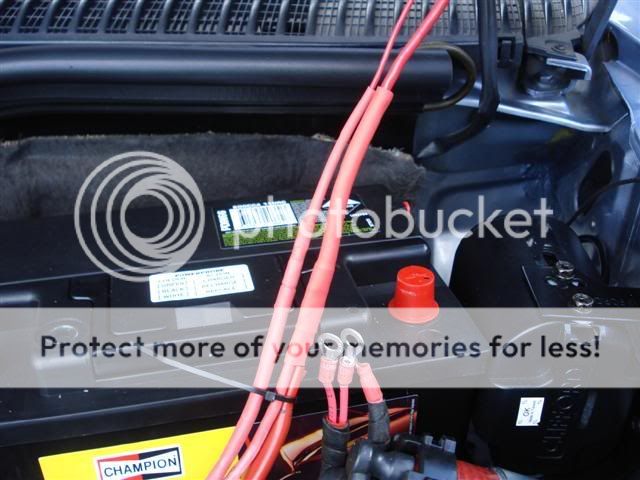 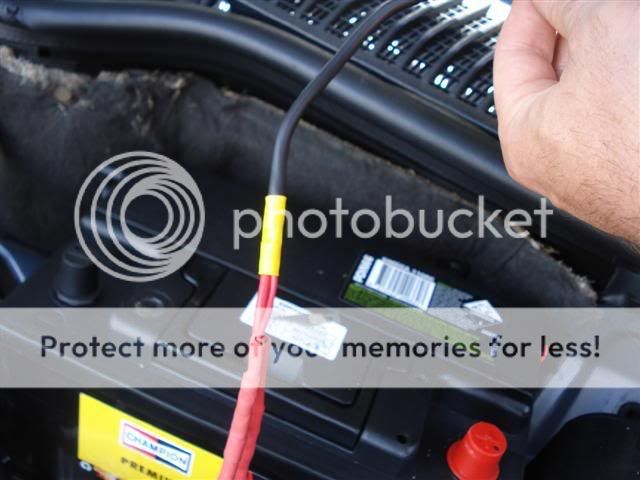 Then with one end of my you-beaut red battery cable crimped (and then threaded through the protective condiut) ...  ... I connected it to the starter solenoid, passed it through the clamp on the engine (so it doesn't touch anything and chafe or melt again ) and threaded it through to the battery ... 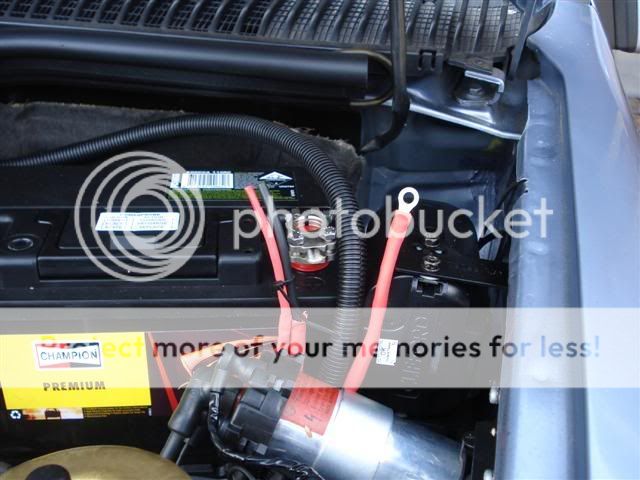 I then cut it to length, removed a bit of the protective condiut (to keep it all red) stripped the end and clamped on the terminal plus the fuse wires ... 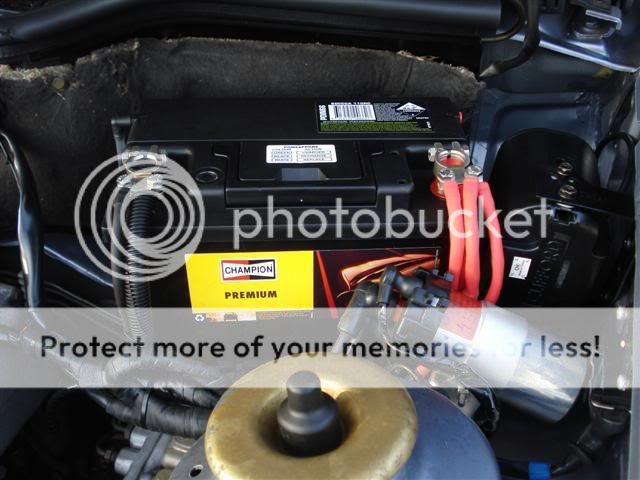 Heres another shot to show how much neater it now is and my polished ignition amp bracket is installed ... 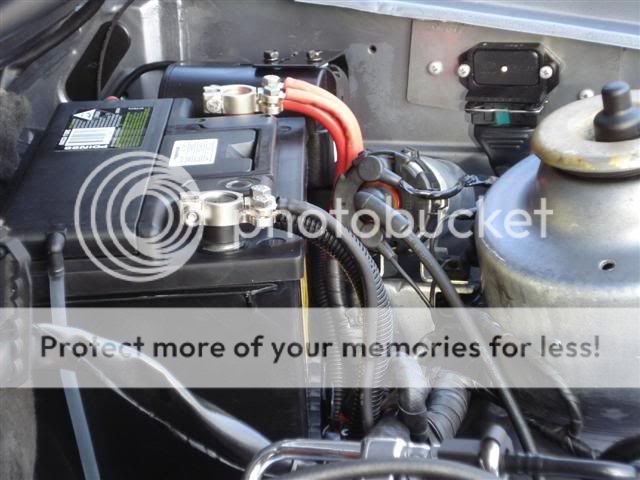 Finally a distant shot (sorry about the crap photo it was getting dark) to show the end result Much better IMHO [:p] 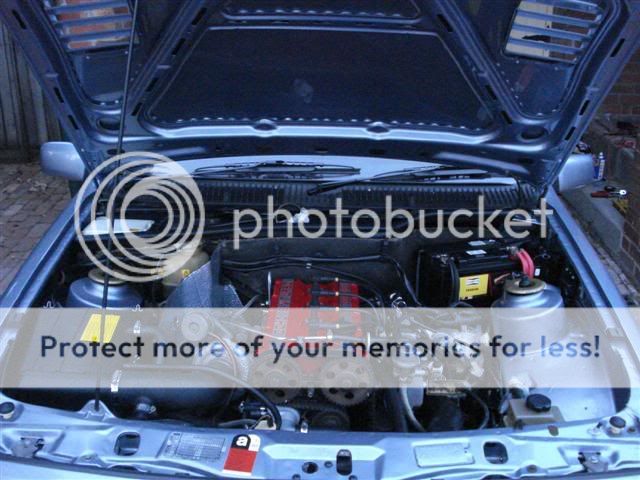 I was never really happy with my first attempt, I'm glad I did it again now and ... if I had known how bad the wiring was originally, I wouldn't have driven the car !
|