esc-078
Enthusiast

- Total Posts : 152
- Scores: 5
- Reward points: 2868
- Joined: 2011/08/01 11:02:49
- Status: offline

RE: Steve's Mk2
2009/06/12 09:24:30
(permalink)
quote:
Originally posted by fordsy
Here is another shot of the box. Doesn't look like there will be any fouling of the bar by the throttle.
Hmm.. just recieved a email from David at Gartrac. Here's a snippet. quote:
MK2 HYD PEDAL BOX [GAR 6101] COST £324.64
YOU CAN NOT FIT O/E PEDAL, BIAS ADJUSTER IN THE WAY, GP4 THROTTLE PEDAL NEEDED[GAR6108] COST £51.87
WE BUILD THE PEDAL BOX WITH, 0.625" CYLINDER ON THE FRONT, 0.70" ON THE REAR BRAKES AND WITH 0.70" ON THE CLUTCH
I think the very top of the pedal where the cable attaches is where the concern is. Either that or they're trying to make more pounds by selling a GP4 throttle pedal as well [%]. With the current exchange rate, you might as well get a GP4 throttle pedal too. Price including delivery to AUS for a MK2 hydraulic clutch pedal box is 763.082 AUD!
|
fordsy
Aficionado

- Total Posts : 797
- Scores: 13
- Reward points: 3029
- Joined: 2011/08/01 11:02:49
- Location: Location : Location !
- Status: offline
RE: Steve's Mk2
2009/07/12 20:48:57
(permalink)
Right. Back to the repair work. The test fit of the heater worked a treat. Fits like it did before i chopped the bulkhead apart. Top section of the front firewall was welded in today from the engine bay side. I'm saving the inside welding for one big hit as i'm trying not to start too many different things at once. 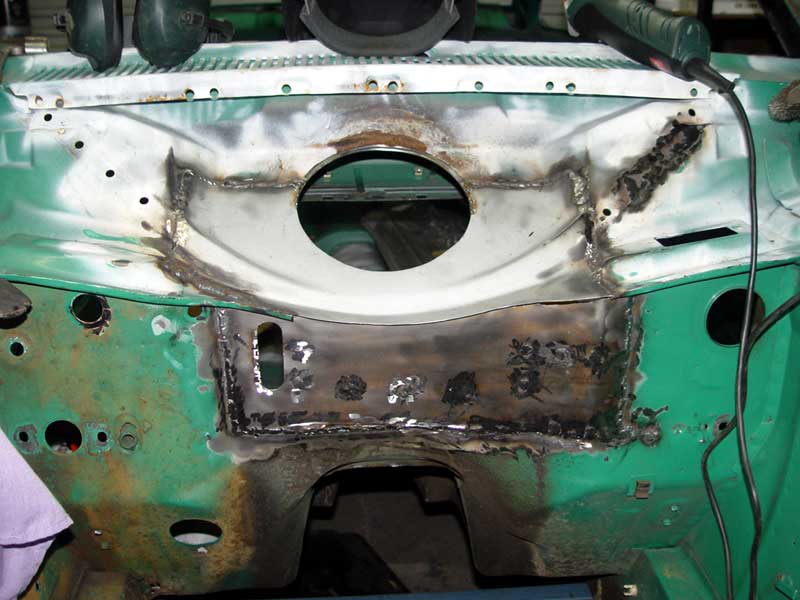 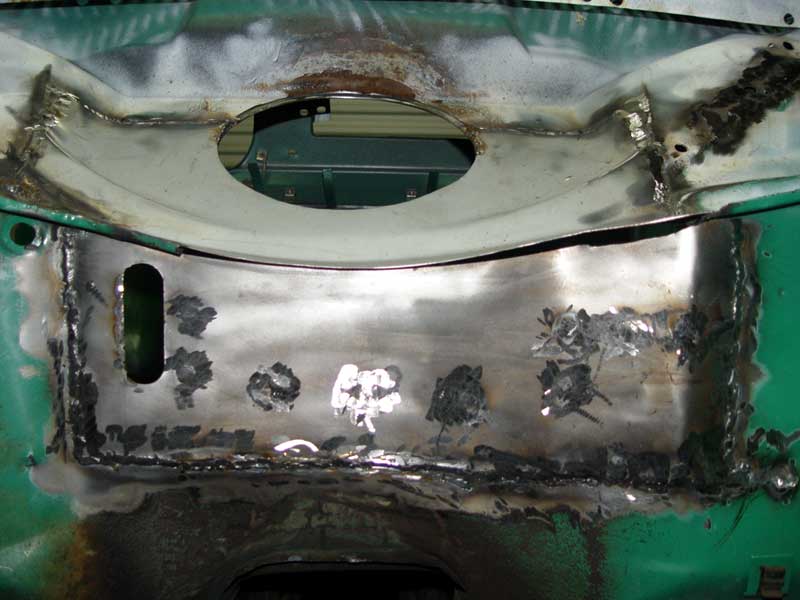 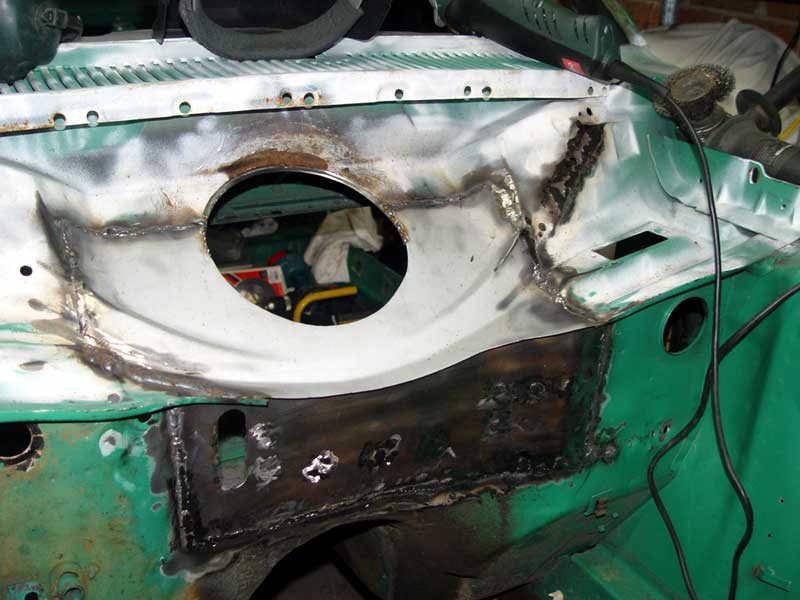 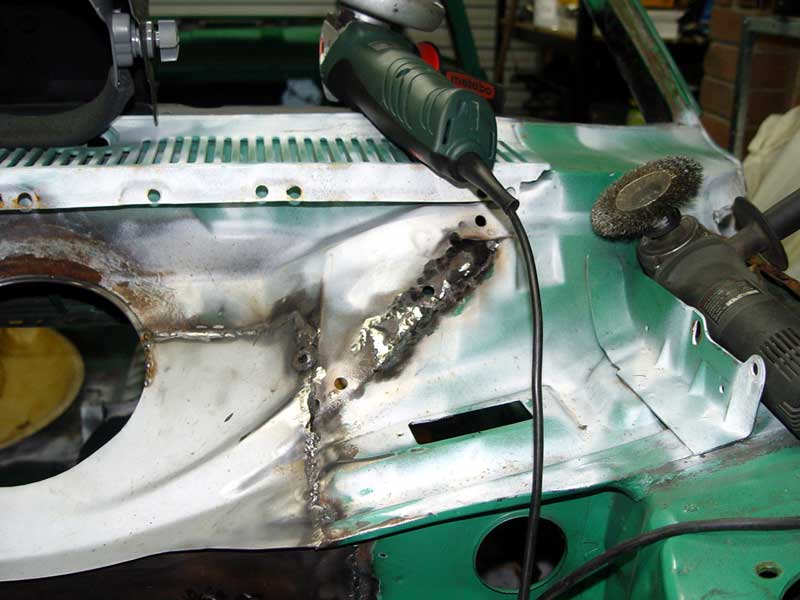 Next job is to roll the lip down against the firewall and seam weld it. This gives a little more room behind the rocker cover and helps to strengthen the firewall. That'll finish the engine bay side firewall welds then it's into the inside to finish off the lap welds, seam seal and paint.
|
fordsy
Aficionado
- Total Posts : 797
- Scores: 13
- Reward points: 3029
- Joined: 2011/08/01 11:02:49
- Location: Location : Location !
- Status: offline
RE: Steve's Mk2
2009/07/12 21:06:49
(permalink)
My daughter is showing some good early signs of an interest in restoring cars. Here she is 'reading' my POR15 catalogue. 
|
fordsy
Aficionado
- Total Posts : 797
- Scores: 13
- Reward points: 3029
- Joined: 2011/08/01 11:02:49
- Location: Location : Location !
- Status: offline
RE: Steve's Mk2
2009/08/12 20:42:38
(permalink)
Just posting this here as i don't want to forget it and i'm trying to keep all my information in one place.
Exhaust manifold stud replacement = M8 X 20 Cap head bolts or hex head as required.
front wing retaining bolts = m8/lock/nut x 6
CAM IS JUST OFF DIAL IN SPEC TO AVOID VALVE DAMAGE IN TRANSIT. THERE IS A SCRIBE MARK ON THE BACK CAM JOURNAL AND TOWER, ONCE THE HEAD IS ON TURN THE CAM TO THESE MARKS AND FIT TIMING BELT. ONCE BELT IS FITTED AND TENSIONED INLET VALVE 2 AND EXHAUST VALVE 3 WILL NEED ADJUSTING.
BEFORE FITTING CAM COVER WIPE LUBE OVER CAM LOBES.
NEW OIL AND FILTER MUST BE USED AND OIL NEEDS TO BE A MINERAL BASED 20W/50, 25W/50 OR 25W/60 NO SYNTHETIC CAN BE USED.
OIL FILTER SHOULD BE PRE-FILLED.
ONCE ENGINE IS STARTED AND OIL PRESSURE IS UP ENGINE SPEED SHOULD BE TAKEN TO 2000-2500RPM FOR 20 MINUTES TO BED CAM IN.
AFTER 20 MINUTES CAM COVER NEEDS TO BE REMOVED, HEAD RE-TORQUED AND VALVE CLEARENCES CHECKED.
FUEL WILL NEED TO A MINIMUM OF 95 OCTANE.
DON’T USE SHELL FUEL, MOBIL, BP AND CALTEX ARE BEST.
SPARK PLUGS WILL NEED TO BE NGK AP6 OR 7FS.
PLEASE NOTE SPARK PLUGS MUST BE FITTED WITH EARTH ELECTRODE BETWEEN 4 O’CLOCK 8, MARK THE HEX OF PLUG WITH A TEXTER IN LINE WITH ELECTRODE AND CHECK ONCE TIGHT, PLUGS MAY REQUIRE SWAPPING TO ACHIVE THIS, IT’S WORTH BUYING TWO SETS AT A TIME JUST IN CASE.
IGNITION AND CAM TIMING AS WELL AS JETTING MUST BE SET ON A DYNO.
SPEC.
CAM RL30
CLEARENCES IN .010” EX .012”
CAM TIMING INTIAL USING LIFT @TDC .125” INLET NUMBER 1
COMPRESSION RATIO
HEAD 43CC
HEAD GASKET SUPPLIED 6.79CC
RATIO FOR STANDARD LC ENGINE 10.88:1
“ “ “ HC “ 10.94:1
“ “ “ ENGINE WITH FLUSH DECK HEIGHT 11.01:1
“ “ FOR + .040” FLUSH DECK HEIGHT 11.23:1
COMPRESSION RATIO CAN BE RAISED BY USING A .030” HEADGASKET.
FLOW TEST RESULTS.
TEST CARRIED OUT @25” LIFT INL EX
100 59 59.5
150 85.5 78
200 116.6 98.5
250 139 100
300 155 110
350 158.3 120
400 169 126
450 179.4 131
500 183.5 136.4
550 189.5 -
OVER ALL EXHAUST % AVERAGE IS 79.7%
LOW LIFT EXHAUST FLOW % IS HIGH TO HELP CYLINDER SCAVENGE.
EXHAUST FLOW %AVERAGE FROM .250” ON IS 73.45%.
|
joeyjonsey
Supporter
- Total Posts : 241
- Scores: 3
- Reward points: 5179
- Joined: 2011/08/01 11:02:49
- Location: Brisbane, Logan qld Australia
- Status: offline
RE: Steve's Mk2
2009/09/12 01:06:17
(permalink)
do you really need to weld the inside of the repaired sections i would of thought with thin steel it wouldn't matter hows about sikaflex ?
|
fordsy
Aficionado
- Total Posts : 797
- Scores: 13
- Reward points: 3029
- Joined: 2011/08/01 11:02:49
- Location: Location : Location !
- Status: offline
RE: Steve's Mk2
2009/09/12 13:47:01
(permalink)
The part i need to weld is the other side of the overlap. I'm not welding into the back of the welds i've just done.
|
MK1_Oz
Aficionado
- Total Posts : 466
- Scores: 9
- Reward points: 4285
- Joined: 2011/08/01 11:02:49
- Location: South Australia
- Status: offline
RE: Steve's Mk2
2009/10/12 19:53:22
(permalink)
Nice dolly Fordsy. What dimension is the metal? I was thinking of using 50x50x2. Mine will need to cope with several trips on the back of a trailer. I am also probably going to use the jacking holes int he chassis to secure the shell to the dolly.
WHat height do your chassis rails sit at??
|
fordsy
Aficionado
- Total Posts : 797
- Scores: 13
- Reward points: 3029
- Joined: 2011/08/01 11:02:49
- Location: Location : Location !
- Status: offline
RE: Steve's Mk2
2009/10/12 21:34:07
(permalink)
I'm fairly sure it's 50x50x2. The dolly is 1m wide and 1.5m long. The uprights are 33cm. The front top crossbar is 1m wide. The back is 1.3m wide on account of the change in rail spacing. The height from the floor to the chassis rails is about 55cm which is very handy for working around the car. It means i can sit on a chair while welding on most parts of the outside.
I'll measure the exact height to the chassis rails tomorrow when i get a chance.
|
fordsy
Aficionado
- Total Posts : 797
- Scores: 13
- Reward points: 3029
- Joined: 2011/08/01 11:02:49
- Location: Location : Location !
- Status: offline
RE: Steve's Mk2
2009/11/12 17:33:50
(permalink)
The frame is 50x50x2. Chassis height is 55cm above the floor. Here's todays progress. I've finished the welding on the firewall. The top lip has been folded down and welded. 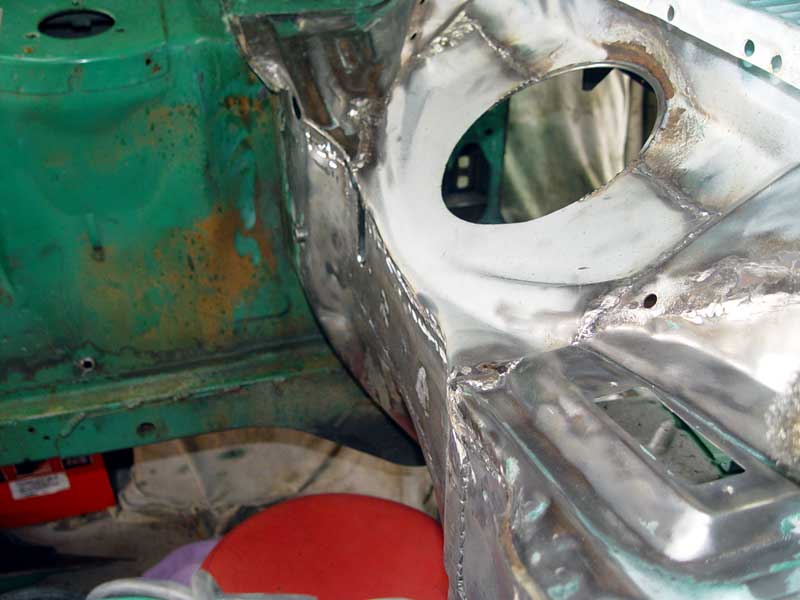 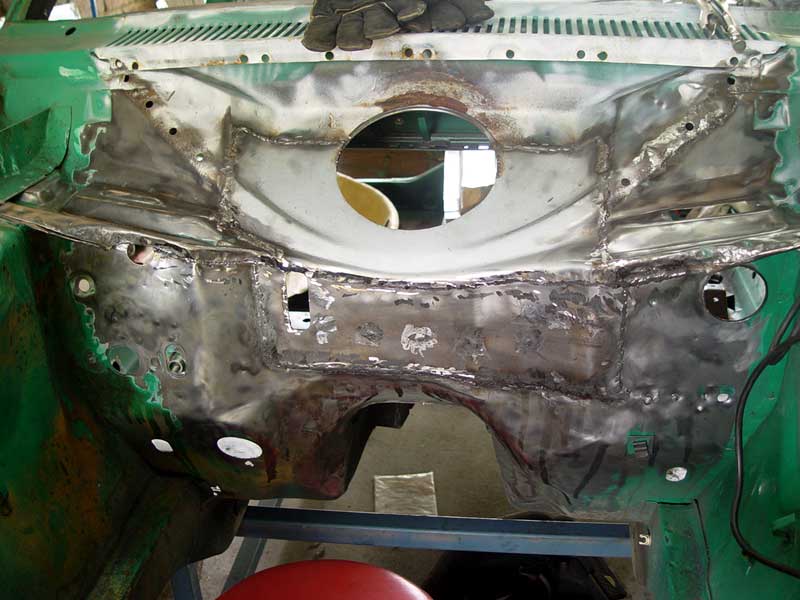 Having done that, i installed the front chassis gussets. 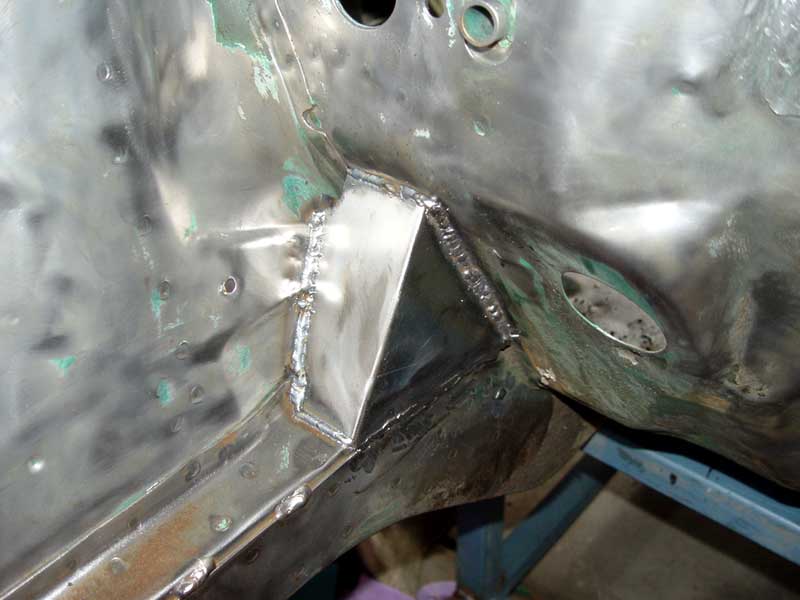 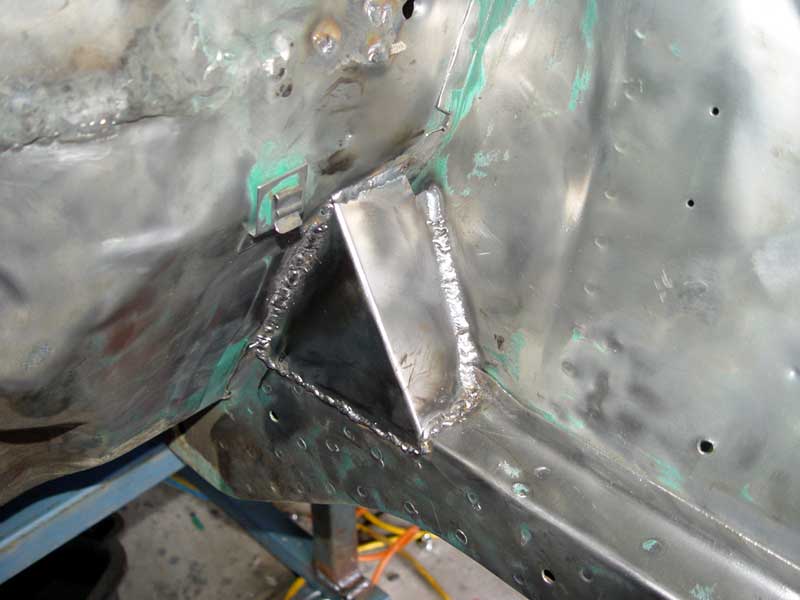 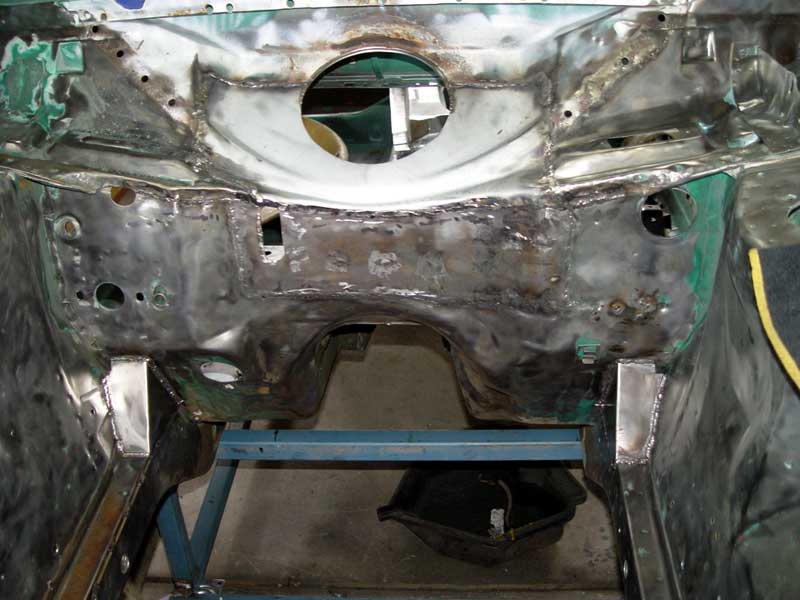
|
Phil
Supporter

- Total Posts : 1786
- Scores: 35
- Reward points: 4581
- Joined: 2011/08/01 11:02:49
- Location: Sydney NSW Australia
- Status: offline
RE: Steve's Mk2
2009/11/12 18:12:02
(permalink)
Looks great Steve  There's nothing like a big project to get the juices flowing[:p]
|
maxrs
Scholar

- Total Posts : 1334
- Scores: 1
- Reward points: 4483
- Joined: 2011/08/01 11:02:49
- Location: Mango hill Queensland Australia
- Status: offline
RE: Steve's Mk2
2009/11/12 22:59:58
(permalink)
quote:
Originally posted by Phil
Looks great Steve
There's nothing like a big project to get the juices flowing[:p]
I could not agree any more. We have been a little thin with new projects. Thanks for showing what the gusset looks like in it's raw state. Many are too afraid to share. Keep up the great work Steve.
|
esc-078
Enthusiast
- Total Posts : 152
- Scores: 5
- Reward points: 2868
- Joined: 2011/08/01 11:02:49
- Status: offline
RE: Steve's Mk2
2009/12/12 15:55:59
(permalink)
Looking at the pic's of the gussets, just wondering if they'll trap water and dirt in 'em being that there's a small opening at the top (just where water would flow down) and are fully welded at bottom? Might be a rust problem in the making Not knocking you're work Steve, as you've done a heck of a good job. It's the first time I've actually seen pic's of the gussets before painting. I'm thinking maybe cut out a little bit off the bottom edge of the gusset where it meets the firewall and rail to let any water and dirt that get's trap out before welding?? What do you guys think? 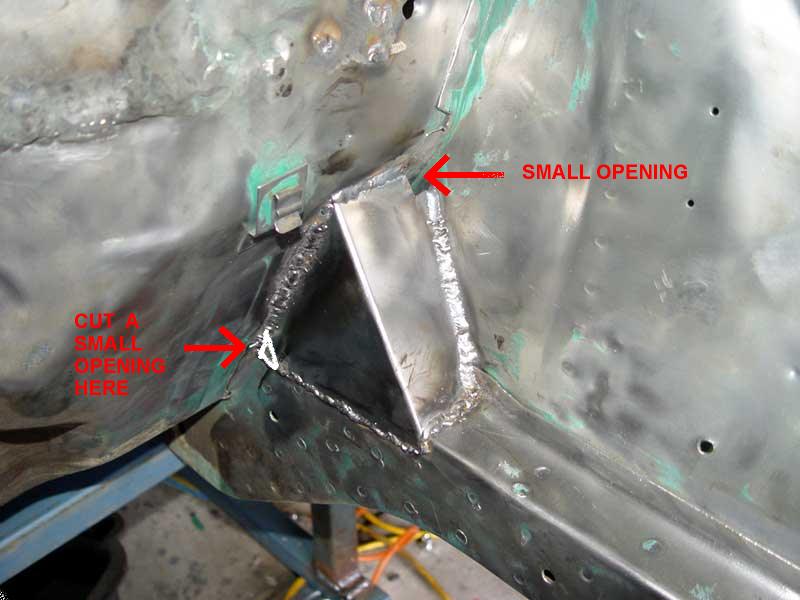
|
MK1_Oz
Aficionado
- Total Posts : 466
- Scores: 9
- Reward points: 4285
- Joined: 2011/08/01 11:02:49
- Location: South Australia
- Status: offline
RE: Steve's Mk2
2009/12/12 16:04:32
(permalink)
Agree....do anything to keep the worms at bay!!!!!
|
fordsy
Aficionado
- Total Posts : 797
- Scores: 13
- Reward points: 3029
- Joined: 2011/08/01 11:02:49
- Location: Location : Location !
- Status: offline
RE: Steve's Mk2
2009/12/12 17:43:41
(permalink)
Yeah. I'm aware of that opening. There's also an opening in the firewall behind the gusset the normally has an oval shaped plug.
I left the hole there so i could make sure that i could access behind the gusset in the restoration stage so i can fill it with fish oil or the like then seal it up. The other option is to fill it with structural foam.
I'll get a photo from inside the car tomorrow to show the access holes in the firewall.
|
fordsy
Aficionado
- Total Posts : 797
- Scores: 13
- Reward points: 3029
- Joined: 2011/08/01 11:02:49
- Location: Location : Location !
- Status: offline
RE: Steve's Mk2
2009/12/12 17:50:23
(permalink)
Today's work. The slam panel and front panel have been removed. I was going to take the drivers side wing off to allow me to weld the inner wing but there should be enough space for me to leave it on. This should help align the front when i get around to replacing it.  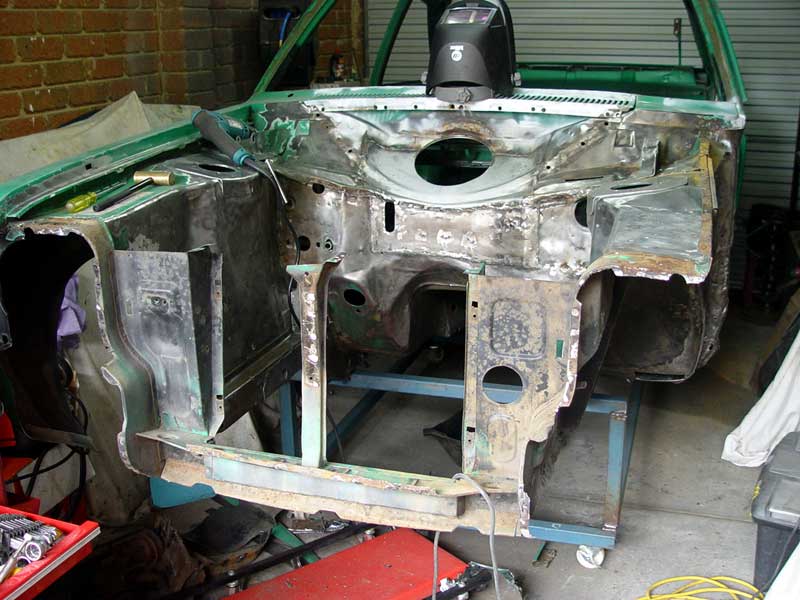 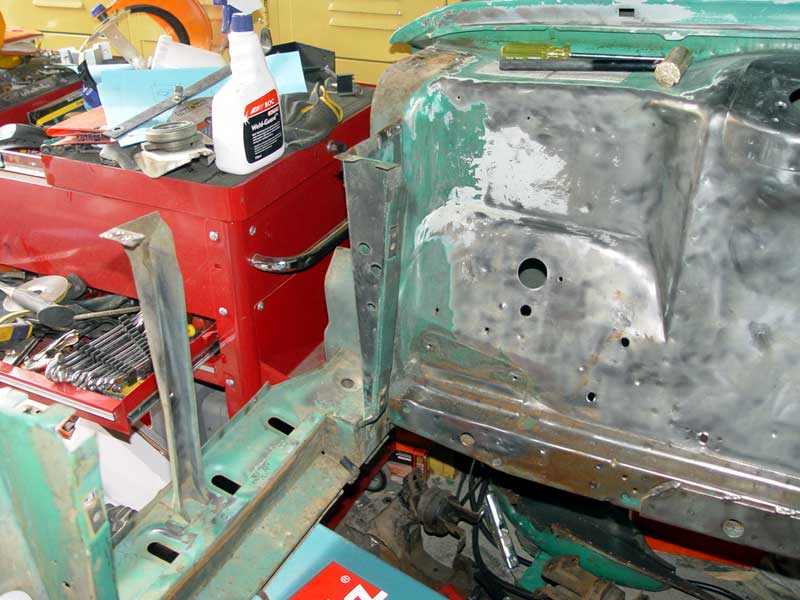 The firewall, engine bay and gusseting with all get a good coat of POR15. That should prevent the rust returning.
|