fordsy
Aficionado

- Total Posts : 797
- Scores: 13
- Reward points: 3029
- Joined: 2011/08/01 11:02:49
- Location: Location : Location !
- Status: offline

RE: Steve's Mk2
2010/01/02 20:37:12
(permalink)
Nope. Rears first, then the front. I still need to fit the front, slam and passenger wing before I tackle the fronts and the spoiler. I'm hopefully picking up the front on Sunday so i'm aiming to have the rears done by then. I'm only doing a three day week this week so I should have enough time to get it done.
|
jpayne
Scholar

- Total Posts : 360
- Scores: 19
- Reward points: 2898
- Joined: 2011/08/01 11:02:49
- Location: Melbourne
- Status: offline
RE: Steve's Mk2
2010/01/02 21:26:50
(permalink)
Mate,
get in there with a hammer and dolly and flatten those hammer marks! you might want to use some heat to shrink the metal down. where you have most of the hits is clearly visable from the inside of the boot and will quickly draw attention, and will always bug you.
To remove the excess on the lip i ran the grinder with a cutting disk around the top using the quarter panel against the spindle as a guide, perfect 7mm flange all the way around.
cheers,
JP
|
fordsy
Aficionado
- Total Posts : 797
- Scores: 13
- Reward points: 3029
- Joined: 2011/08/01 11:02:49
- Location: Location : Location !
- Status: offline
RE: Steve's Mk2
2010/01/02 21:31:21
(permalink)
Yeah. I will. I don't plan to leave it like that. I ran out of out puff about 5pm. I spent the morning shifting more gardening stuff and that took it out of me. Building a rock wall and moving just over a tonne of gravel by hand isn't great prep for working on the car. I'll dig out the panel beating hammers in the morning and make the bumps go away.
*Just remembered that the fuel tank will hide it but i'll bang them out anyway
|
fordsy
Aficionado
- Total Posts : 797
- Scores: 13
- Reward points: 3029
- Joined: 2011/08/01 11:02:49
- Location: Location : Location !
- Status: offline
RE: Steve's Mk2
2010/02/02 11:19:19
(permalink)
Those dints were bugging me all night, so first thing i've done is dig out the good hammers 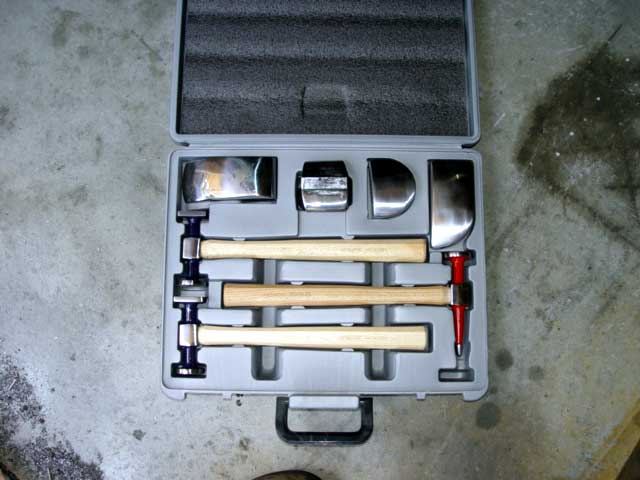 And gave this bit 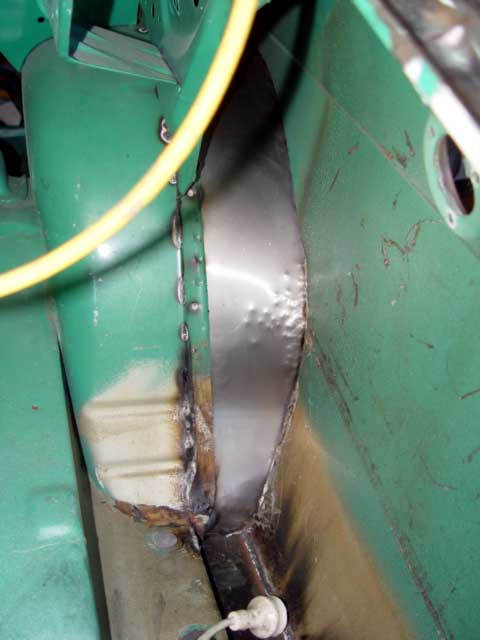 A good bang with the right tool til it looks like this. 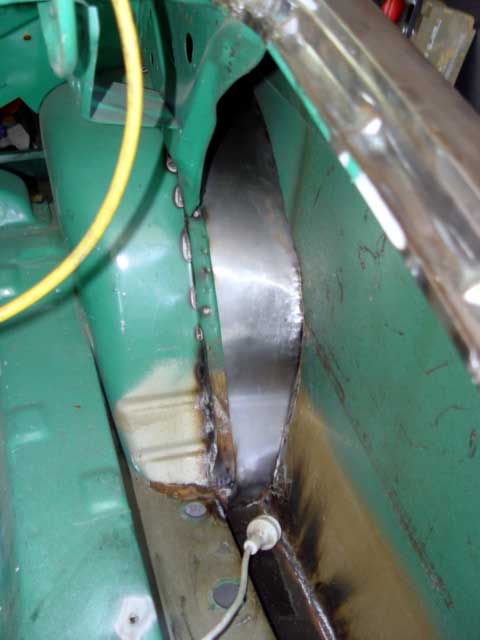 A bit of flap disc on the grinder to come and it's all good. Not need for heat. The pics i'm putting up here are my online diary. I'm listing pretty much every shot I take, good or bad, as my little history piece on the car. I don't mind people pointing out stuff that isn't 100%. In fact, the more people who do, the better my work will turn out. 
|
fordsy
Aficionado
- Total Posts : 797
- Scores: 13
- Reward points: 3029
- Joined: 2011/08/01 11:02:49
- Location: Location : Location !
- Status: offline
RE: Steve's Mk2
2010/02/02 12:15:47
(permalink)
I've jumped ahead a couple of steps and done a test fit on the arch. 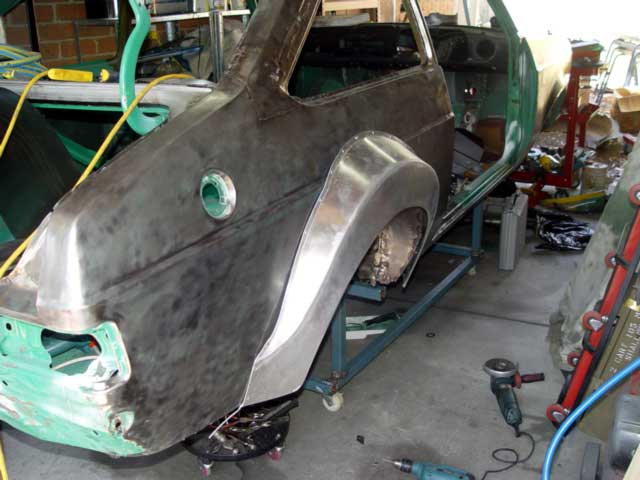  I still need to do some more tinkering with the outer tub but it'll have to wait til Friday.
|
Bloodyeck
Enthusiast

- Total Posts : 223
- Scores: 0
- Reward points: 729
- Joined: 2011/08/01 11:02:49
- Location: DARWIN NT Australia
- Status: offline
RE: Steve's Mk2
2010/02/02 13:57:11
(permalink)
Love your work Steve. Thanks to you and PeterM I've found the motivation to attack a Mk2 with terminal rust to the floor, which I bought recently. Unfortunately, even on the lowest settings my mig welder perforates those less than robust floor panels from Hadrians. I did not have the same trouble with the floor panels I'd previously bought through Rare Spares. What welder are you using?
|
fordsy
Aficionado
- Total Posts : 797
- Scores: 13
- Reward points: 3029
- Joined: 2011/08/01 11:02:49
- Location: Location : Location !
- Status: offline
RE: Steve's Mk2
2010/02/02 14:05:52
(permalink)
I've got a Kemppi Minarc 150 portable. With 0.6 wire in it, it'll do 0.4mm steel. I'm using 0.8mm wire and the only trouble i've had is it blowing through a couple of rusty sections. I'm using BOC argoshield light gas.
|
Gdub
Master

- Total Posts : 927
- Scores: 32
- Reward points: 2475
- Joined: 2011/08/01 11:02:49
- Location: Melbourne Vic
- Status: offline
RE: Steve's Mk2
2010/02/02 17:26:11
(permalink)
WOW!
This is really impressive to follow. How much of this type of stuff have you done before or are you teaching yourself as you go?
You must have a lot of patience!
Looking forward to catching up with you at SFS. Looks like i am pretty much tied to the event marquee for the day doing membership so i wont be hard to find!
G
|
fordsy
Aficionado
- Total Posts : 797
- Scores: 13
- Reward points: 3029
- Joined: 2011/08/01 11:02:49
- Location: Location : Location !
- Status: offline
RE: Steve's Mk2
2010/02/02 20:21:29
(permalink)
This is the first car I've ever done. I did part of a MIG welding course back in '99 but other than that, it's all self taught. I get my inspiration from other cars that i've seen built up on forums, like bloodyeck has done with mine and PeterMs. I figure if someone else has done it, I can do it too. It's worked for me so far. [:x)]
|
esc-078
Enthusiast
- Total Posts : 152
- Scores: 5
- Reward points: 2868
- Joined: 2011/08/01 11:02:49
- Status: offline
RE: Steve's Mk2
2010/03/02 17:10:34
(permalink)
Keep at it Steve, well done on your first attempt at a full rebuild. Looking good. Here's a look into the future..... ([:x)])  
|
fordsy
Aficionado
- Total Posts : 797
- Scores: 13
- Reward points: 3029
- Joined: 2011/08/01 11:02:49
- Location: Location : Location !
- Status: offline
RE: Steve's Mk2
2010/05/02 18:42:20
(permalink)
More work. I've started on the Passenger rear arch. First i gave the new lip on the drivers side a trim. 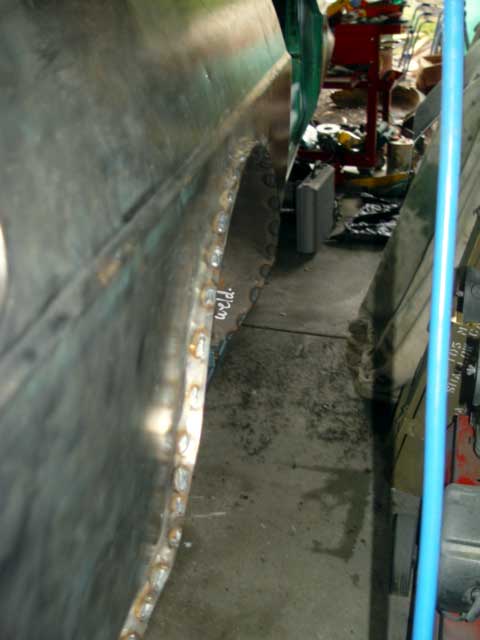 Then following the same procedure as the drivers side, I cut out the passenger side standard arch 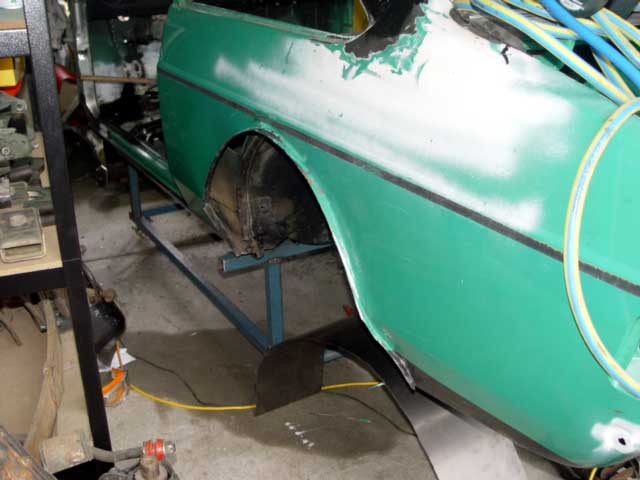 This spot has been full of crap on both sides of the car and is worth checking. You can get into this without cutting if you remove the back seat trim and stick a vacuum cleaner down the gap. 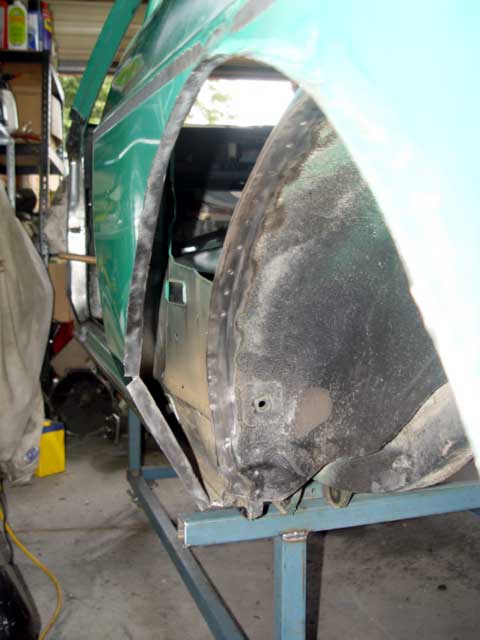 New metal for the outer tub. Still has to be drilled. 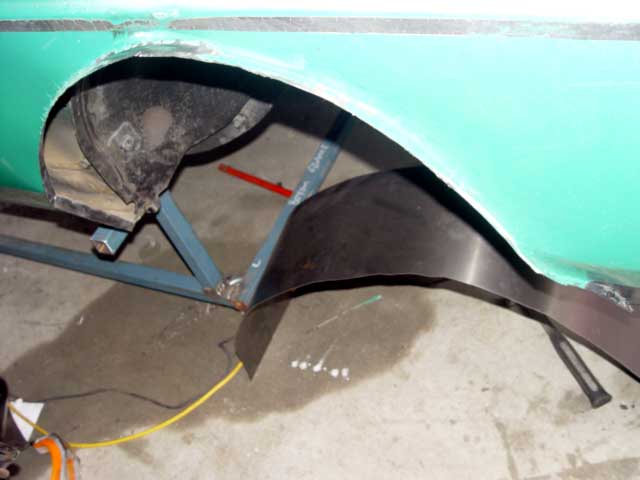
|
krt10
Scholar
- Total Posts : 663
- Scores: 21
- Reward points: 3808
- Joined: 2011/08/01 11:02:49
- Location: adelaide sa Australia
- Status: offline
RE: Steve's Mk2
2010/05/02 19:14:38
(permalink)
quote:
Originally posted by fordsy
This spot has been full of crap on both sides of the car and is worth checking. You can get into this without cutting if you remove the back seat trim and stick a vacuum cleaner down the gap.
i couldnt believe it when i pulled out the trims in my car. so much crap down there. anwyay top work steve. i am really enjoying following this one.
|
fordsy
Aficionado
- Total Posts : 797
- Scores: 13
- Reward points: 3029
- Joined: 2011/08/01 11:02:49
- Location: Location : Location !
- Status: offline
RE: Steve's Mk2
2010/06/02 17:28:58
(permalink)
Welded in the new outer tub. 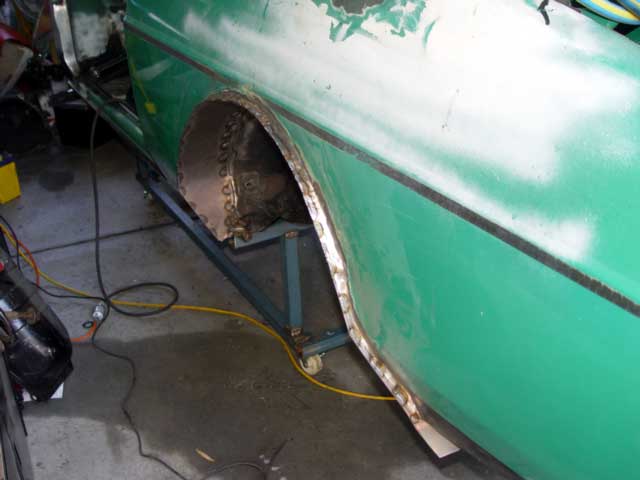 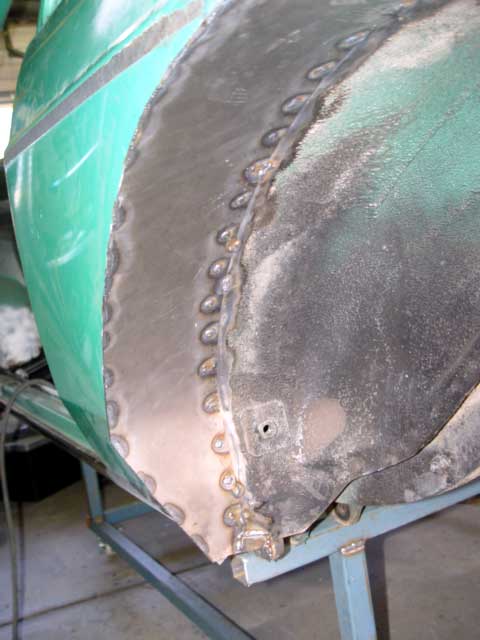  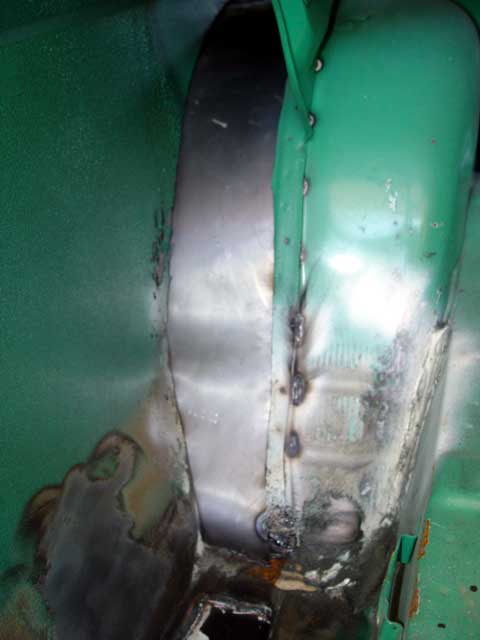 Just need to tidy up both sides where the new outer tub meets the rear boot floor. Next job is paint removal from the whole outside of the car and select bits of the interior as well as welding in more patches when i get sick of the grinder.
|
KIZZA
Aficionado
- Total Posts : 471
- Scores: 0
- Reward points: 4135
- Joined: 2011/08/01 11:02:49
- Location: melbourne vic Australia
- Status: offline
RE: Steve's Mk2
2010/07/02 02:25:24
(permalink)
looking good fordsy in you happen to read this in the morning my number is 0401 911 248 and I'l have that tank in my car for you. cheers Kieran
|
fordsy
Aficionado
- Total Posts : 797
- Scores: 13
- Reward points: 3029
- Joined: 2011/08/01 11:02:49
- Location: Location : Location !
- Status: offline
RE: Steve's Mk2
2010/08/02 17:25:09
(permalink)
Thanks to SMCKA I now have all the panels I need to reassemble the front end but first I'm going to finish the rear arches. So... Here we go. Using some proper 8g self tapping screws I did another test fit. Using the self tappers saved me from drilling out the holes as a separate task. With the arch held in place with the self tappers I gave the lip a little bit of panel beating to make the lip flush all the way round. 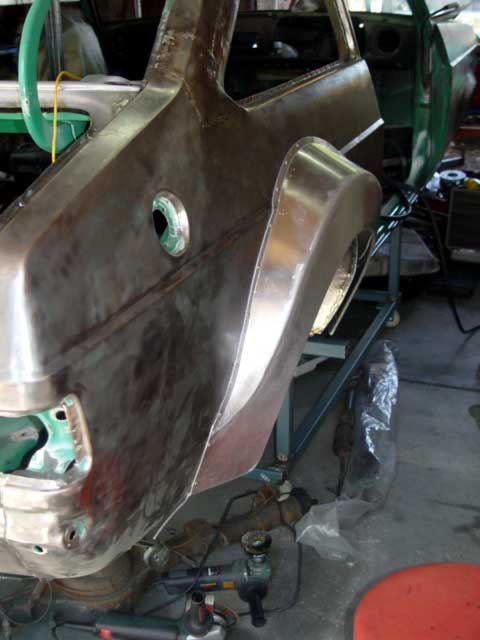 I gave the inner side of the alloy arch a good coat of etch primer.  Along with the rear quarter panel where the arch mounts to.  After that dried, I put a bead of Sikaflex around the lip of the alloy arch where it'll be in contact with the rear quarter. Then using one self tapper at the top to hold the panel one I started with the rivets. I first put all the rivets in without popping them to double check the alignment. All was good. Then starting from the top down I popped away until it looked like this.. 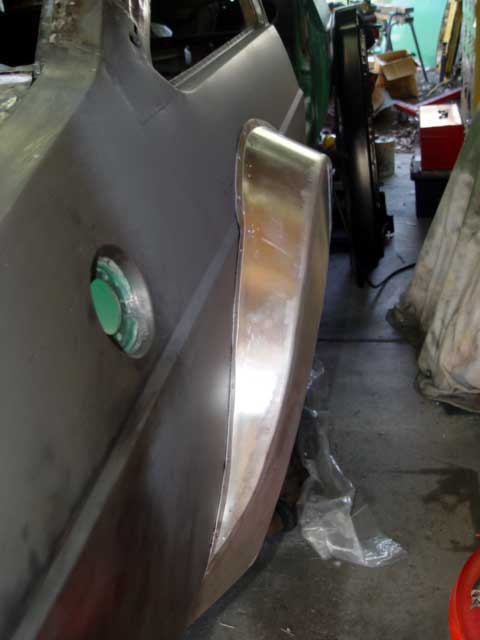 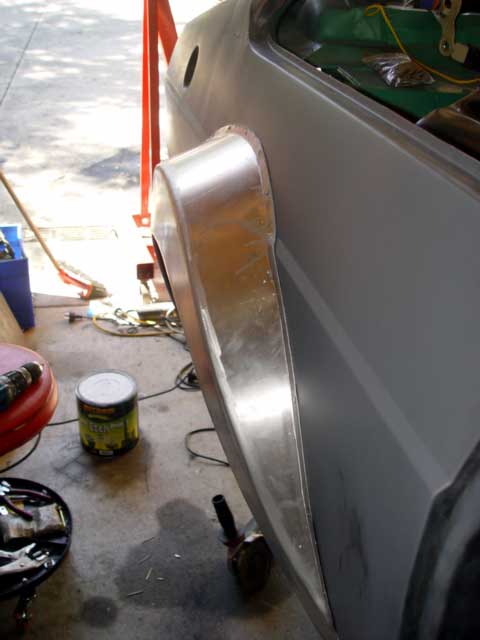 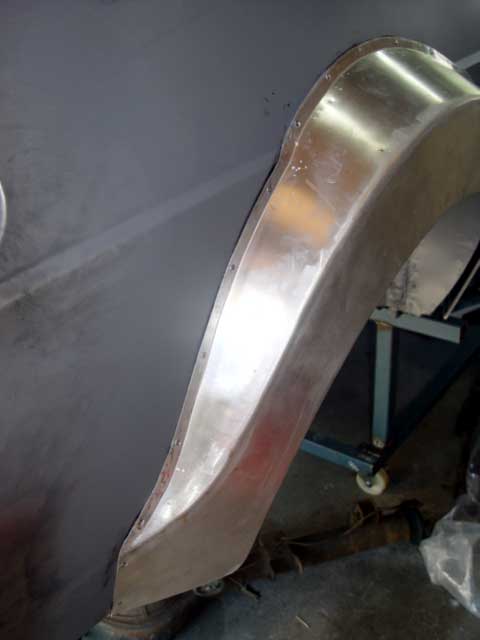 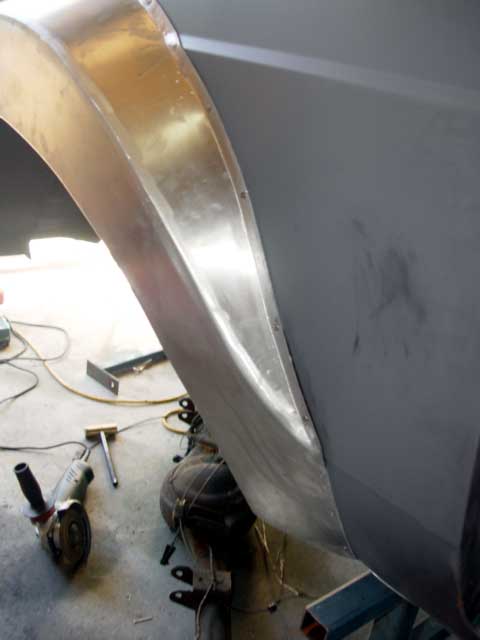 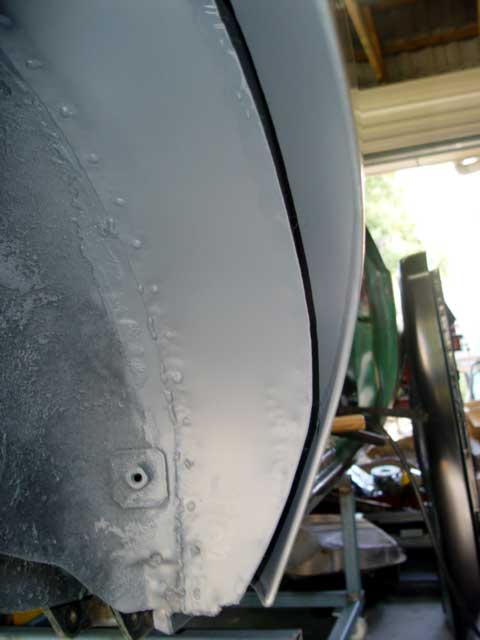 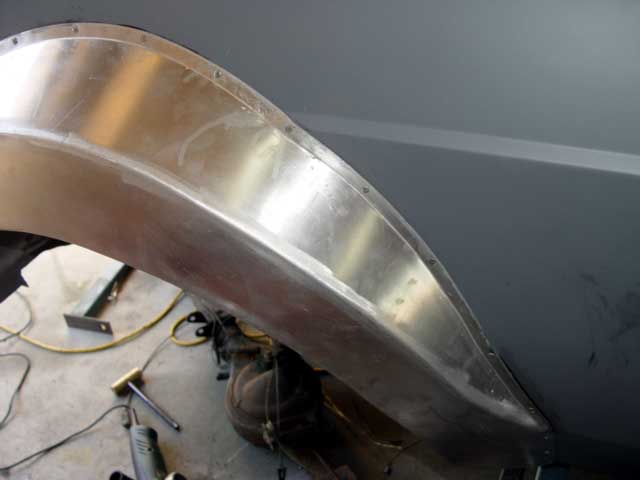 Next is the passenger side but i still have to strip the green paint off first. fun fun. 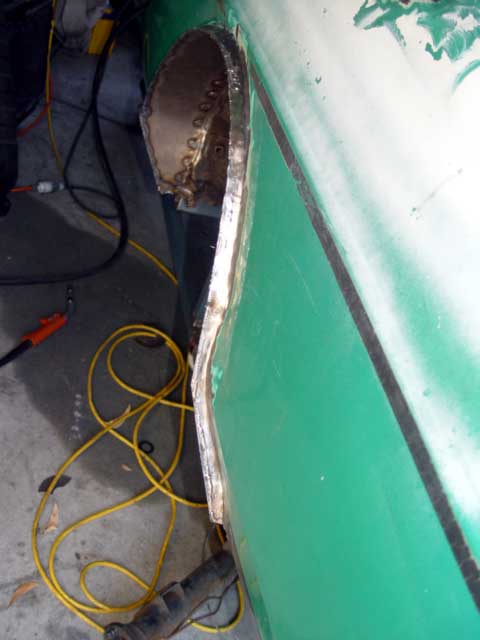
|