fordsy
Aficionado

- Total Posts : 797
- Scores: 13
- Reward points: 3029
- Joined: 2011/08/01 11:02:49
- Location: Location : Location !
- Status: offline

RE: Steve's Mk2
2010/02/01 18:01:51
(permalink)
Cheers Phil. It's a bigger job than i first thought but i'm having lots of fun doing it. Rear scuttle is next, followed by the boot surround, rear wheel wells, drivers side C pillar and drivers footwell. I've got about twenty plugs to weld into the floorpan and interior, a couple more gussets in the engine bay then attach the new front and finally the big one, fitting the alloy arch kit.
|
krt10
Scholar

- Total Posts : 663
- Scores: 21
- Reward points: 3808
- Joined: 2011/08/01 11:02:49
- Location: adelaide sa Australia
- Status: offline
RE: Steve's Mk2
2010/02/01 20:33:01
(permalink)
some great work going on steve. always love seeing updates
|
fordsy
Aficionado
- Total Posts : 797
- Scores: 13
- Reward points: 3029
- Joined: 2011/08/01 11:02:49
- Location: Location : Location !
- Status: offline
RE: Steve's Mk2
2010/03/01 17:55:34
(permalink)
Worked on removing the rear scuttle and repairing the corners today. First job was to remove the old scuttle plate. As it's being binned I ground out the spot welds as this is much quicker than drilling them. This allowed me to have a look at the corners. Passenger side one is knackered. 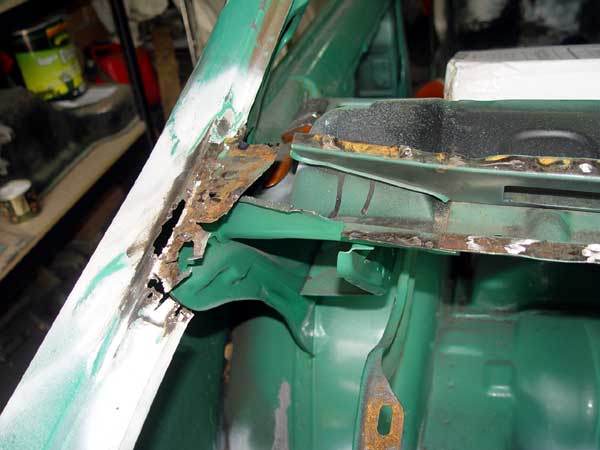 Drivers side one is actually pretty good. All it's getting is a coat of POR15 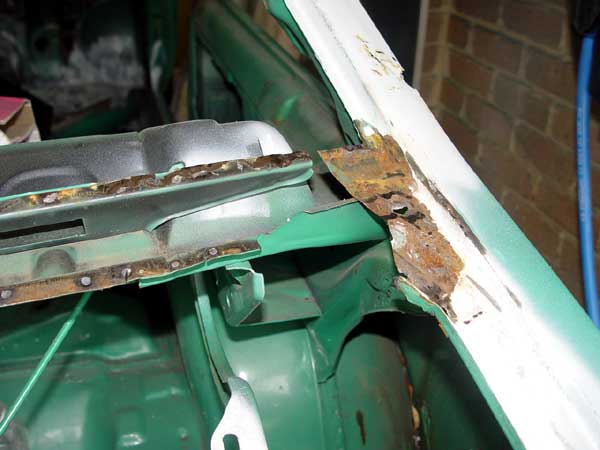 The rear minus scuttle. 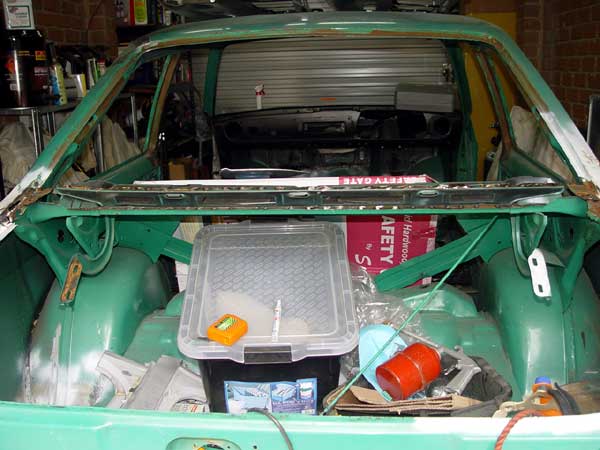 Welding in a piece from a donor car. I welded in another bit but didn't take a photo of it. 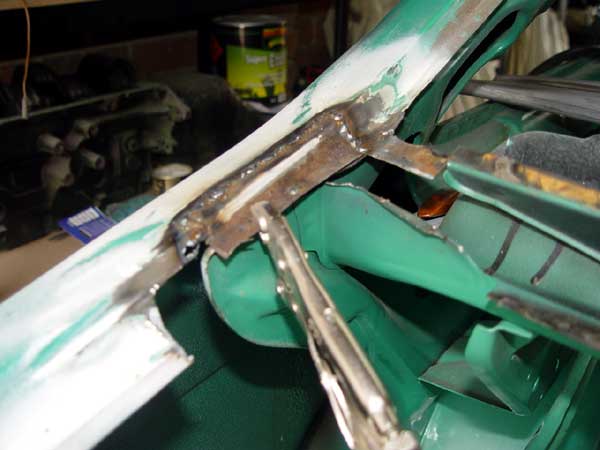 Repaired corners with some POR15. 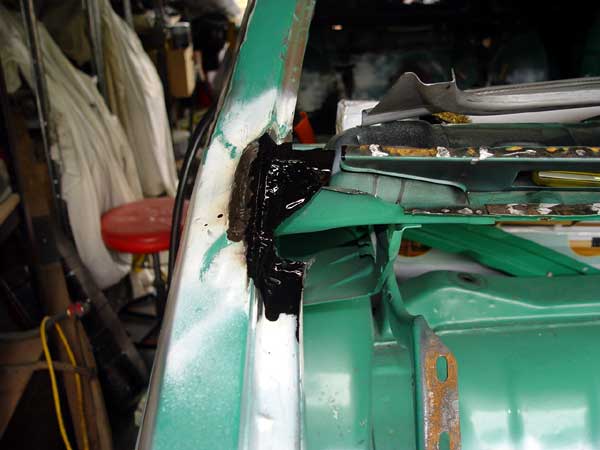 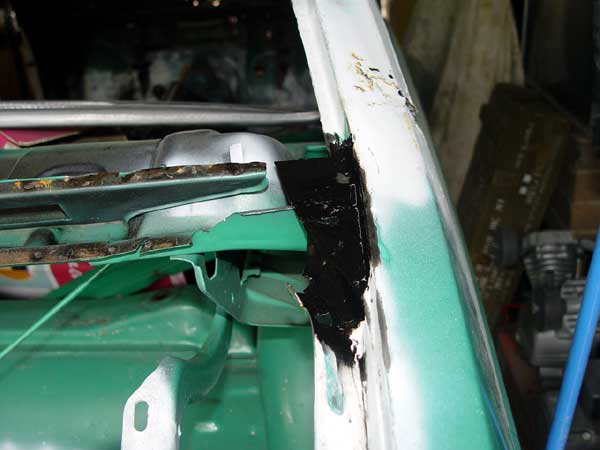 Next job is welding the new rear scuttle on.
|
fordsy
Aficionado
- Total Posts : 797
- Scores: 13
- Reward points: 3029
- Joined: 2011/08/01 11:02:49
- Location: Location : Location !
- Status: offline
RE: Steve's Mk2
2010/04/01 19:49:51
(permalink)
Remembered that I need to paint the internal surface of the new rear scuttle so I dug out the POR again. Seeing as I had it open I then painted a few more bits including the end of my nose. Now I have four days of thinking I have a fly on the side of my snoz. Fun Fun. New rear scuttle.  Other end.  Inside of new heater plenum cover. 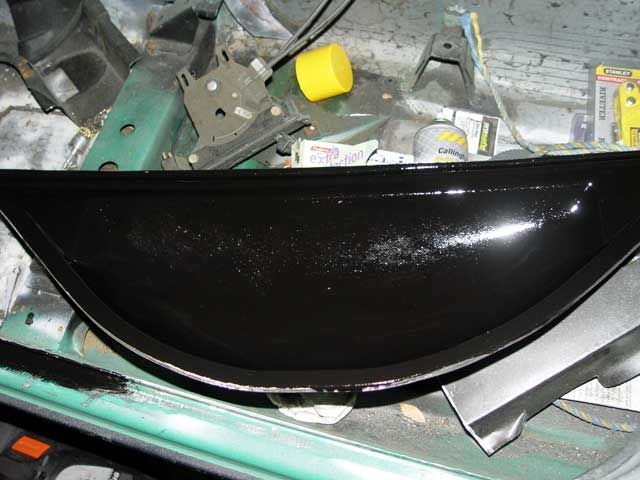 Bottom of the new A pillar. 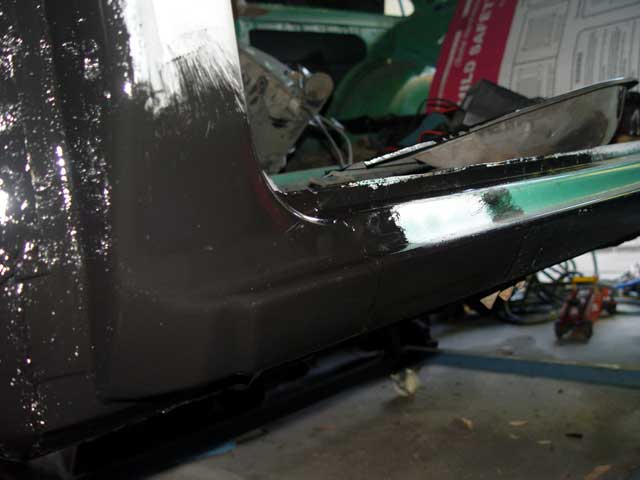 Join between A pillar and kick panel. 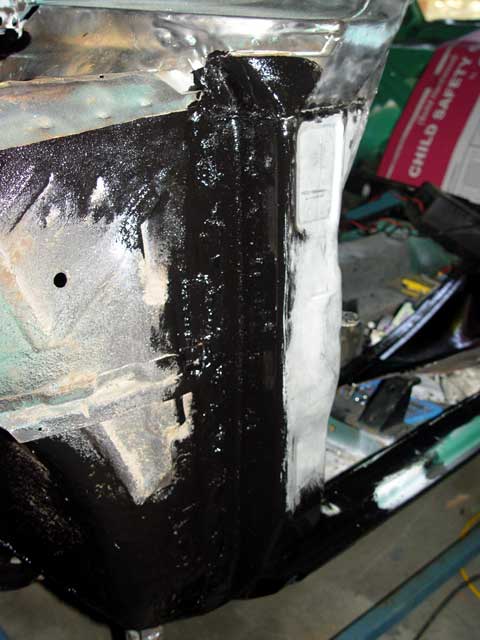 Hidden part of the front crossmember. 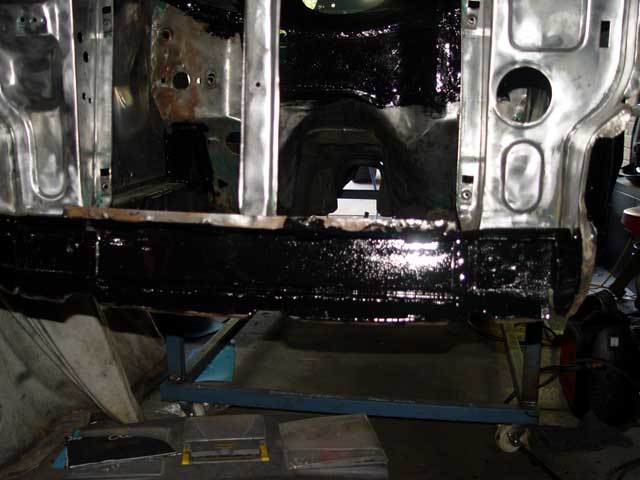 Outside of the footwell repair and the seam welds done earlier. 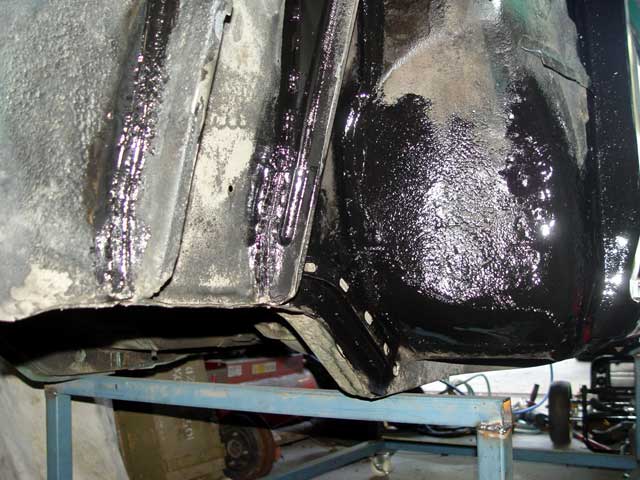 Repaired firewall and heater bowl. 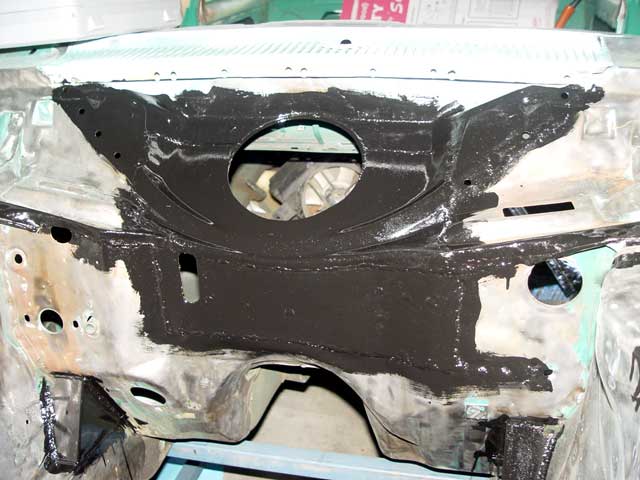 Rear C pillar vent area. 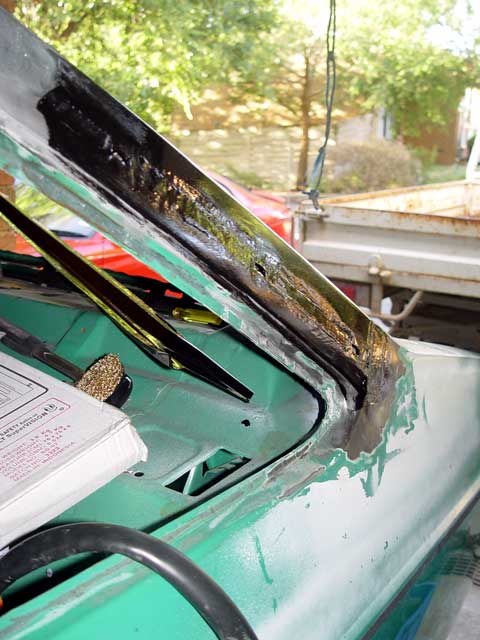 Also bought a set of vice grips to help hold the rear scuttle in place while I weld it in. 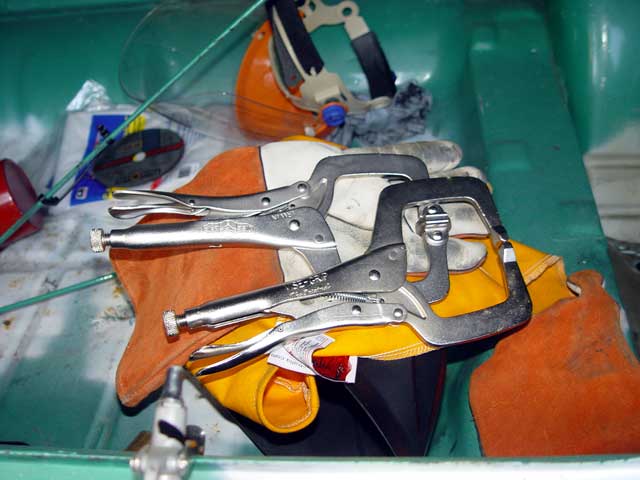
|
Gdub
Master

- Total Posts : 927
- Scores: 32
- Reward points: 2475
- Joined: 2011/08/01 11:02:49
- Location: Melbourne Vic
- Status: offline
RE: Steve's Mk2
2010/04/01 20:39:44
(permalink)
I've been watching your progress with interest. I have recently done the heater section and bottom of the rear window plus a boot floor on my wifes RS 4 door. Mine this week made it into primer and should have the engine bay and door jambs painted by the end of Wednesday.
Having done it i dont envy you but am impressed with the job you are putting out.
Gareth
|
fordsy
Aficionado
- Total Posts : 797
- Scores: 13
- Reward points: 3029
- Joined: 2011/08/01 11:02:49
- Location: Location : Location !
- Status: offline
RE: Steve's Mk2
2010/04/01 21:34:15
(permalink)
Sounds good Gareth. I'm hoping to get to the primer stage soonish. It all depends how the arch fitting goes. Any pics?
|
fordsy
Aficionado
- Total Posts : 797
- Scores: 13
- Reward points: 3029
- Joined: 2011/08/01 11:02:49
- Location: Location : Location !
- Status: offline
RE: Steve's Mk2
2010/05/01 14:53:06
(permalink)
Welded in the new rear scuttle this arvo. Took a lot less time than i thought it would. Step 1. Find every vice grip that i own and test fit the new scuttle panel. 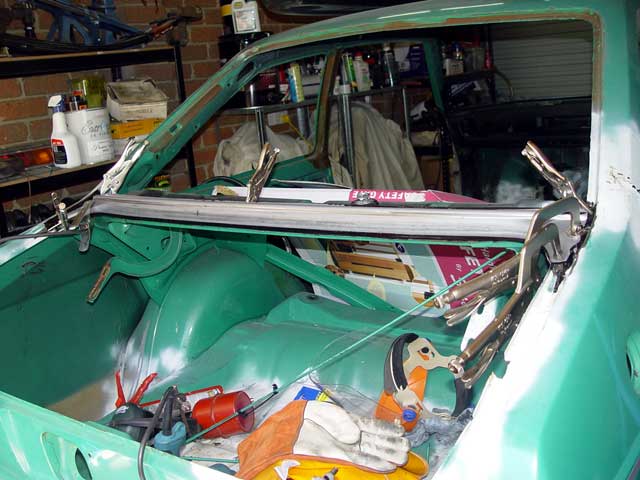 Corners are the hardest part to align. 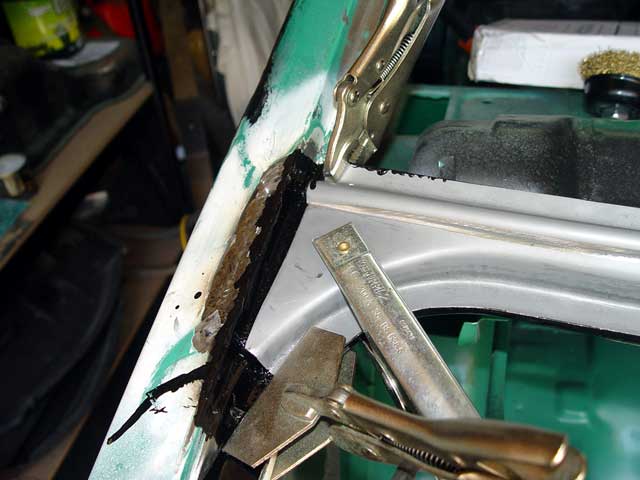 Drilled a couple of holes to plug weld the centre of the scuttle as the corner alignment is spot on and this will help hold the scuttle in place. 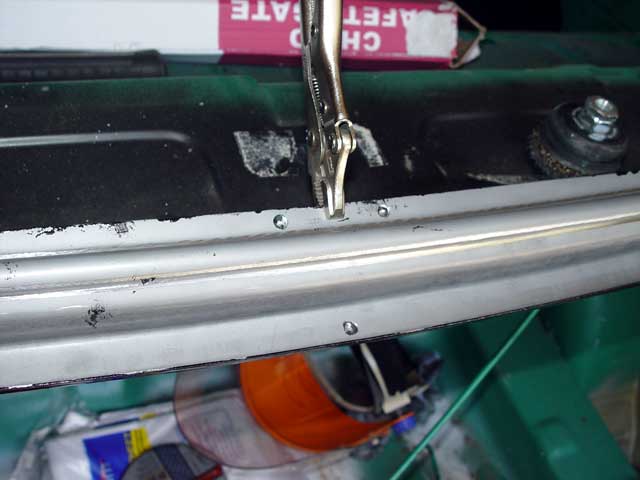 Welded one corner. 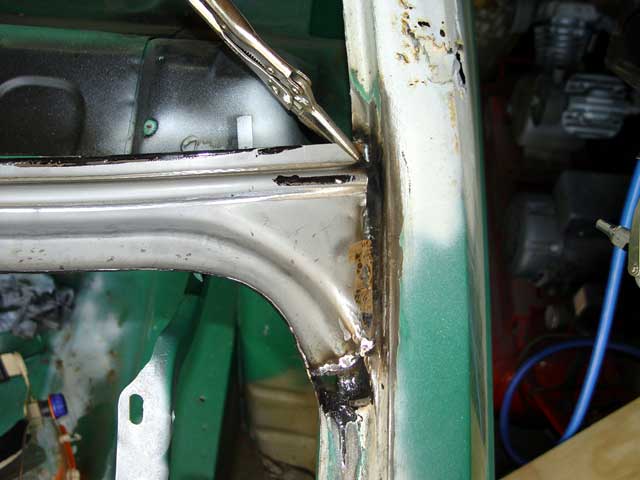 Then the other. 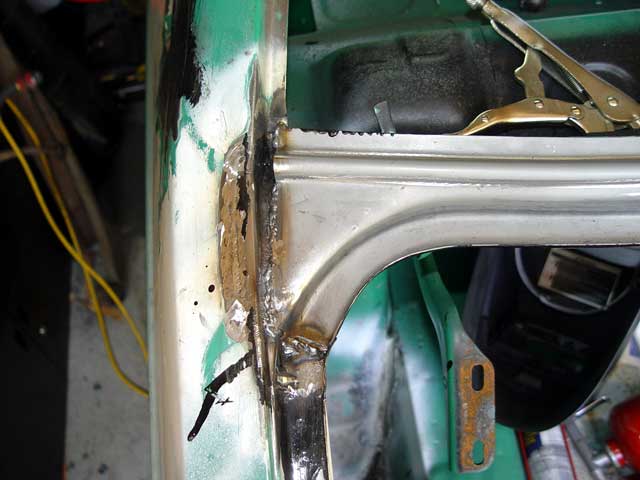 Marked out a heap of spots to drill for plug welds. 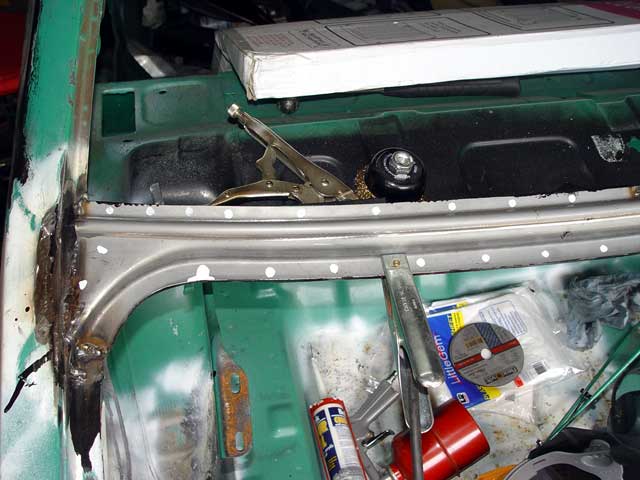  Rear scuttle installation done. Plug welds finished and ground back. I have a couple more small spots around the boot opening to do then it's on to the rear wheel wells. 
|
fordsy
Aficionado
- Total Posts : 797
- Scores: 13
- Reward points: 3029
- Joined: 2011/08/01 11:02:49
- Location: Location : Location !
- Status: offline
RE: Steve's Mk2
2010/05/01 16:07:53
(permalink)
Finished the couple of small patches. No pics as i'm running late for work.
|
escortinadriver
Deity

- Total Posts : 1299
- Scores: 155
- Reward points: 6343
- Joined: 2011/08/01 11:02:49
- Location: Vic Australia
- Status: offline
RE: Steve's Mk2
2010/06/01 11:46:40
(permalink)
Great work Steve...
Progress is really moving along..
Shaun
|
fordsy
Aficionado
- Total Posts : 797
- Scores: 13
- Reward points: 3029
- Joined: 2011/08/01 11:02:49
- Location: Location : Location !
- Status: offline
RE: Steve's Mk2
2010/01/13 13:22:52
(permalink)
This arrived today from the UK.  Another piece of the jigsaw done.
post edited by fordsy - 2011/10/07 01:18:50
|
fordsy
Aficionado
- Total Posts : 797
- Scores: 13
- Reward points: 3029
- Joined: 2011/08/01 11:02:49
- Location: Location : Location !
- Status: offline
RE: Steve's Mk2
2010/01/17 19:36:11
(permalink)
Today's work. Cleaned, removed and replaced the bottom of the spare wheel well. Wasn't as bad as I thought the rust would be. I cleaned the internals with the wire brush on the grinder. 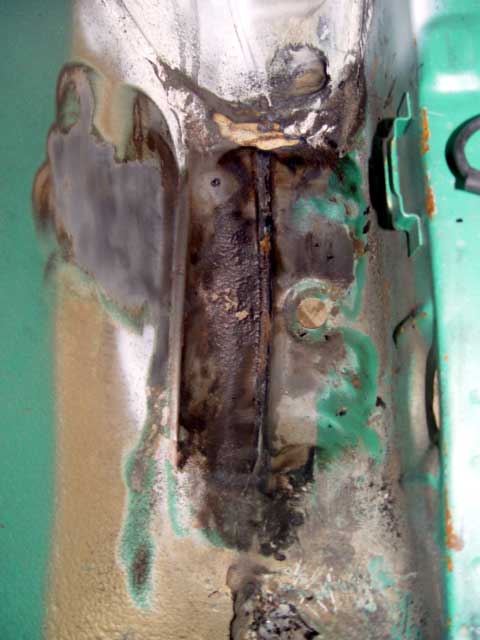 Then cut out the dodgy area plus a little bit for good luck. 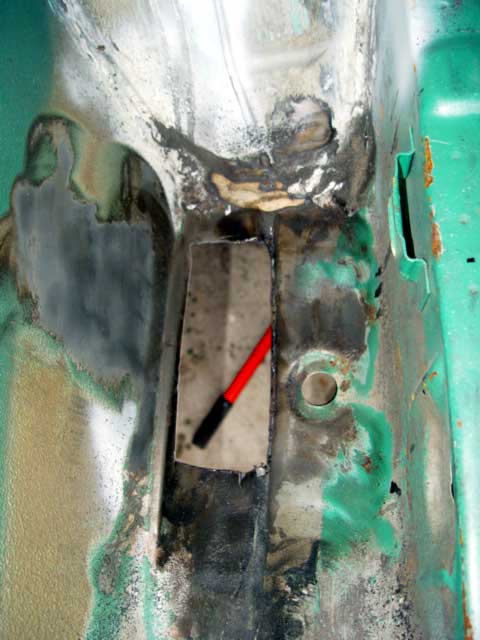 Then cut the patch from the rust repair panel and welded it in. 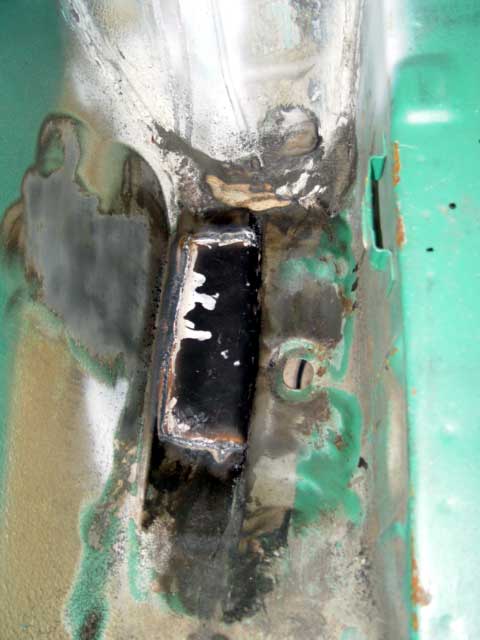 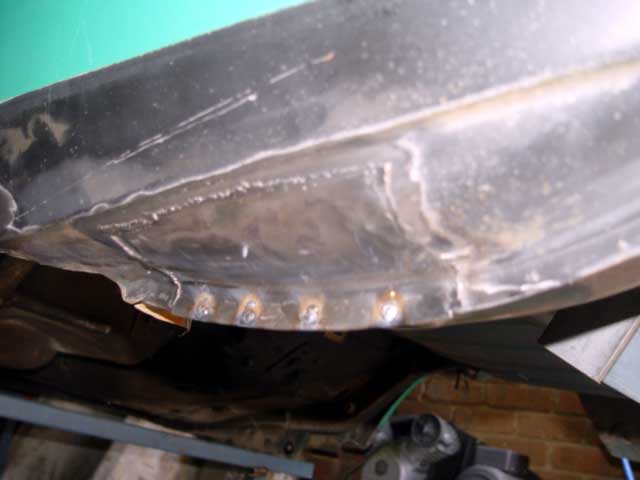 The fuel tank side had more rust so it needed a bigger hole cut out. Repair process will be the same. 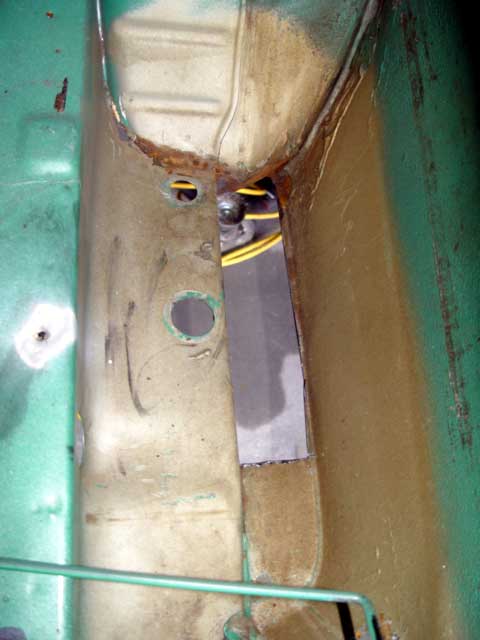 Then on to the C pillar. 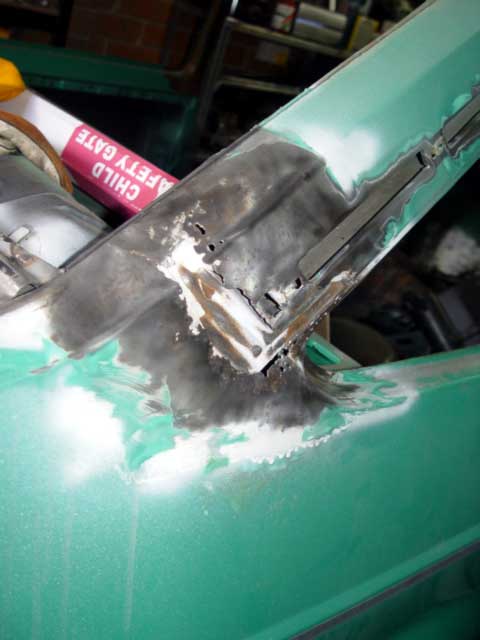
|
Sterling
Scholar
- Total Posts : 1060
- Scores: 0
- Reward points: 663
- Joined: 2011/08/01 11:02:49
- Location: Flinders VIC Australia
- Status: offline
RE: Steve's Mk2
2010/01/17 21:17:42
(permalink)
loving this progress mate, your a very thorough man steve.
|
fordsy
Aficionado
- Total Posts : 797
- Scores: 13
- Reward points: 3029
- Joined: 2011/08/01 11:02:49
- Location: Location : Location !
- Status: offline
RE: Steve's Mk2
2010/01/17 22:13:18
(permalink)
I can't wait til i've finished the rust repairs and I move on to some of the more interesting bits.
|
Paul Dunstan
Supporter

- Total Posts : 1378
- Scores: 35
- Reward points: 4790
- Joined: 2011/08/01 11:02:49
- Location: Adelaide SA Australia
- Status: offline
RE: Steve's Mk2
2010/01/18 13:55:03
(permalink)
Hi Steve
I'm looking at the same "C" pillar repairs - would you mind posting some pics of the panels behind the pillar that require replacement? Are you going to fabricate the internals also or just plate the outside?
It looks like we're going to have some fun here!
|
fordsy
Aficionado
- Total Posts : 797
- Scores: 13
- Reward points: 3029
- Joined: 2011/08/01 11:02:49
- Location: Location : Location !
- Status: offline
RE: Steve's Mk2
2010/01/18 18:37:30
(permalink)
I'll take some photos as I go along Paul. I'm hoping to only replace the outer skin as the inner strengtheners look okay from what i've seen of them so far. I've got a complete rear quarter spare, including the internals if required.
The rust is mainly where the foam seals are. They're the big problem.
|