MK1_Oz
Aficionado

- Total Posts : 466
- Scores: 9
- Reward points: 4285
- Joined: 2011/08/01 11:02:49
- Location: South Australia
- Status: offline

RE: Simon's Mk1
2010/03/28 21:18:04
(permalink)
Simon,
Have you gone to the extent of unpicking seams in areas that you are not repairing? The few I have pulled apart for repair so far have had a good amount of rust in them. I am debating pulling apart all seams for cleaning but this would be a horrible horrible job.
Maybe pouring rust converter into seams would work?
Glenn
|
Simon
Supporter

- Total Posts : 313
- Scores: 5
- Reward points: 6377
- Joined: 2011/08/01 11:02:49
- Location: Melbourne, Australia
- Status: offline
RE: Simon's Mk1
2010/03/28 21:59:45
(permalink)
quote:
Originally posted by MK1_Oz
Simon,
Have you gone to the extent of unpicking seams in areas that you are not repairing? The few I have pulled apart for repair so far have had a good amount of rust in them. I am debating pulling apart all seams for cleaning but this would be a horrible horrible job.
Maybe pouring rust converter into seams would work?
Glenn
Hi Glenn, Yes I have unpicked mine in selected areas. All I can suggest is if you remove the paint in the affected area, all of the spot welds along the seam will become very obvious. Hit them with a centre punch, then get yourself a spot weld remover bit and drill them out so you can do all the cleaning you need to. If you're already going to a lot of trouble to prep the car for paint, you may as well do it properly. Ultimately it's your call though.
|
Simon
Supporter
- Total Posts : 313
- Scores: 5
- Reward points: 6377
- Joined: 2011/08/01 11:02:49
- Location: Melbourne, Australia
- Status: offline
RE: Simon's Mk1
2010/04/18 22:17:12
(permalink)
Not a lot of progress, but some is better than none. I actually spent a bit of time last week making my own sheet metal folder. It's a bit light-on for serious stuff, but it should come in handy. I've made a start on repairing the heater plenum, as well as modifying the radiator support panel. I know a lot of people get a bit funny about cutting the rad support, but I plan to use an aftermarket alloy radiator intended for use in a Mk2 16V VW Golf, which is quite a bit wider than than the standard Escort radiator. Plus I think the standard Escort radiator support looks a bit fugly. The pic is a bit blurry, but you can see here I've started cutting out the rust in the heater plenum area. 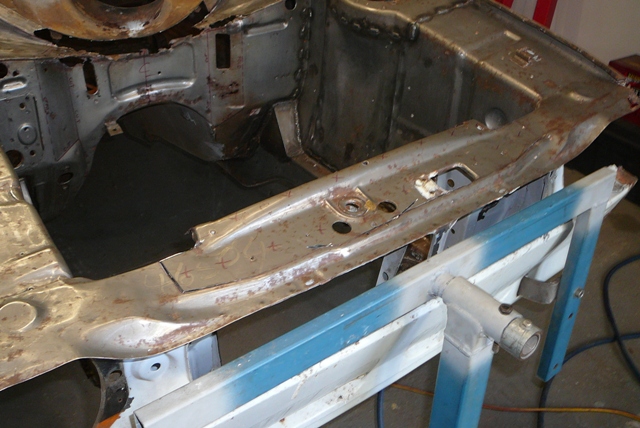 Given I will be using a fibreglass bonnet secured with bonnet pins, the standard bonnet catch on the slam panel will become obsolete, so rather than unpick spot welds, grind back brazed joints, then weld up all unwanted holes, I thought I'd just replace the section with new sheet. 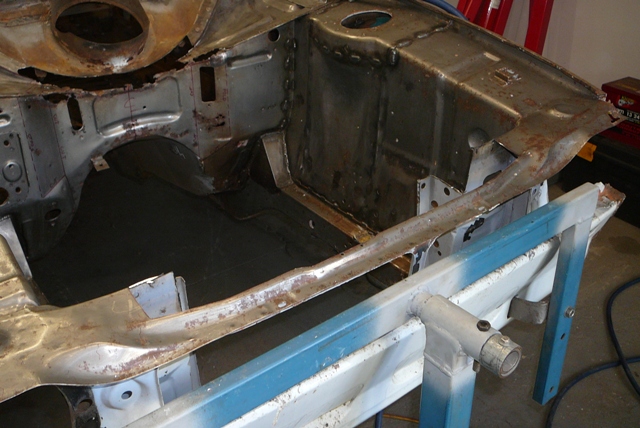 I'm just waiting for my radiator to arrive before I weld in the new section. And here's the first rust repair on the heater plenum. 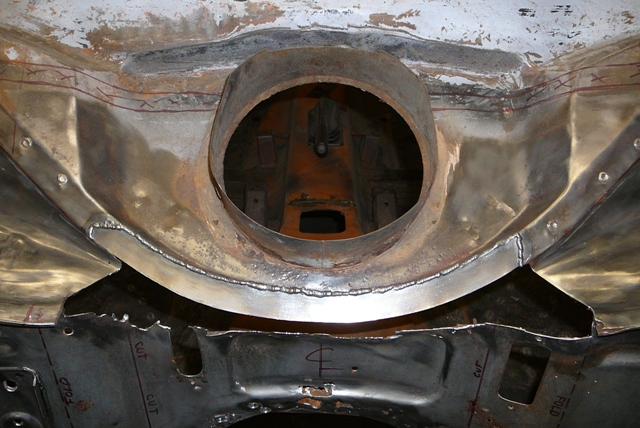 Oh, and here's an 'action shot' a friend took the other night on his phone... 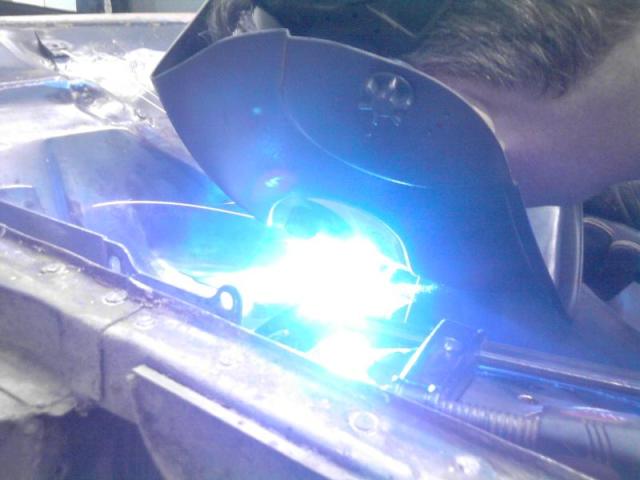
|
Paul Dunstan
Supporter
- Total Posts : 1378
- Scores: 35
- Reward points: 4790
- Joined: 2011/08/01 11:02:49
- Location: Adelaide SA Australia
- Status: offline
RE: Simon's Mk1
2010/04/18 22:39:15
(permalink)
Good to see some progress.
You still recessing the bulk head with a modified plenum cover?
|
Simon
Supporter
- Total Posts : 313
- Scores: 5
- Reward points: 6377
- Joined: 2011/08/01 11:02:49
- Location: Melbourne, Australia
- Status: offline
RE: Simon's Mk1
2010/04/18 23:06:13
(permalink)
I refuse to answer that question for fear it may incriminate me!
|
martymexico
Deity

- Total Posts : 2765
- Scores: 456
- Reward points: 6177
- Joined: 2011/08/01 11:02:49
- Location: Adelaide Sth Aust Australia
- Status: offline
RE: Simon's Mk1
2010/04/18 23:20:54
(permalink)
Go on....do it, its heaps of fun  I'll show you how when/if i get a mk1 panelvan!!
|
Simon
Supporter
- Total Posts : 313
- Scores: 5
- Reward points: 6377
- Joined: 2011/08/01 11:02:49
- Location: Melbourne, Australia
- Status: offline
RE: Simon's Mk1
2010/04/25 22:07:50
(permalink)
A little more progress today. I dressed the welds on the first heater plenum repair. In the photo it sort of looks like I've welded it to a crummy bit of steel, but it is solid, albeit a little pitted. The raised inlet for the heater fan is still to be cut out and welded up. 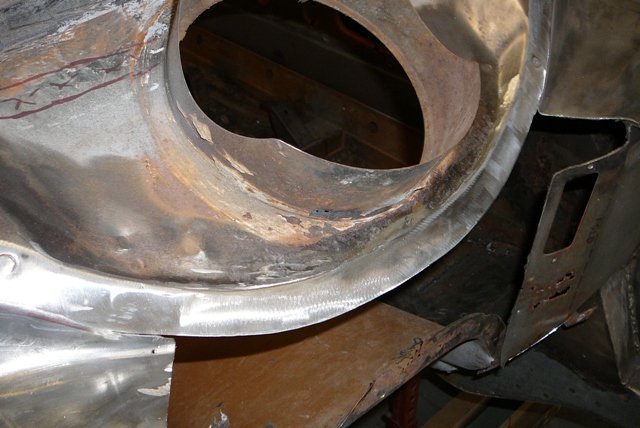 I also unpicked the transmission tunnel spot welds from the firewall and cut out the rusty mid section. 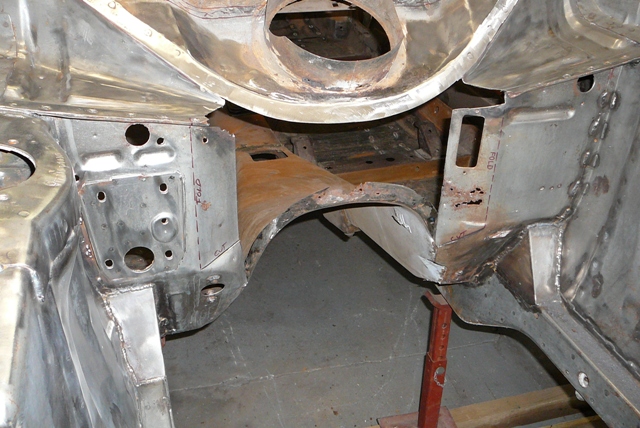 It probably sounds nuts, but I'm going to try and repair/remake this section so it can go back in. 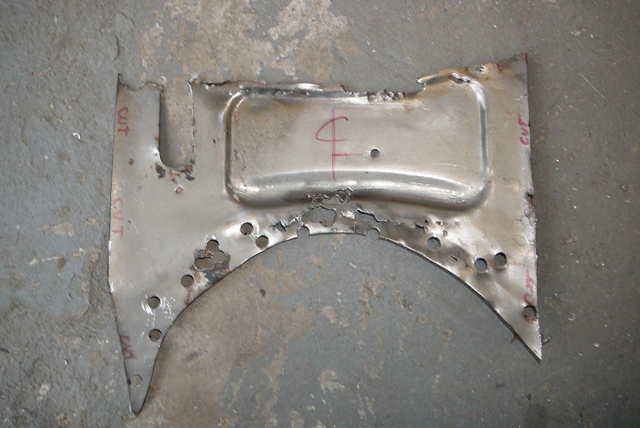 And finally, I put my home made sheet metal folder to use and folded the lip on the new slam panel top section. 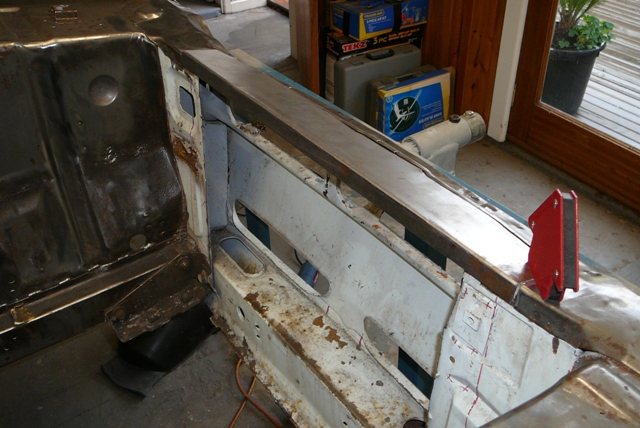 That's about it for the moment!
|
tanz
Enthusiast

- Total Posts : 37
- Scores: 0
- Reward points: 2151
- Joined: 2011/08/01 11:02:49
- Location: Australia
- Status: offline
RE: Simon's Mk1
2010/04/25 23:45:20
(permalink)
Any chance of some pictures of the folder? 
|
Phil
Supporter
- Total Posts : 1786
- Scores: 35
- Reward points: 4581
- Joined: 2011/08/01 11:02:49
- Location: Sydney NSW Australia
- Status: offline
RE: Simon's Mk1
2010/04/26 07:18:05
(permalink)
Nice progres Simon
|
Simon
Supporter
- Total Posts : 313
- Scores: 5
- Reward points: 6377
- Joined: 2011/08/01 11:02:49
- Location: Melbourne, Australia
- Status: offline
RE: Simon's Mk1
2010/04/27 11:58:46
(permalink)
quote:
Originally posted by tanz
Any chance of some pictures of the folder?
Hey Anthony, here ya go. It's really nothing flash and far too light in construction to be really useful, but it helps. The fold bar (50x50x3mm steel angle) flexes when trying to fold larger sections, meaning the radius of the slam panel fold was larger than I wanted. So I put it in the vice and tightened up the fold with some gentle persuasion from a BFH... 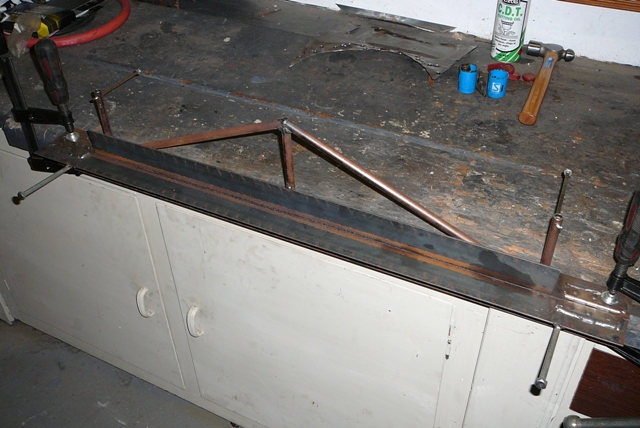
|
tanz
Enthusiast
- Total Posts : 37
- Scores: 0
- Reward points: 2151
- Joined: 2011/08/01 11:02:49
- Location: Australia
- Status: offline
RE: Simon's Mk1
2010/04/27 12:54:48
(permalink)
Thanks Simon!
It was mainly the hinge set-up I was looking for. The latest hoist turned up mounted on some nice RHS, and thought that'd be good for a folder![%] Now, off to the hardware to get some nice and heavy door hinges.
Cheers.
|
Simon
Supporter
- Total Posts : 313
- Scores: 5
- Reward points: 6377
- Joined: 2011/08/01 11:02:49
- Location: Melbourne, Australia
- Status: offline
RE: Simon's Mk1
2010/04/27 15:00:56
(permalink)
Yep, I just used some hinges I had left over from a cubboard I built. If you want something a little more heavy duty, gate hinges would probably be the go.
|
martymexico
Deity
- Total Posts : 2765
- Scores: 456
- Reward points: 6177
- Joined: 2011/08/01 11:02:49
- Location: Adelaide Sth Aust Australia
- Status: offline
RE: Simon's Mk1
2010/04/27 19:34:53
(permalink)
Nice progress happening there simon, i've been studying the moving back area of the bulkhead/plenum, the spot where you have drawn the slice lines is prolly not a good plan as the seam where the bubble welds to wont line up at all causing many griefs and growls!!  May i suggest to slice it nearer to the top as possible and fill the sides in with strips. A modification to the bubble, maybe cut into 3 pieces and rewelded due to the size/width will be reduced. Also You can remove upto 35mm from the front bulkhead without modding the bubble and still fit the heater box as normal...if your running one! Cheers
|
Simon
Supporter
- Total Posts : 313
- Scores: 5
- Reward points: 6377
- Joined: 2011/08/01 11:02:49
- Location: Melbourne, Australia
- Status: offline
RE: Simon's Mk1
2010/04/27 23:18:46
(permalink)
Thanks for the tips Marty. The markings on the plenum area are quite old and were pretty much a case of "thinking out loud". The vertical lines in the photo were reference marks for something else, although I can't remember what!
I think I have my 'rust repairs' more or less sussed now. Just need to find the time to tackle them.
|
Simon
Supporter
- Total Posts : 313
- Scores: 5
- Reward points: 6377
- Joined: 2011/08/01 11:02:49
- Location: Melbourne, Australia
- Status: offline
RE: Simon's Mk1
2010/04/28 23:53:33
(permalink)
My new radiator arrived today. It may not be quite as pretty as a PWR unit, but for the price it's not too bad and it's almost a perfect fit. I just hope it works! In my case it doesn't really matter how it looks as the plan is to sit it under the new slam panel, which really only leaves the core visable. One of the problems with sitting it so far forward is that it doesn't really leave me much space to fit an oil cooler, as the radiator sits very close to the front panel. The other concern I have is whether it will get enough airflow through it sitting so close to the front panel, but I guess people stick intercoolers in there with no issues, so with a decent thermo fan hopefully it should be O.K. I really don't want to start cutting holes in the front panel. 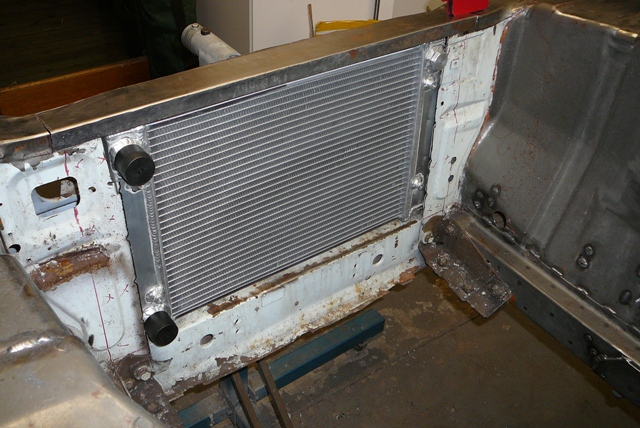 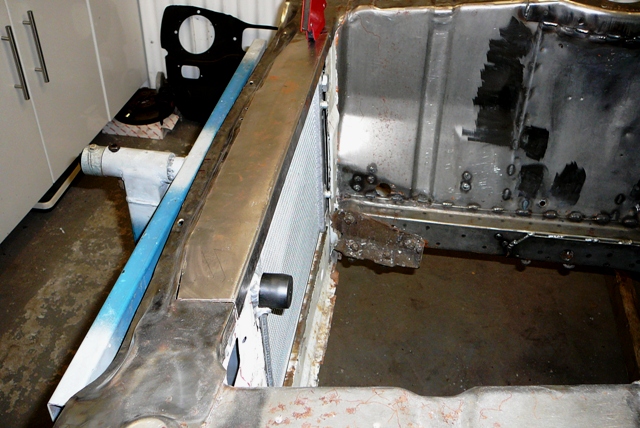 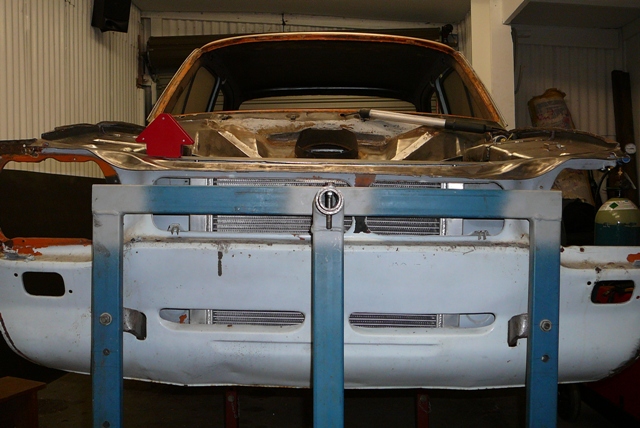 I just need to trim a little more off the support panel for it to fit properly, then I'll weld in some vertical strenghening ribs down either side of the radiator and sort out some mounts. Once that's done I can weld in the new slam panel.
|