2024/11/28 14:34:40
escortinadriver
martymexico
Sometimes Ford used a rolling spot weld to pinch and weld at the same time. 
 
it makes a strong join... And annoying to unspot.


Thanks, looked it up. have learnt something new.
 
It's definitely made me re-think my plan of fitting the entire donor inner arch into the wagon.
 
Think ill still sit on it for a little bit and work out my plan of attack.
 
Shaun
2024/11/29 11:07:47
martymexico
Same, I didn't know they existed until I seen a doco on the company that now makes Mini shells showed how some areas were stitched together as the original method was done using the original jigs and welders
2024/12/01 10:23:39
escortinadriver
After I finish the rear arch, the next piece of the puzzle is a dent (scrape) on the rear 1/4 and also the tailgate. Both are in sections that are inaccessible from the rear.

After seeing other use these, i have been watching prices on and eventually pulled the trigger.

Once the guard is done, this will be the next thing.

Attached Image(s)

2024/12/01 11:10:48
martymexico
Way cool, we're the nail welder guys now hehe. Mine has a volt regular dial but it's on nearly flat out anyways. Warning, safety eyes as sparks fly a lot of its not square to the panel and don't wiggle the nail off or you'll pull the panel causing a hole, cut it with grinder and linish flat. I had a problem with the key shape washers not seating in the tool holder so I lathed the threads a little more to line up. Apart from that it's a valuable device to have , I've used mine on 3x cars so far and still millions of needles left to use ! Next you'll be buying cleco's to hold panels in place lol .
2024/12/04 17:56:19
escortinadriver
Finished off the last of the rear sill guard section.

There wasn't much metal, and what was there was paper thin, with the paint holding most of it together.

I didn't have rust cuts for this section so tackled it in pieces. Maybe a little slow, however I got there in the end. It was multiple layers with the sill, arc section, rear section, inner arch and a curved section.
I got it to a point u was happy with (sick of it) and ended up giving the pin holes a quick skim with metal filler. At least it's now solid.

I'll give it a skim of filler later, mind you, the lower half has stone guard and the rest is almost covered by the door. Just the rear arch to do and the passenger side, the worst side, is done.


Attached Image(s)

2024/12/04 18:33:58
martymexico
Nice job, 👍 . I can understand the sick of it part, I get there a lot and was a daily can of over its when I did the Anglia, that just never let up on rust. It gave me a better understand of welding thin metal and replicating factory parts. Lesson learnt, never do a Anglia again...
2024/12/04 18:46:58
MarkA
Looks good considering what you started with Shaun.
Its always a hard question, "how far do I go?"
Main thing is it wont crack as its now solid.
2024/12/04 20:18:22
escortinadriver
Thanks for the kind words.

Keep trying to tell myself, 'as long as it solid, and better than before you started, it's a pass'. So far so good.

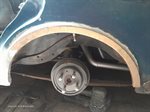
The rear arch has me spooked a bit. I guess it's a fear if warping such a large panel.

I realised I have both front arch lips spare, which, when flipped left to right sides, match the contours and profiles of the rear arch.

Thats means I now have 2 arch sections, so I get a second chance if I mess it up!!!

So, with that, I've decided to trim down the front arch section and just do the bare minimum around the arch. Either lapped or but welded, not sure yet, however if it looks good, it'll stay.

If I'm not happy, I'll cut it out, and go with the larger rear guard section higher up the guard.

Here's how the front offside front guard fits the rear near side rear arch. The lower sections don't quite match however they are solid on the wagon and won't be needed.


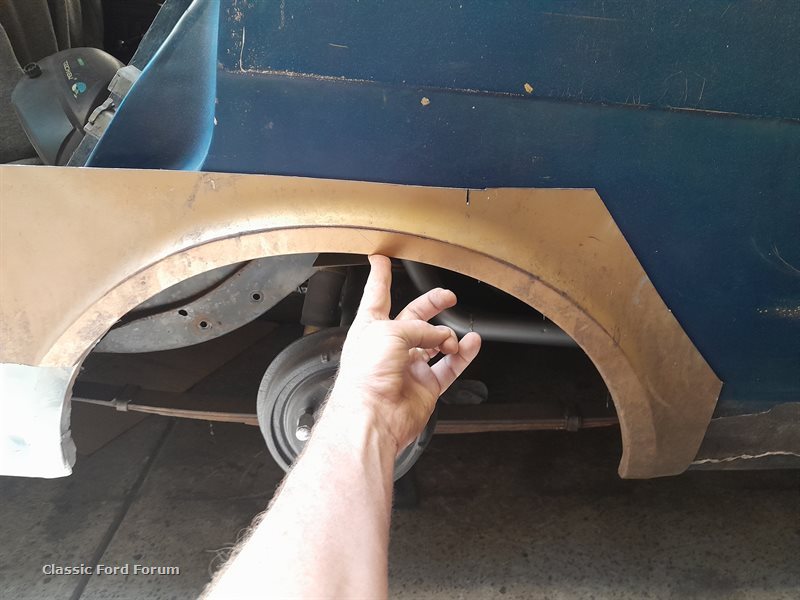
And here it is mostly trimmed to the flat section of the arch lip.


Will tackle it in a few days and let you know the results.

Attached Image(s)

2024/12/06 13:41:54
deano
definately got the bug now, sill panel came out nicely.
I think you'll be safe regarding warpage, the lip should keep everything flat if you take your time.
 
Your nail welder is a good idea and on my wishlist oneday. Dad has a series of tailgate dents he wants me to pull out that really need something like that to make it easier.
 
Marty loves his Cleco's, but they never jelled with me for some reason, possibly the operators fault.
Self drilling metal screws do the same, and give you a smaller hole to spot weld up.
 
2024/12/06 16:06:37
escortinadriver
Had a small window of time so had a go at this today. The rest will have to wait until next week. Still a bit to go however I'm really happy with how it's coming along so far. Now it's just a case of taking my time and filling in the rest. I've done the usual of treating and zinc coating the back, and will be able to get to the inside with some seam sealer. Haven't got photos of all the steps however you get the idea.


I'd used the welder for another project so a few test cuts to dial in the settings...


So far so good.

Attached Image(s)

<< ..2122.. >> - Powered by APG vNext Trial

© 2025 APG vNext Trial Version 5.1

Use My Existing Forum Account

Use My Social Media Account