2025/10/01 19:21:40
martymexico
Glad to have helped !
Yeah the caliper looks close , as you say, going to the step will be heaps of gap . I have a pic of my van 2.0 struts done but can't find it . Think I shaved the hubs on a 60deg to replicate Capri hubs
Edit, found pics !!!

Attached Image(s)

2025/10/01 20:45:58
MarkA
Mark.
I just saw your bit on the outer door handle gaskets.
I bought these from this place in the UK a couple of years back and they fit great.
I didn't want to use old ones on a new paint job!
They are still listed;  https://www.ebay.com.au/itm/133101653714
2025/10/01 22:05:10
PartTimeMK2
Yah Mark those are the ones I bought, I just cant get them to sit with a nice gap along the top cause of the flex in them. I'm probably being too pedantic to be honest.
 
Thanks Marty, I am going to pop them back down on Friday for another skim, I'll get him to stay where he was at the outer edge but go to the inner step.
2025/10/02 10:57:37
deano
would it be a total no no to file a poofteenth off the flange on the strut instead?
 
2025/10/02 11:56:00
martymexico
Haha, that's a clever one, back in the day we used to grind a chunk off the caliper bump , proper bodge !
2025/10/02 16:56:11
PartTimeMK2
deano
would it be a total no no to file a poofteenth off the flange on the strut instead?


Hahaha if I'm picking up what you're putting down that would move the whole hub assembly back and the disc would hit the inner race of the caliper AND the hub would foul .
2025/10/03 19:01:17
PartTimeMK2
Lots of little things happening at the moment with the car.

I finally dropped the pedal box down to powder coating. I also dropped off the headlight globe mounts, the handbrake boot retainer, steering column and the rear number plate holder. I got home though and realized I accidently left a part out of the box so will need to head back there on Monday, he's flat out at the moment so might be a few weeks before I get everything back.


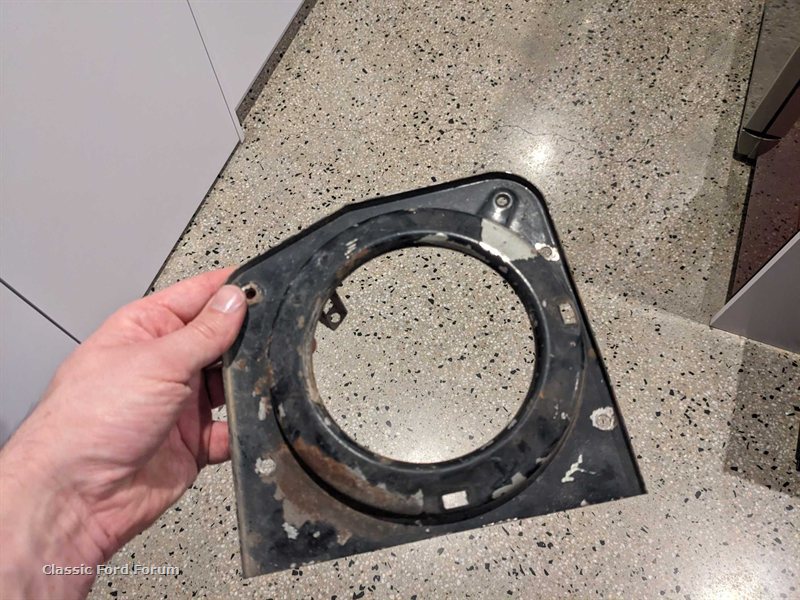
The RS has four of these mounts that hold the globes and attach to the main headlight bracket on the car. Plus a bowl that the headlight sits in and the chrome surround "sandwiches" the globe in place.


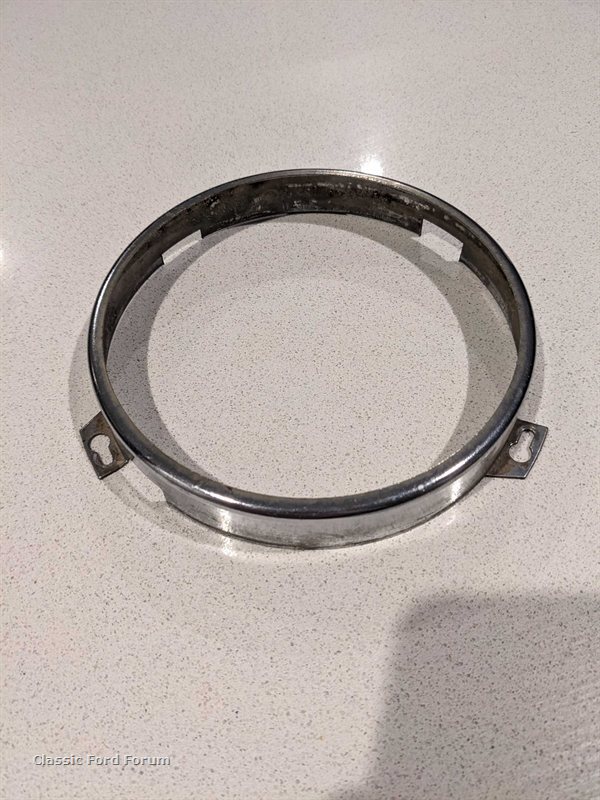
I debated getting these chrome parts powder coated black, but my gut feeling is the black would make the headlights look smaller and strange. The chrome kinda makes the light fill up the space better if that makes sense. So I'll just hit these with some barkeeps friend and see how they come up, may need to get them re-chromed though. These will be the only chrome parts left on the car. 

The hubs are back with the machine shop, he's taking the angle steeper and going to the step on the back of the hub - should have them back on Wednesday. 
 
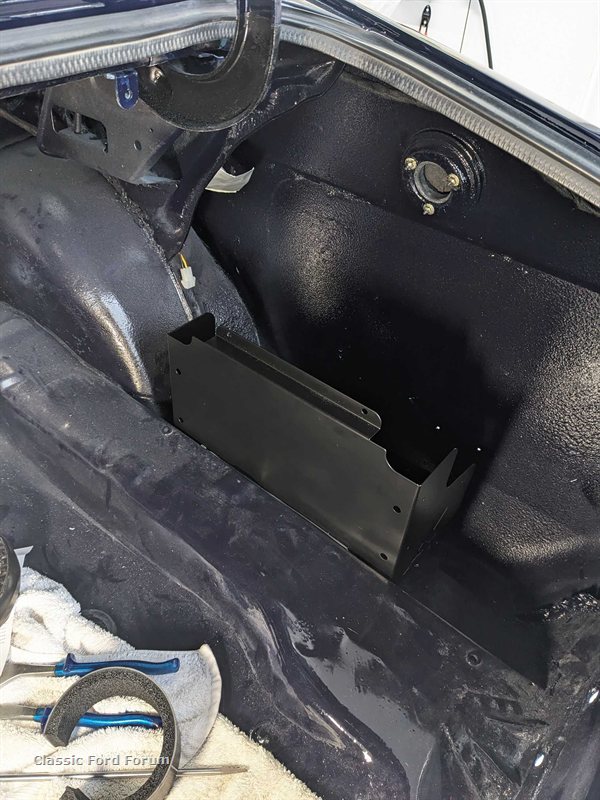
I also got cracking on with the battery mount, I had to make a bracket that attached to the bottom of the tray to support it / attach it to the wheel well. 

 
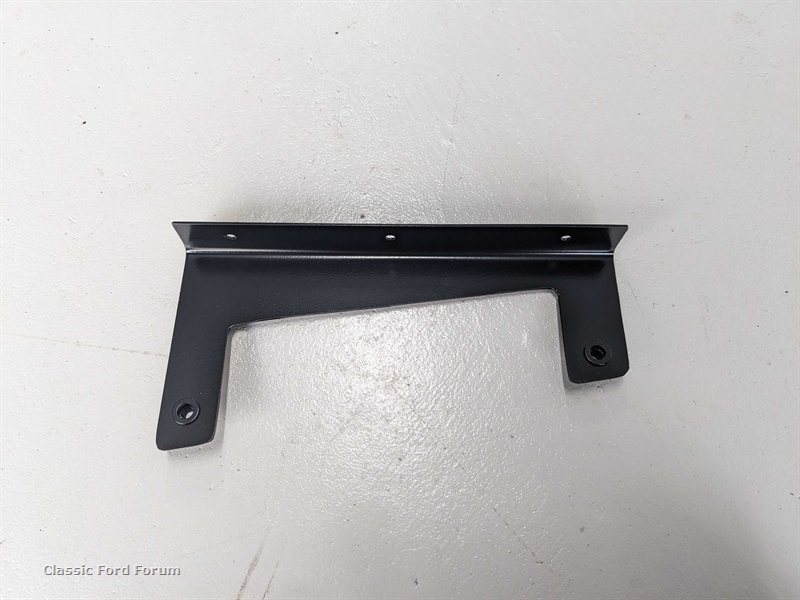
Considering all the cuts were with a grinder I am real chuffed how it came out , I also got to use my new cheapy bender - the bender will need some modifications to make it a bit sturdier!


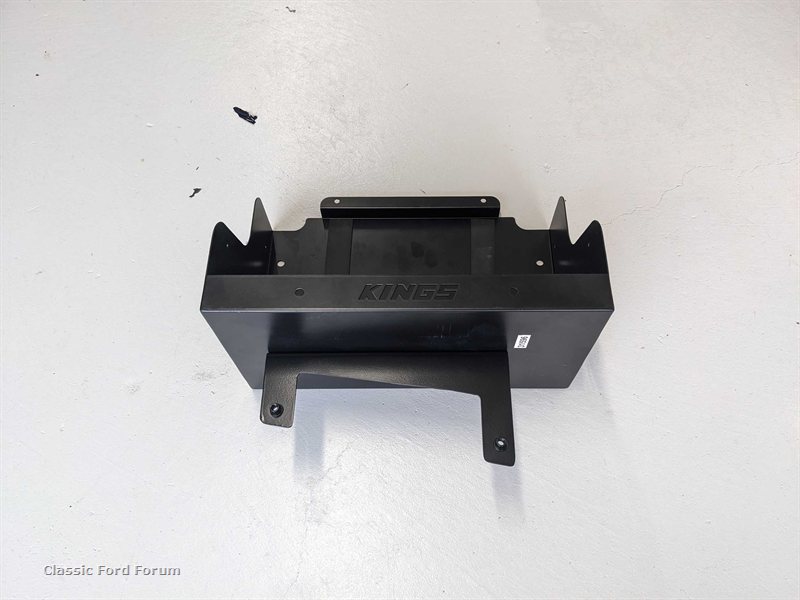
After that it was time to put it in the car, now I have a nice flat area to mount all my relays and run the wiring nicely - if there is space behind the boot furniture. I'm considering ditching the wood and making sheet aluminum ones when I make the one for the back seat.


On the list for this weekend is retrofitting the main headlight mounts to be rivnuts and bolts instead of screws, getting the main crash bar on and cleaning up the indicator lenses, housings and wiring.

Attached Image(s)

2025/10/04 10:05:50
martymexico
Yeah keep the chrome rings, black will make the car look odd
2025/10/04 14:29:13
PartTimeMK2
All the mounts are back on the front, I put M3 rivnuts in the slam panel to hold the main mounts on. Unfortunately I didn't have the right washers for the M3 bolts so I've ordered a pack off fleabay. You can see I've done the bodge double washer for now until the other washers arrive .


In this shot you can see the passenger side is tweaked in a little at the top inner edge, not sure if that is just escort stuff or if it's from an old accident. You can see the actual bumper rail is fairly beat up. The car did get hit in the front when my mum was driving it to work back in the 90s. Nothing a little spacer couldn't fix though - a 3 mm washer has straightened it back in line with the drivers side.


It's kinda hard to tell from the photo but everything seems to line up quite well with the small spacer. Will need a little bit of final adjustments when the nose cone goes on. 


Also can I just say this forum is awesome, I found a post from like 11 years ago with the proper exploded diagram for the RS front headlights, I wanted to double check I had everything right and of course the forum had the answer! Drewdog even used it for his and commented on it .
 
Alright next on the list is cleaning up the indicators and getting them ready to go back on.

Attached Image(s)

2025/10/04 15:24:27
martymexico
So lucky to have interweb for checking on how stuff goes, I built my RS back when the www was a luxury. I remember the light cluster as well but think there's a L and R on some bits, it was try and see what happens..
Once your nose cone is all good and installed, I recommend to remove it again until very late in the build so it's not in the way. Mine didn't go back on to after a few road tests round the B roads
<< ..5152.. >> - Powered by APG vNext Trial

© 2025 APG vNext Trial Version 5.1

Use My Existing Forum Account

Use My Social Media Account