2025/09/07 15:14:40
martymexico
Still holding 2nd gear !!
2025/09/08 20:53:27
martymexico
Small change of direction on brakes for the front end. I'm not up with the Peugeot models but these are for the 207 and 308 , I did buy the smaller rotors a month ago but was thinking they weren't any real upgrade over stock except venteds.
On with the pics n tell segment ...
I'll start with the size which is now 283mm x 24 m thick and the total height is 1mm taller than escort/Capri vents of 34mm so are just about perfect for the upgrade. The center not as like my smaller ones only needs 2mm lathe to enlarge.
First pic is the rotor after I've layered tape over the face and marked for the holes , this is a simple trick with a compass and verniers, once the center is marked and pin hold it's plain sailing from there on . Measurements are center to center of opposing holes and then the closer ones to create the cloverleaf effect

This pic is the other small 247mm rotor

Rotor bolt hole measurement from the Capri hub

Next will be to drill the holes and lathe the centre to fit the hub, I think I'll lathe the hub to match the rotors , strength isn't a prob at the back of the hub with only 1mm shaved off

Attached Image(s)

2025/09/09 18:54:43
MarkA
Simple geometry Marty. Remember when we said at school when being taught some new thing, 'I'll never use that'.
Rest my case.
Alternatively you could be trying to draw some meridians for map projections?
2025/09/09 20:47:43
deano
here was me thinking it was explainin the eclipse from last night.
 
Can you put some orbit dimples in those bigger rotors Marty?
Would go well with the solar system theme thats coming together.
Do you need any longer studs?
I have a few sets over from Nice,  depending on the knurl size needed.
2025/09/09 21:12:19
martymexico
Yeah Marka, I was not of a fan in Maths , kinda just did enough to survive thru to end of yr11 which is when I quit the whole school system.
Anyways today was to finish off the rotors to hub with drill press and a tiny bit of filing. Once everything fits I champhered the edges to reduce any cracks.
I will be cleaning up the hubs when the bearings arrive and they'll be all done at that time.


Also while looking about, I've got a full set of fiesta hubs which have longer but not silly long studs, they look like they'll pull thru a stock Capri stud hole of 1/2" or 12.7mm , slight problem is I don't have a 12.7mm drill bit just a 12.5mm so it'll have to do.


Attached Image(s)

2025/09/10 23:00:05
martymexico
Well bit of a luck, I had found a 12.7mm drill and drilled the stud holes, I think they was just rusty as hardly any swarf came off so they are now ready for the fiesta/focus studs at a later date.
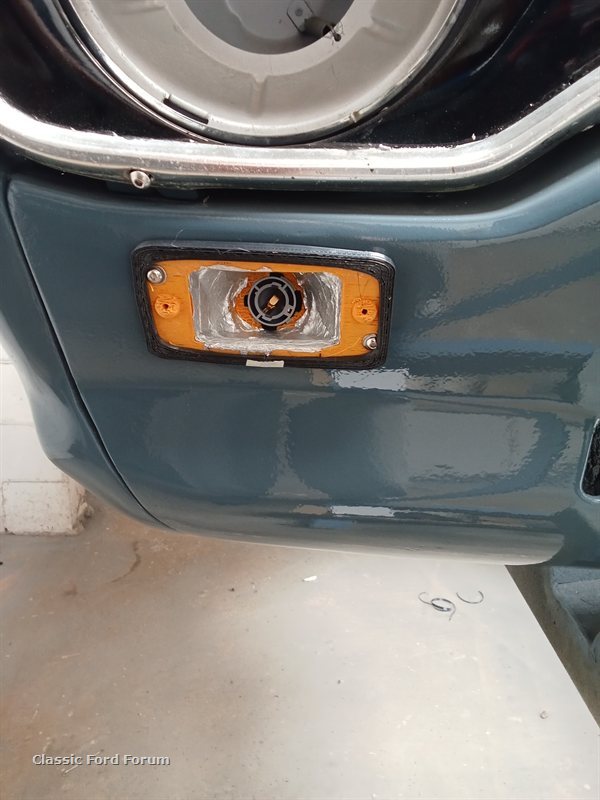
Moving to the car itself, I had been redesigning the indicators, mainly the way the lamp is situated in the back, that's all done and works a treat. I had a slight over sizing of the rubber seal , or now it's TPU. I did make them with a cut at the bottom so it's easier to fit on the indicators, some super glue to joint them.
Using MarkA's favorite nutserts again to hold the housing on the body and I just run a thread in the housing for the lens, all bolts are ss and m4 cap screws
Even though the housing is orange, I did apply alfoil to help the reflecting appearance
From inside the arch you can see the nutserts , I used alloy ones as I thought steel ones will start to rust being in a weather area

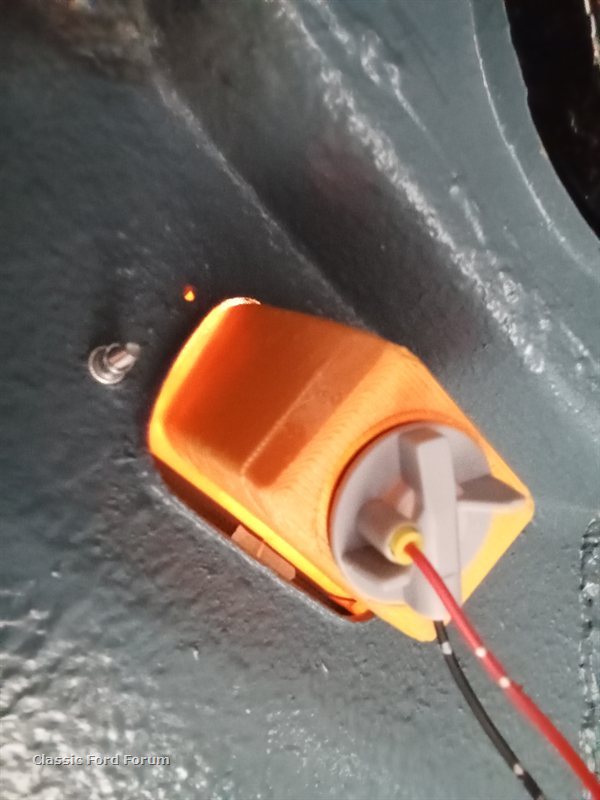
This one looks a little off straight but it was later fixed

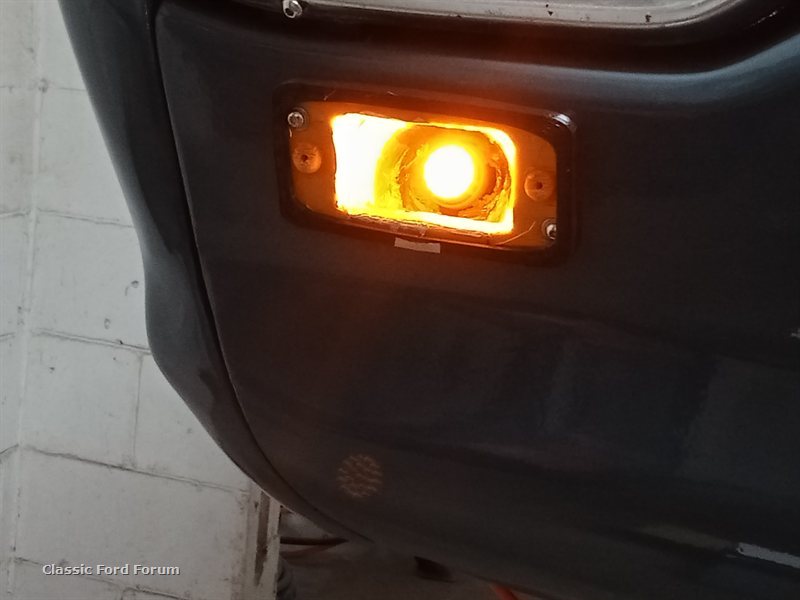
Using a jump pack to power up the LED bulbs

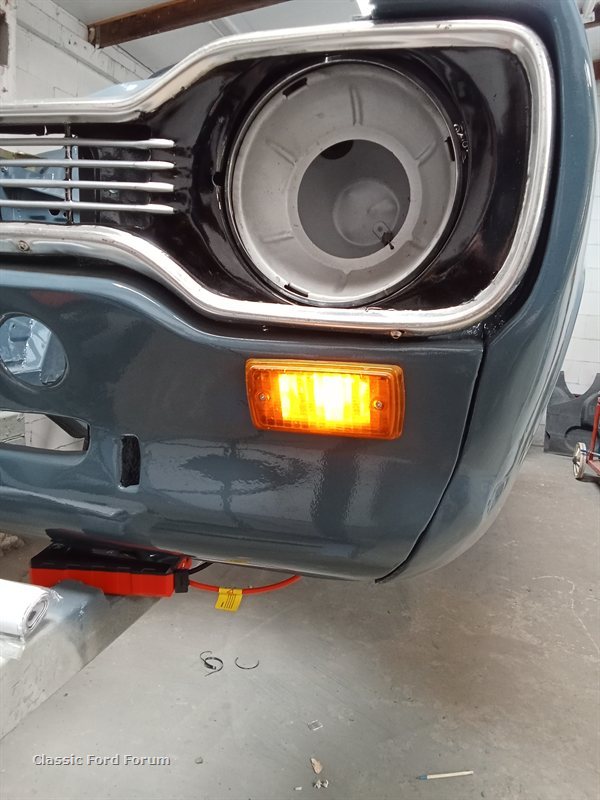
This has a orange led bulb so I'm thinking to go with clear lenses, any objections??

Attached Image(s)

2025/09/11 19:11:40
MarkA
Is that last shot with the clear lens? If so it looks a bit alien to me
The orange lens looks good
2025/09/11 19:16:44
MarkA
Yep, I have now gotten onto the aluminium nutserts Marty after you mentioned using them.
I generally use SS ones, mainly because I do marine stuff too, but have found the alloy ones to be pretty solid.
With the SS ones, anything over 6mm is definitely a job for the big tool. Have broke 2 hand held type guns now.
 
2025/09/11 19:45:20
martymexico
Haha Marka, the lens wasn't on, I just had an orange lamp, the cleary lenses are a direct copy of the factory orange ones so still have the bumps inside to defuse light.
I've never used the stainless rivnuts, they must be a flight to squash in position, do you use the bolt cutter type hand installer?

On to today's efforts with the taillights, I'm not printing taillights, only the bulb connector bit too use the modern bulb holder twist type. So the adapters were printed in petg so should last a long time. First job was to disassemble the light assembly to bare bones, then was to mark a circle to die grind with the porting tool.

Next was to make them fit in the space and not interfere with the housing, next was to glue them down with Sikaflex polyurethane sealer, this stuff is really strong adhesion, prolly more than required for these little parts.

I have since shaved back the excess and painted them in silver

Attached Image(s)

2025/09/12 20:08:43
martymexico
Yesterday rvo I painted the light housings an old silver I had just so the light housings look a little newer, even though I'll be fitting those plastic covers when I find them .
Here they are after the reflectors we're glued back in

Tried my hand at a new skill, vinyl wrapping. I bought a few mtrs of chrome which is for the bumpers and got this super silver just to trial, I think it's fine on the taillights and is a bit more bright in the sun. Had to make a plate for the surrounds to mount to do I could heat gun and stretch the vinyl around the corners, still learning this stuff..

Maybe I will watch more wrap vids to get the jist of this material

Attached Image(s)

<< ..8182.. >> - Powered by APG vNext Trial

© 2025 APG vNext Trial Version 5.1

Use My Existing Forum Account

Use My Social Media Account