2009/03/11 19:54:55
Paul Dunstan
OK, time to tackle to "A" pillar rust.

Decided the best way is to remove the gutter and replace the rusty sections and then re-attach the gutter. Had previously had a go at plug welding the holes from the front but proved unsatisfactory.


More to follow as I progress - this is the removed gutter section from the "A" pillar door opening. Clearly shows the major rusty sections.


2009/11/14 18:07:12
PaDDy555
quote:
Originally posted by Paul Dunstan

OK, another mediocre update [:I]

Purchased another set of rims to get some decent outers. Found it will be cheaper to do it this way instead of paying to get the others refurbished. Anyway, I now have a set of 15x7 and 15x7.5 which should be ideal considering the offest of my centres will currently have 24P on the front and 18P on the rear.

I now have an array of inners and outers plus 7 Porsche centres which I have started listing on Ebay!


what brand/type of rims are these??
2009/11/14 19:05:19
jds
quote:
Originally posted by PaDDy555

what brand/type of rims are these??

Simmons V4.
2009/11/14 19:09:47
jds
quote:
Originally posted by Paul Dunstan

OK, rotors now in place and all looks good


These struts look interesting, can you tell us more about 'em please?
2009/11/14 20:05:13
Paul Dunstan
Hi JDS.

Thanks - yes they're Simmons V4 which I've altered to my preferred width (15x7 front, 15x7.5 rear) after obtaining, selling and swapping many rim sections etc

Struts are from a car I obtained and sold on. I think they're standard Mk2 2.0L struts with the lower spring seat removed. A threaded section of water pipe was then welded onto the tube and a threaded "nipple" added to the spring seat. This has produced a rather crude adjustable spring platform. It also has a locking nut below the spring seat. It aint pretty but I guess it does it's job.

Also has Bilstein inserts.

Brakes are explained earlier in the thread.
2009/11/23 19:01:51
Paul Dunstan
OK, another step forward as a parcel arrived today


Now I have the last piece of the puzzle I can proceed with the engine mounts confident everything will fit without fouling [:x)]
2009/06/12 23:14:14
Paul Dunstan
Trying to get stuck into the remaining rust repair to ensure it's ready for paint when the time comes

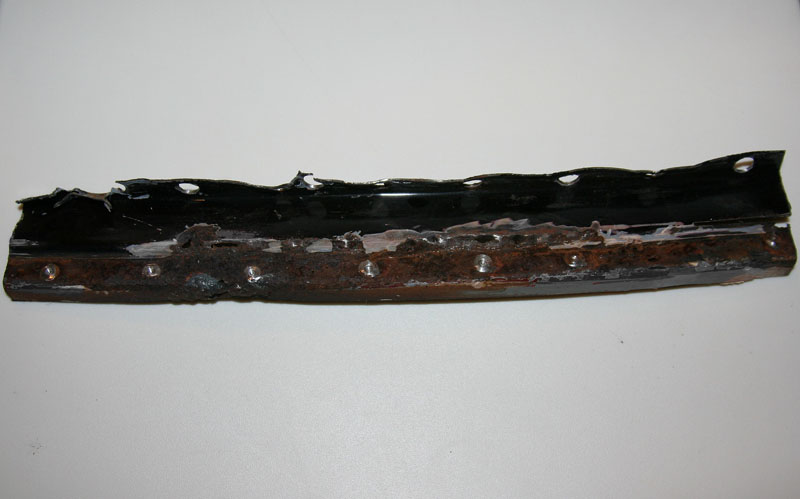
I needed to remove the under side section of the "A" pillar as there were rust holes all the way down which required the drip channel to be removed in the previous photos.

Section removed - difficult to see but holes are visible in the centre-line of the panel.


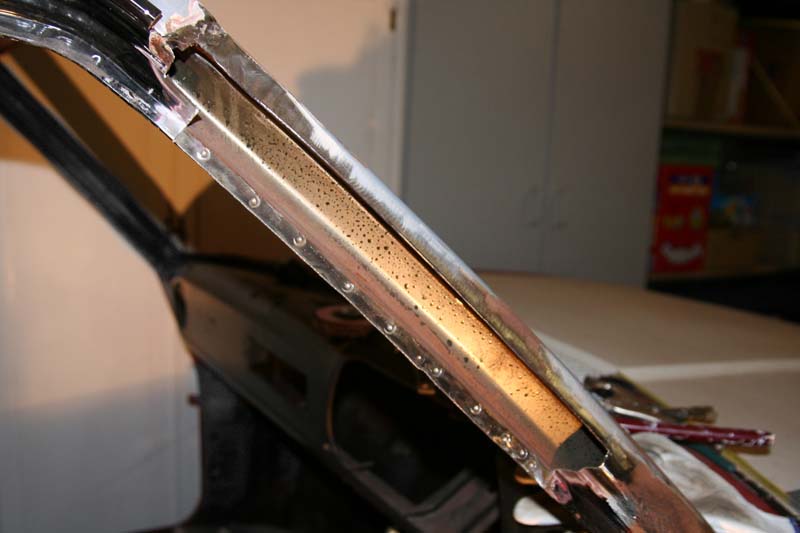
Where the rusty section was removed.


This then required a replacement section to be cut to size and grafted in.


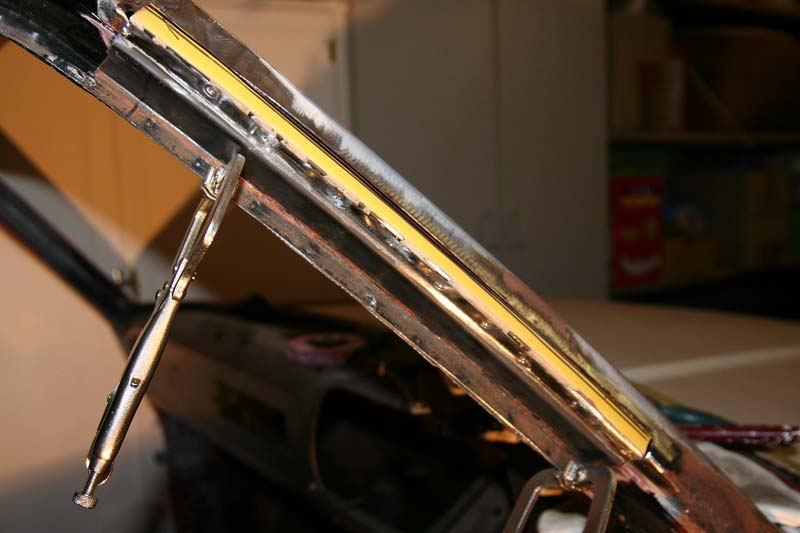
Unfortunately time got away and I was unable to begin welding - stay tuned I may be best to mount the door to ensure correct alignmant etc.

2010/11/01 15:26:24
ash
Martymexico, you recommended in this thread that Paul look at Telstar/626 handbrake cables for the R31 calipers.

Did you manage to get this working on your car?

If so, could you post some close up pics.

Cheers
Ash
2010/11/01 16:20:56
Paul Dunstan
Hi Ash

Posted similar response in your other post. You need all the R31 hardware to make it simpler.

Look here for a Torana conversion (same principles)

http://www.gmh-Torana.com.au/forums/index.php?showtopic=30223
2010/02/21 22:44:25
Paul Dunstan
OK - some of my profile cutting has returned (along with the remaining rear brake kits for those waiting - terribly sorry) so I thought I'd see how the new cross member mounts will look.

I still need to prepare some angle (with mounting holes) to be welded into the right angle relief as this will resemble the original mounting arrangement. I will then completely box the upright and will mimick the WCXM style mount.

I have prviously had the the engine mount plates cut so once this is finished I can fit the cross member and finalise the engine position and finish the mounts.


<< ..1314.. >> - Powered by APG vNext Trial

© 2025 APG vNext Trial Version 5.1

Use My Existing Forum Account

Use My Social Media Account