2019/06/08 00:37:59
Paul Dunstan
Added a PWM dimmer and adjustment knob to the cluster too which deletes the OEM switch 
 

Attached Image(s)

2019/06/23 17:35:50
Paul Dunstan
 
Finishing off a few small jobs so I can begin bolting some gear into the car - namely brakes and steering.
Needed to add a bracket to provide some additional support due to the torque of the EPAS as I didn't want to rely solely on the dash mounting point and the bracket at the base of the tube near the floor.
Also wanted to add some rigidity to the firewall as originally the booster assembly tied in the inner guard to the firewall. Removing the booster and going with the hydraulic pedal box places all the pedal forces on the firewall so I wanted to distribute this in a similar way to the OEM set-up. I plan to have a simple M8 rose jointed rod running between the firewall bracket and a bracket bolted into position where the booster assembly once was secured.
Wasn't happy with the driving position of the DBW throttle so I modified the mounting to allow for more fore and after adjustment as well as being able to alter the angle of the pedal.
 

Attached Image(s)

2019/06/23 21:36:25
NQRS
Hey Paul,
I've heard of de-cluttering an engine bay but yours takes the cake! That is the neatest set of brake lines ever, would have been a fun job getting those tight little turns sorted.  Len
2019/06/23 23:16:37
Paul Dunstan
Thanks Len. It wasn’t as hard as it looks. However as the rear line was made from the back forward I had a few nervous moments bending that one so it finished perfectly.
2019/06/30 17:48:13
Paul Dunstan
More therapeutic brake line manufacturing 
I had originally planned to run flexible and I feel that was the easier option but the way I have planned the brake lines exiting the pedal box into the engine bay meant a very sharp radius to clear the top of the brake pedal and run over the top to the MC's. I have also heard of issues when bleeding dual master pedal boxes which I think may be attributed to the flexible lines exiting the MC's and looping over the pedal box meaning the MC's are not the highest part of the system. Doing it in hard lines means the MC's outlet remain the highest part of the high pressure system. Obviously the reservoirs are higher than the MC's .
As it so happens the flexible lines I ordered will fit the front struts and I can modify the 3rd hose to run from the body to the diff . I'm also a brake fitting short to allow me to complete the clutch hard line to the MC.

Attached Image(s)

2019/07/07 23:13:04
Paul Dunstan
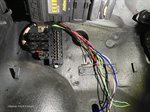
Getting stuck into the wiring over the weekend and as the original harness was in reasonable condition I see no reason not to re-install it but I need to make some changes to improve reliability and to include some additional items (EFI, EPAS etc). The idea is to install a new fuse / relay box inside the car as I have removed the original fuse box from the engine bay. I will integrate the new fuse box and relays into the original harness via 2 8 pin connectors. I have incorporated 5 relays which are all controlled via the Haltech Elite 1500 ECU in an effort to remove the electrical loads from the OEM switchgear.
  • Fuel Pump - control the in tank fuel pump.
  • Ignition - everything that originally operated via the IGN switch in the ON position. Have split the output into two fused circuits as per the original layout.
  • Engine fan - obvious.
  • ECR - Injectors and Ignition control.
  • Starter - Starter motor control (can set the starter to automatically disengage when a particular engine speed is reached or prevent starter operation under predetermined parameters).
Overall there are now 15 fuses throughout the car - 10 mounted in the new fuse box, 2 headlamp (dipped and hi beam), 1 demist, 1 horn, 1 starter and a 40A circuit breaker for the EPAS unit. I have also used the OEM wiring within the new fuse box where possible to retain some relevance to the original schematics. A separate dual relay under in the engine bay will operate the headlamps and another will operate the horn. I will continue to use the original demister relay as I see no need to change it. The starter relay will use a fuse mounted on the relay as I ran out of fuses! So, hoping this resolves the issue of fuse reliability and prevent the melting of the headlamp switches .Also removed the old cluster connector and added an aftermarket item as I have many more inputs etc to run the additional features in the updated gauge cluster.
 

Attached Image(s)

2019/08/08 23:00:48
Paul Dunstan
Powered up the electrics over the weekend and went without a hitch so I pulled the harnesses out and taped the original one in fabric tape and enclosed the ECU harness in a self closing nylon wrap. I made sure to keep both harnesses separate so they can be removed independently and used plugs where circuits transferred between harnesses.
The black plugs on the left are for ECU and white ones are to the fuse box. Red and yellow cables are the feeds for the main harness and EPAS. The coiled wiring at the top is for headlamps (additional relays), horn, starter motor and thermo-fan which exits through the original loom opening. The other (white tape band) goes though a new exit on the drivers side containing the engine wiring (sensors, injectors, coils, DBW and alternator) with the smaller loom feeding the DBW pedal.  Coiled at the bottom is the VSS and handbrake warning.


Attached Image(s)

2019/08/11 10:48:59
escortinadriver
Super neat as always
2019/08/12 20:42:31
Paul Dunstan
Thanks - it's quite a mission to keep it neat and praying I haven't missed anything! Once I sort my heater core (other post) I can install it all and wait for the engine to be finished (which is underway).
2019/08/12 22:21:12
NQRS
Hi Paul,
Nice job- electrics have always been my downfall.  My son put all the late model electrics of a 4 door sedan into his old ute, climate control AC etc, etc, V8 conversion and box.  Took him 6 months and fitted it all into his original dash so it looked standard.  Unbelievable stuff, Can't even imagine how he worked it all out- apparently started out with complete looms spread out on sheets of ply in his shed.
<< ..4344.. >> - Powered by APG vNext Trial

© 2025 APG vNext Trial Version 5.1

Use My Existing Forum Account

Use My Social Media Account