2010/02/11 18:08:04
Gdub

That looks suspiciously like a MAzda reservior, perhaps of an early FWD 323?

2010/02/11 18:19:14
Paul Dunstan
quote:
Originally posted by Gdub


That looks suspiciously like a MAzda reservior, perhaps of an early FWD 323?


Shhhh!
2010/02/11 19:18:49
MK1_Oz
where in Adelaide did you get your steel pipe from? I am yet to start looking around for it (too busy having a heart attack at the price of the race seats!!!!!!!)
2010/02/11 22:54:32
Paul Dunstan
Power Brakes
2010/11/11 22:45:57
Paul Dunstan
OK, a few items arrived today - some for a rainy day though.

I saw these on Ebay UK and managed to pick them up for $550 incl freight along with a pair of DCOE alloy profile cut flanges. These are EFI Hardware's tapered (45/43/40mm) Pro-Race items which are their top line product - well pleased. This along with the CAD drawing I have of the head flange plate should see stage 2 of the Zetec well under way for the future .


Considering I'll be replacing all the solid fuel and brake lines I figures it would not be a bad thing to have a decent flaring tool. Found this on the Eastwoods site in the US for half the price locally (incl freight).


http://www.youtube.com/watch?v=AnQJIjM0EBo
2010/12/11 07:12:53
Puzzlescort
just watch the Video & checked out Eastwoods, definately a good tool and worth while if you are going to bbe doing a lot of flares
2010/11/29 17:43:00
Paul Dunstan
Well, another few hours closer to finishing

Decided to tackle the reservoir mount and all was going well until my welds began to deteriorate - found out the trigger in the MIG wand was intermittent (too many spot welds ). Anyway, got it working well enough to finish.

All welded up!


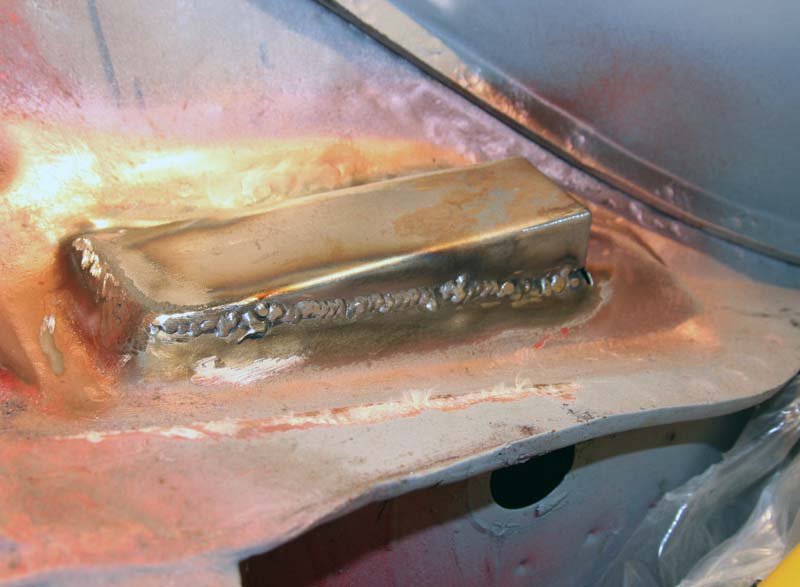
Welds dressed and showing the principle behind the reservoir mounting - hoses will be connected prior to mounting the reservoir and will be hidden beneath the bulkhead panel. The hoses will only have a very short run to the master cylinders on the bias pedal box .


A lick of filler will see it looking fine but a coat of crappy primer for now will have to do!


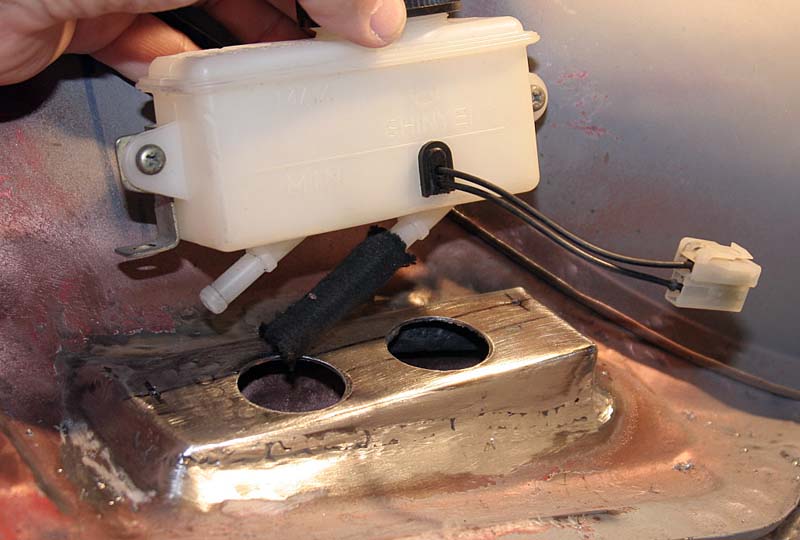
A view of the mounted reservoir from the front!


A bit hard to see but the flapper disc touched the panel infront of the new mounting revealing a suspicious looking fabric - FIBREGLASS!!!! A little digging has uncovered an earlier sin which possibly requires removal of the D/S bonnet mount to fully explore the extent of the dodgy repair [:(!][:(!] Don't you just hate it!!
2010/12/28 18:48:06
Paul Dunstan
Chipping away!

Decided to take a break for the bathroom reno and spend some time in the garage.

The drivers side "A" pillar repair panel has been staring me in the face for months so I thought I'd get it done. So, I mounted the door to ensure all the gaps were right (well as good as a 1980's English Ford can be) and started.......

Drilled the holes for the plug welds and clamped in position.


Got it to this stage before the MIG started playing up again [:(!] Managed to get the majority finished except for the small patch at the top and going over and completely filling the plug welds along the door opening.


Door closed and all looks good.


I now Need to cut out an ugly section just below this repair as we tried to initially repair the rust holes by plug welding but ended up chasing our tail. The only way to fix this was to remove all the rusty sections and graft in replacements. This will continue once I fix the MIG again!

Then it's a case of welding the gutter back on and finish it off .
2010/12/28 18:58:34
MK1_Oz
Isn't it a pig when the MIG starts to play up Paul!! Been there done that (fixed by a nice new Licoln 180c )

Good to see you are still chipping away at it.
2010/12/28 19:08:54
Phil
Looking good Paul, some nice repair panel fabrication there
<< ..2324.. >> - Powered by APG vNext Trial

© 2025 APG vNext Trial Version 5.1

Use My Existing Forum Account

Use My Social Media Account