2008/11/05 21:06:30
Phil
Looks very tidy Simon
2008/12/05 00:08:26
Paul Dunstan
Good work Matey! Car looks a million bucks compared to the original images.

Who would have thought your TX3 would rival the Mk1 on this site. I'm thinking this new TX3 thread will be longer than the Mk1's very soon[(#)]
2008/05/13 14:58:24
Gdub
The sad part for all us escort guys is it is does better lap times than us on the track too!

Bloody Lasers!

Might have to sneak one of those BP jobs under the bonnet of the green car someday ...
2008/05/13 15:30:08
Panthro
naaa just shove a turbo Ztech in there thats the way (cept for the $$$$[8~2])
2008/05/13 16:11:02
mud
Looks great after the tidy up, wheels really suit it IMO.
2008/05/13 19:25:38
Simon
Thanks for the kind words fellas! I shall continue on with my little story then...

Following on from SFS, a friend (GTMK1 from this forum) advised me of a sprint at Calder the following weekend. So I put my entry in and went tyre shopping!

Bang for buck has been the name of the game from the outset with the TX3, and after reading a bunch of tyre reviews on the net, I decided to go with a set of Hankook Ventus RS2 Z212s. I'm not even going to bother comparing them to the crappy old Falkens. Vast improvement.

Before sending the car in for a wheel alignment, I ordered a set of camber bolts for the front end from Whiteline and fitted them the night before. I had the camber set at maximum, and the alignment guy didn't have to touch the bolts. They allow for +/- 1.5 degrees adjustment, and I ended up with -1.35 degrees, meaning I was running positive camber originally. I believe that's pretty common for a front wheel drive. Toe was set at 1mm toe out on each side (again, thanks for the tips Wozzah!).


At Calder the difference in front end grip was huge. However, if the front end did ever push on, I could just come off the throttle to induce lift-off oversteer, bring the tail around and then bury the throttle again.


Oh, I forgot to mention that I had also made up an oil catch can by this stage...


...and managed to track down a factory strut brace from a 4WD Turbo.


The car performed well at Calder, but unfortunately the front pads completely ran out of friction material without me realising it until the drive home. [:I] So on Monday morning I placed an order for new rotors all round with the fronts being slotted, and Lucas/TRW pads for all four corners.
2008/05/13 21:05:52
Wozzah
Hey Bud,

Laser is looking great!! How does it drive with the revised wheel alignment specs?? Have you worked out the rear sway bar yet?? WHat did you decide?? Hope it has worked out ok.

Also noticed you haven't fitted the extractors yet!! you slacka@#e!!


I can definately recommend one of these vehicles to anybody, they a good, cheap fun. Just an "all round" good package, great engines and super cheap to get bits for if you break something!!

Cheers
Woz
2008/05/14 16:02:49
Simon
quote:
Originally posted by Wozzah


Also noticed you haven't fitted the extractors yet!! you slacka@#e!!


Yeah, yeah, I’m getting to that!!!

I had Peter R come around and help me fit up the new rotors and pads, and we noticed the rear left calliper had done absolutely zero work. The piston was stuck, so Pete wound it back in and we hoped it would be O.K. until I could fix it. Pedal pressure was fine, and the new pads worked a treat.

GDUB had attended one of the Winton Sprint rounds in 2007 and was suitably impressed. With round 1 for 2008 fast approaching, I went on the hunt for a new rear calliper. After being stuffed around by a wrecker who thought he knew what he was talking about, I took a punt and drove out to Andy’s Autos. Luck was on my side and they had a KF 4WD in the yard which uses the same rear calliper as my car.

So I got it home, fitted it up, pumped the pedal up, pumped it some more, and a little more... nothing. I’d buggered the seals in the 325,000km old master cylinder. So, again I placed an order with my local brake shop and they had a new master cylinder in by that afternoon.

Peter R and another friend Matt came around that night and helped me flush the system and bleed it with new fluid. Good as new, and just in time for Winton!

With Winton being a good 2.5hour drive from Melbourne, GDUB and I dragged our respective partners up to Benalla on the Friday night so we could be at scrutineering by 7.30am on the Saturday. Winton is an awesome circuit, and their sprint series gives competitors heaps of track time. We had a 15min practice session in the morning, and managed to squeeze in 5 timed sessions for the day – all for $90!


It wasn't until Monday morning when I checked out the Natsoft results that I realised I'd taken a class win for Under 2 Litre Road Registered. I was just a little bit chuffed to say the least!

Round 2 of the Winton Sprints was last weekend, so in the lead up to that I thought I would finally fit the set of extractors I'd had sitting around for a while. I really wanted to try and maintain a relatively standard look under the bonnet, so I modified the factory heat shield to fit over them and welded on some mounting posts.


As an off the shelf manifold, the finish of the welds inside the pipes wasn't too bad, but there's always room for improvement. So out came the die grinder.


And the finished product.


So we're almost there! More to follow.

2008/05/14 18:08:13
Wozzah
Looking good bud, let me know how it goes. Looking at the winton pics it looks to be handling ok too,

Woz
2008/05/16 19:39:53
Simon
Thanks Warren.

I think it handles pretty well considering how little has been done to the suspension. Unfortunately I ran out of time trying to get hold of a second rear sway bar, but I'd still be interested in trying it out. Maybe next time.

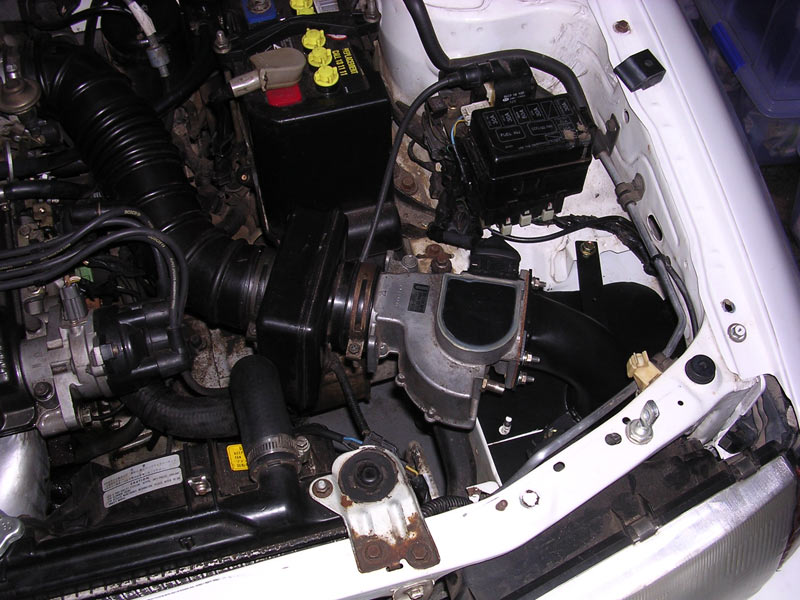
Also prior to Winton I had been doing a bit of reading on autospeed.com, as well as Zoom magazine about the benefits of pod filters. Yes, very ricey, but apparently if done right they can of great benefit and my standard airbox had restriction written all over it.


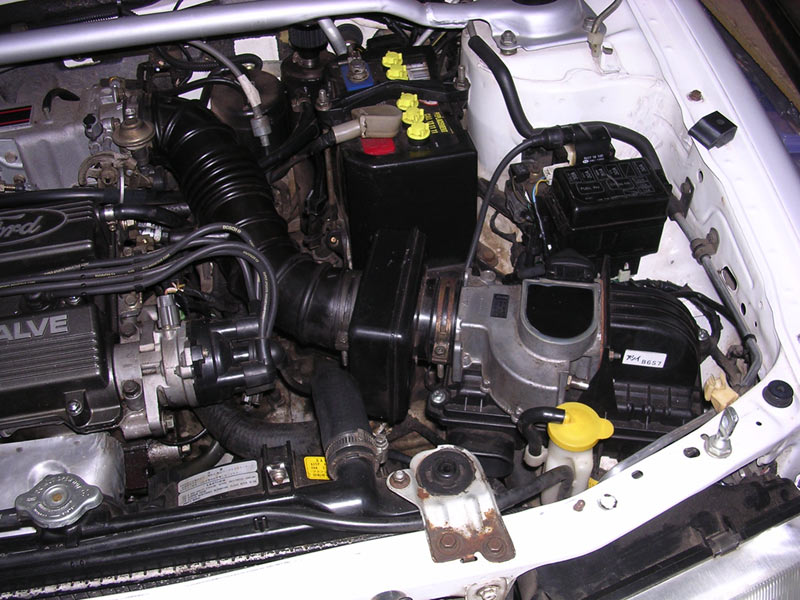
Zoom tested a bog stock MX5 with an 1800 BP engine. They simply unbolted the standard airbox, slipped on a Uni Filter sock and gained 8kw at the rear wheels!

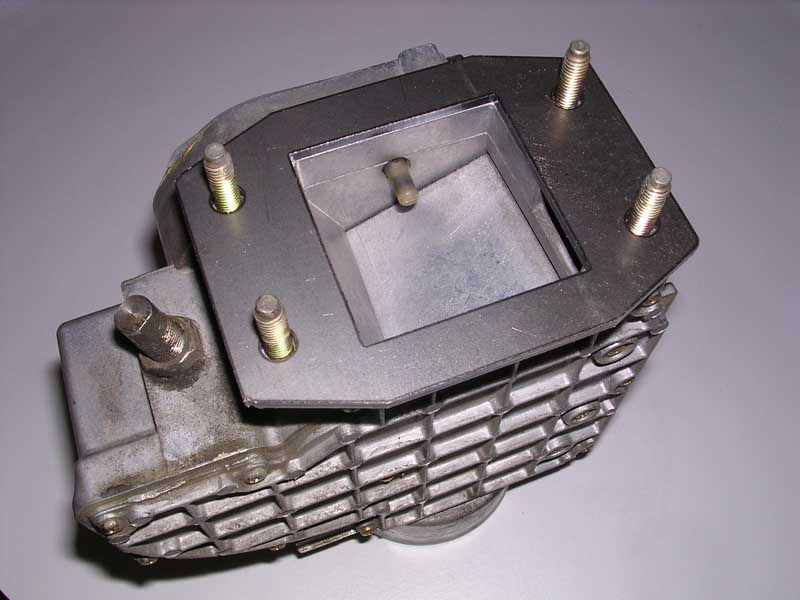
I thought I'd have me some of that, so I drew up an adaptor flange for the airflow meter in Solid Works and sent it off to be laser cut in 3mm mild steel.


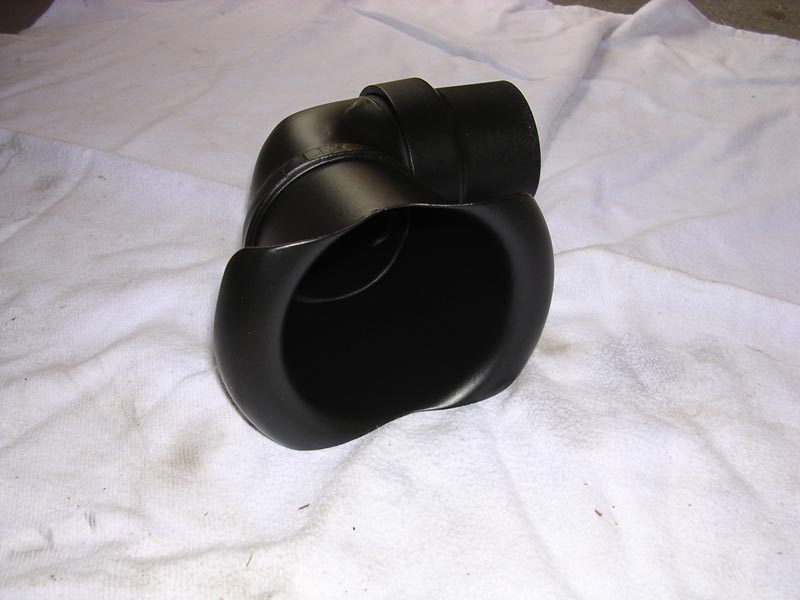
I then went and bought a 2.5inch mandrel bent horse shoe from my local exhaust shop and also had them make up a short 3inch flare for the filter. I cut off a 90 degree elbow from the horse shoe, squared off the end to match the flange, welded on the flare and made up some mounting straps. Then it was off to have it plated.


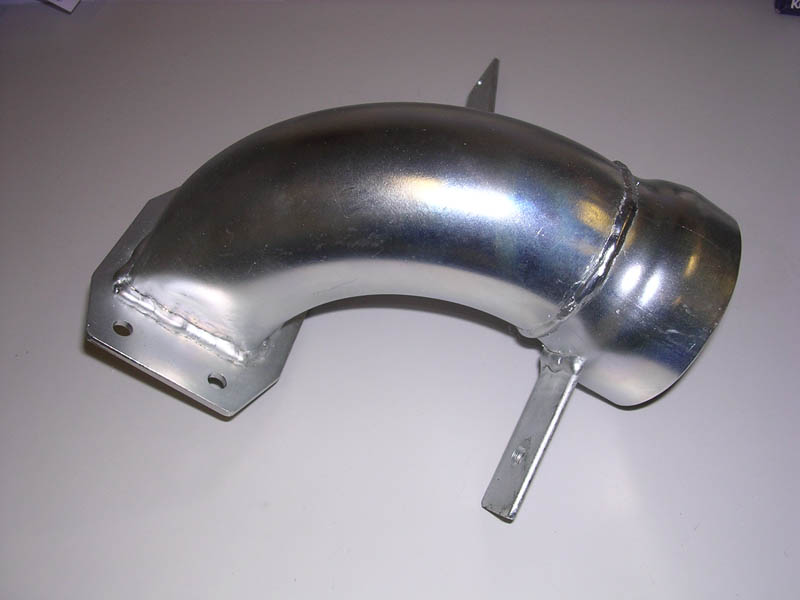
As nice as it looked all lovely and shiney, I was after discreet, so it copped a couple of coats of matte black.


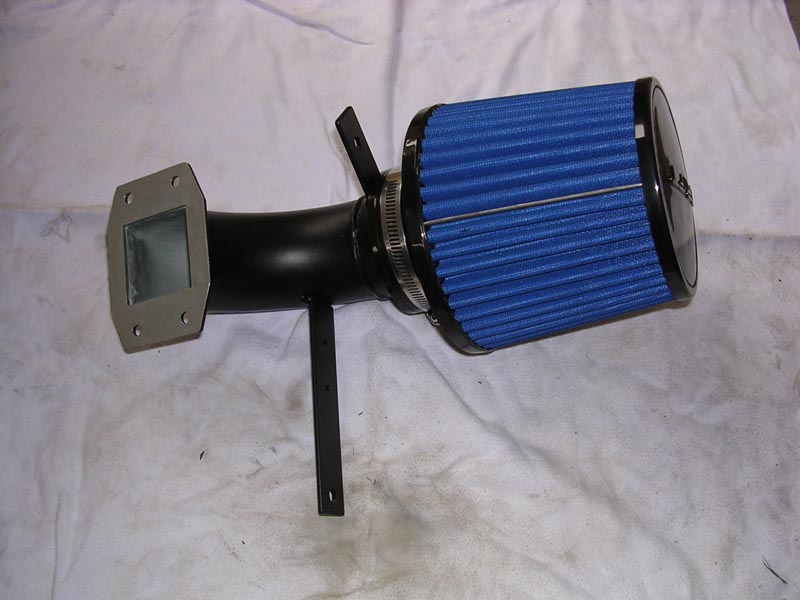
Yes it's a Drift filter from Autobarn, but I kid you not, this thing came up trumps in back to back pod filter tests a couple of years ago. And for $36, who was I to argue!

As I mentioned in an earlier post, my cold air feed also came in for a bit of revision. I cut the top and bottom off the bellmouth so I could sit it further back in the bumper. A 90 degree pipe fitting was added to direct the airflow into some flexible tubing behind the bumper, and then exiting through a new opening in the lower panel within close proximity of the pod filter.


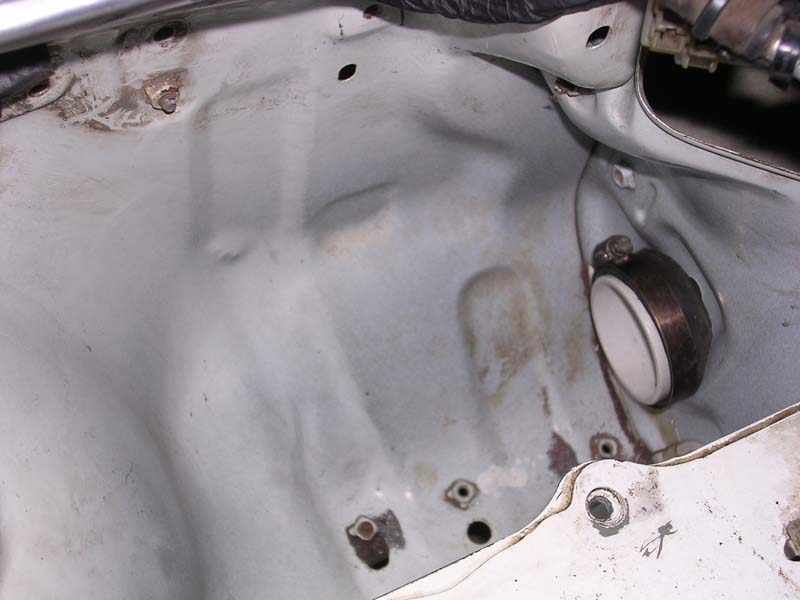
Then it was just a case of making a heat shield to take advantage of the cooler airflow, and it was done. Mind you, I did have to relocate the standard radiator header tank, which in itself was a pain the back side. But I think it was worth it.


So I ran it again at Winton and improved my previous best time by 1.5 seconds, so I was a very happy chappy.


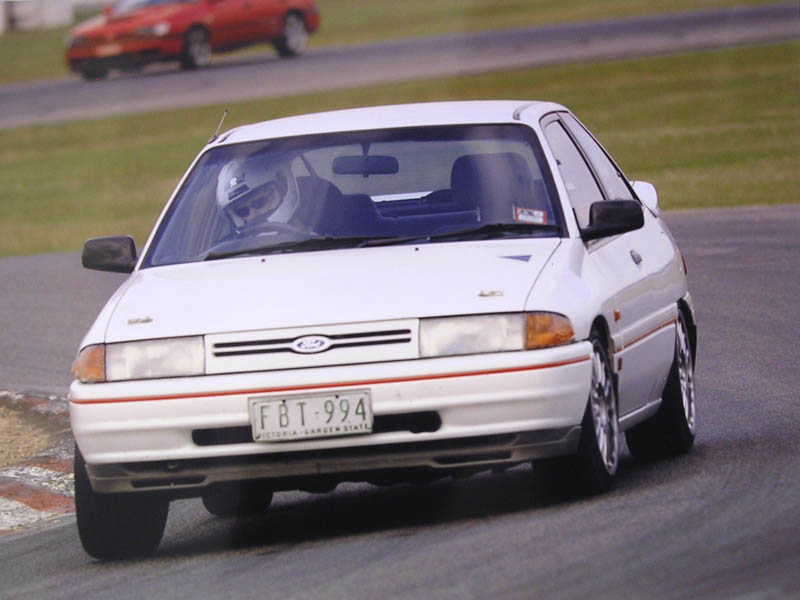
So that's pretty much where it stands to date. Cheap and cheerful and whole lotta fun, even it is a front wheel drive. And most importantly, it owes me bugger all!
12.. >> - Powered by APG vNext Trial

© 2025 APG vNext Trial Version 5.1

Use My Existing Forum Account

Use My Social Media Account