2007/03/01 23:01:58
nigel mk1
The Simmons with dish look great, as is the rest of the car. One of the toughest looking square headlight mk1 around. Paintwork is also looking clean as.

nigel
2007/05/01 07:46:14
BLOWNMK12L
Thanks guys have always liked Simmons and the F90 looks pretty tuff plus at 7in theres so much chrome lip that it makes the wheels look pretty fat.... it took a bit to get them to fit under the guards but I think it was worth it.
2007/05/01 15:49:33
mad-mk1
looks tough as!! [}:)]
2007/06/01 18:21:35
BLOWNMK12L
After going down the NATS real pumped up about cars at the moment so had to go for a good drive this arvo in the 'scort and jeez, it was good fun...... thought i'd post another 2 pics.

Download Attachment: BLOWNMK12L Green Grass Carmas.JPG
78.08 KB

Download Attachment: BLOWNMK12L Low.JPG
73.33 KB
2007/07/01 19:53:15
escort1600
those wheels are perfect. very nice Mk1 :)
out of curosity how much they set you back.
2007/09/02 19:05:55
BLOWNMK12L
******BARGAIN*******
I just picked up a new diff centre for my upgraded courier diff turns out that the early model diff centres are the same as later model LSD centres so now have scored a *NEW* LSD centre for $100 !!!!!WOOOT cant wait to get that bad boy in and see the difference the locker is good in a straight line but this should make things better on the windy stuff.

BLOWNMK12L
PS. RS project nearing completion *fingers crossed it all goes to plan*
2008/01/19 18:33:05
BLOWNMK12L
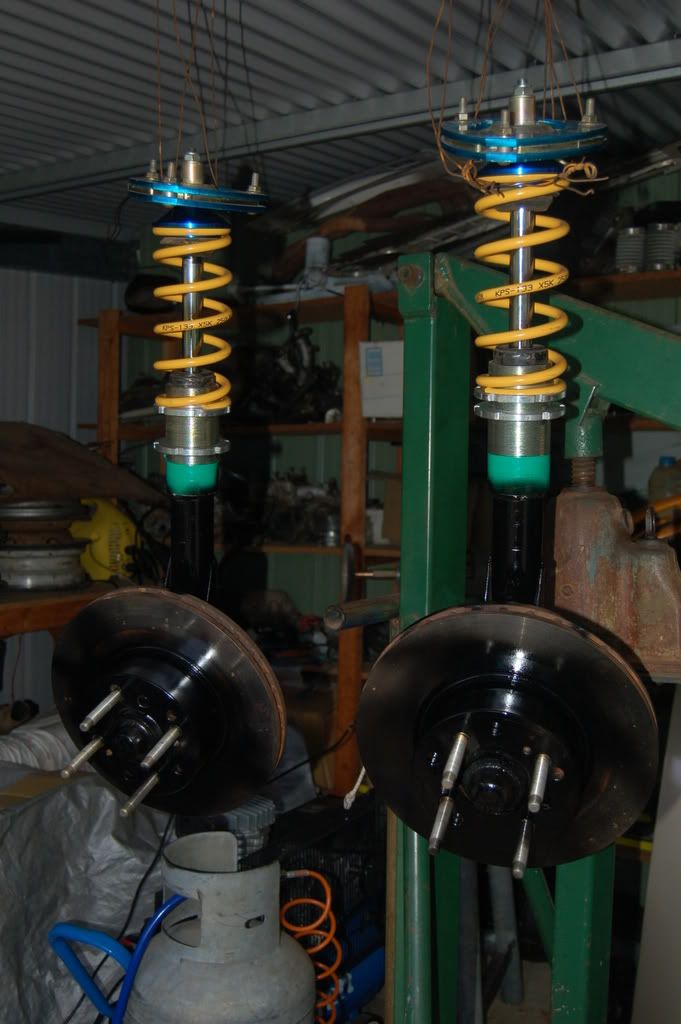
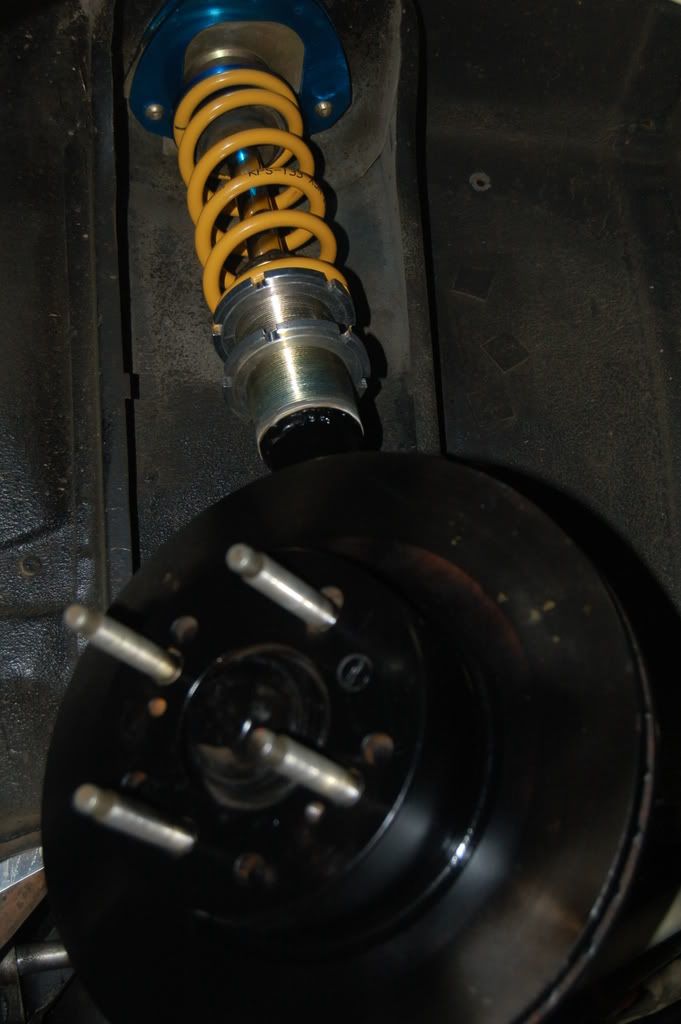
Just got my coilovers finished and half fitted today !

Specs are ;
Noltec Camber/Caster Adjustable Strut Tops
Kings Springs 250lb Coils
VT Commodore 310mm rotors & Calipers
1/2" ARP Wheel Studs
Gusseted
Gloss Black
Photobucket

Photobucket

Was a major mission getting these done, I have had the coil over kit for 18 months, I bought it while I was in England from "Midlands Performance Centre" unfortunatley when we pulled it out of the box to fit the kit two weeks ago we had a number of problems;

1.) 1 X 350lb spring 1 X 225lb spring
2.) Top hats id was too small
3.) Collars were 10mm !!! too big !!!
4.) Nuts were poorly machined and weren't tight on the thread at all !

So we ordered some new springs, drilled out the top has to suit, machined some thick wall pipe down so that the id was right for the strut and od fine for the nuts we had, cleaned the thread up on the nuts for a better fit.

And that brings us to today ! finally finished and painted, spent the morning getting some engines packed for ship out then ran out to my shed and painted the struts, sand blasted some other stuff and bolted them up after also giving the strut tops the one over with the buff wheel to bring the up like new again.

Pretty productive day really.

BLOWNMK12L
2008/01/29 14:34:59
BLOWNMK12L
Guys,
Before we got started on stripping the racecar (see other post in projects) we put the front end back together on the Beige car and I took it for a spin ! Whoa what a difference, even without a wheel alignment but just with setting strut tops at full camber and full caster adjustment, its handling even better than it did before ! I am experiencing virtually no front tyre scrubbing on full lock, which was a problem before even though the front suspension is now set even lower than before ! The real difference is in the driving the car just feels more stable and predictable, love it ! did a dirty big drift around the nearest corner then a drift u-turn and a bit of side to side up the road, car loves it !!!

Next for the old girl is a bigger rad ! I have a falcon one that I have to get modified, so thats this weeks project (amongst others)

BLOWNMK12L
2008/04/13 21:03:58
BLOWNMK12L
Got the bigger rad weeks ago before my last practice day but unfortunately the inlet was in the wrong spot, so before the race I managed to fit the standard engine fan which in conjunction with the two front mounted thermo fans worked a treat and kept the engine below 90 all day !! But I developed a new problem, when flat out I kept running out of fuel after a couple of seconds even after checking the fuel filter and cleaning it every run it was no better. Instead of pulling the fuel system apart and starting again I have decided to go with EA Falcon TBI Injection, looking at the powerboard under pinto's there have been some good results achieved with turbo's and the EA TBI so why not, have an old Wolf3d and complete fuel system minus lines to run up to the front.

So far, have made the inlet adaptor to mount the throttle body where the SU was and have labeled the loom, removed all traces of the carb setup and connected the pumps to the tank.

Need to;
Run stainless braided fuel lines 10mm feed and 8mm return
Wire up loom to power/sensors/injectors/fuel pump relay
Make throttle cable bracket to utilise standard throttle cable and EA linkage on TBI
Get a new water temp sensor to suit my thermostat housing

Got another practise day coming up on the 27th of this month so hoping to have it running by the end of the week and on the dyno the week after, got a bit of a shopping list of fittings both electrical and fuel. Fingers crossed

BLOWNMK12L
2008/04/13 22:03:26
Phil
Hi Ben,

Sounds like a good plan

Can I suggest that you run your return line the same size as your feed line. If you run a smaller fuel return than feed,you can in some cases induce unstable fuel pressure[;^)]
<< ..910.. >> - Powered by APG vNext Trial

© 2025 APG vNext Trial Version 5.1

Use My Existing Forum Account

Use My Social Media Account