2023/04/14 11:23:28
martymexico
Hi Chuff
Seats I've got going in the mk1 are Hyundai Veloster, the both tilt forwards, black leather and have electric bolster support, heated, motorized height and forward back. I didn't realize how chunky they were till installed . I'm sure there's other small 3dr cars with sport seats similar to recaro. My misso has a current Suzuki Vitara turbo and the seats in that would suit escort .

If you go back to page 19 it shows the Hyundai seats install
Cheers
2023/04/16 19:06:09
martymexico

I got heaps done this weekend, welded a bar across the length of the parcel shelf and created Little cup things to notch and allow access to the shock bolts.


That's one job down for the weekend, this is the other.
First off was to assess the back panel and repair what's needed like filling the reverse holes and replace rusted or damaged return tabs

I got the welder set up pretty good by the time I had nearly finished.

Attached Image(s)

2023/04/16 19:22:12
martymexico
With the part linished smooth it was time to set it up on the car and get it as straight and lined up as possible

After a marathon arvo of setting up the panel and making sure the car fits the panel as best it can.
I gave it a dose of copper primer, I seem to use this lots lately cause I find it quicker than mixing primer and cleaning the gun etc.


Nearly all done, just a couple of small closing panel strips and some Sika drip check ( also known as seam sealer) to fill in the seams.

I'll give the car a good air compress session and hit it with some real primer, I've still gotta make the exhaust hanger boxes so maybe after that job.

Attached Image(s)

2023/04/25 20:08:35
martymexico
After a week of prepping my friend's RS for a weekend on the track at Mallala, which we retired half way thru the second day due to a oil leak from the rocker cover which was getting worse so we agreed to pull up stumps before it got really bad , we still needed to drive it home.

Back to the resto, I'm up to the gutters which I'll be quite honest here, I'm bricking it .. Never done then before, I can see the shrinker stretcher being used a lot.. I gave it a shot on a small piece and it seems ok,

On the A post it was usual rust and a 6in repair piece was made but when test fitting it fell in the hole and got wedged at the top of the windscreen pillar, I had to unpick welds at the top of the door shut to create a window for accessing the rouge part, it finally gave up the fight and I carried on welding. I ran out of time to smooth out the weld lumps


there's a piece of gutter at the front and a big piece at the rear which will be a test and hope I can get it looking as is factory as I can

Attached Image(s)

2023/04/27 09:06:36
deano
you'll be able to do it Marty.
I had a similar job to do on Dad's Nissan Civilian motor home.
 
Since i'm such an expert* (cough cough) welder. I thought ,easy as. It was actually not too bad. After doing the roof infil, just like you did, on the bus the rain gutter channel was actually 2 pieces of a 90 degree, which were then fitted opposing each other.
 
The problem was then were then spot welded through together, on the exact face that the water sits. Anyhow, thats how we copied it, and it didnt turn out too bad. 
 
Is the Escort channel one piece, or a combo of layers? 
Im interested to see how you do this bit, some work for the shrinker /stretcher methinks.
 
2023/04/27 14:53:51
martymexico
The escort still is made of 3x layers, roof layer, inner beam and lower inner beam which creates the box section around the perimeter of the inner roof panel. For me to create all those layers it'll be impossible while being Insitu ..
I'll use 1.2.mm to replicate the thickness and hope I can get the welds in the right place and be easy to grind flat. I'll show some pics when I get the courage up 🥴
2023/05/14 18:51:39
martymexico
Well... I'm back...
With a birthday last weekend and Mallala racing the weekend before so things were booked up a little. I'm also learning a steep curve on 3d printing in the eves with thanks to young deano , I've had my machine for 4yrs and never used it.!

Back to the project Escort, getting back to the front windscreen pillar gutter piece, I had a bit of fun with the shrinker stretcher and bead roller to make this panel

Next was to check it with the good side for angle and curve, a bit of back n forth and got it very acceptable.


Fitment seems good so I got welding

This is it all linnished up before primer

Attached Image(s)

2023/05/14 19:23:42
martymexico
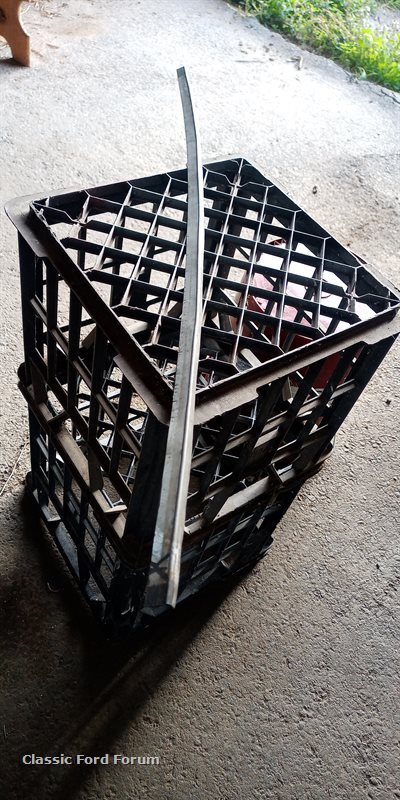
Moving into the rear gutter channel which was about 650mm long , from the back of the door shut right to the end at the back.
For anyone needing a piece of gutter to make, watch these pics.
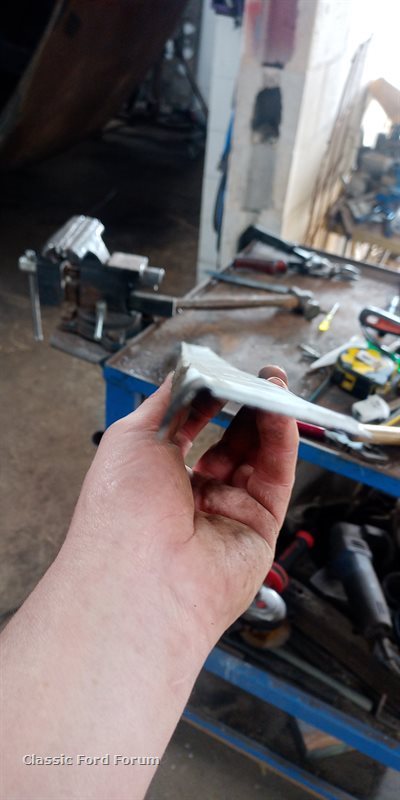
First off is choose your metal, I decided to go a bit thinner (0.9mm) as there's plenty of right bends involved. The first fold is the outer top gutter which folds back inside flat, this was the hardest to do as only about 3mm or so overlap is ample, once it's folded it needs hammering over flat .
Next is to accurately scribe the next fold line, stuff this bit up and it's start it all again, check and check again as this bit is the outer gutter which is seen by everybody.
Once the strip is folded and should be just over 90deg, this part is where things get fun, lightly working on the shrinker to get the curve to line up with the cars roof, and then stretcher lightly on the outer channel to get the curve down to match the swing of the body. Once happy it's over to the bead roller with the stepping wheels to create the hard to copy drop curve below the outer edge, I ran the piece through 3 times but needed to re stretch and shrink the piece to fine tune it .

This is that drop curve to replicate original

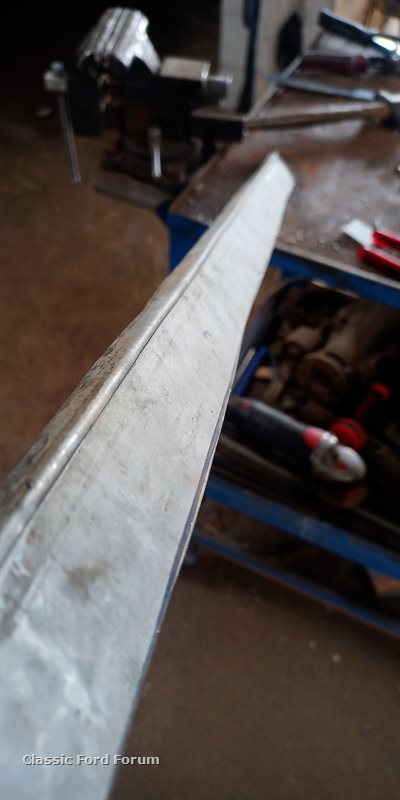
The double curve, back and down

This is the part offered up to the car, car is upside down to make work easier

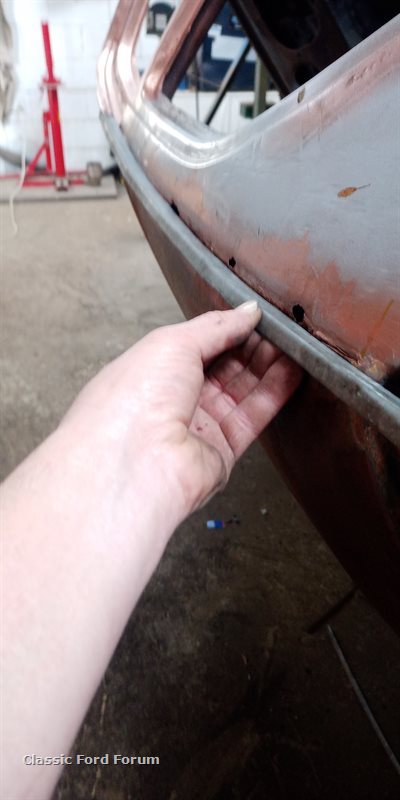
Those 3 rust holes got plugged up before any other welding as it's easy to tackle now than later.
Before I could fit the gutter, I decided to weld a strip to the roof channel, this was also shrink stretched to fit, I welded it to the quarter panel and then to the roof panel to stop any floppy loosened, welded were tacks every 1/4 inch which is plenty, they were shaved back flat so the gutter channel would sit flat against it

There was some extra welding as needed and sanding for a nice finish.

Attached Image(s)

2023/05/14 19:33:23
martymexico
Continued on , this is the strip all smoothed out and I did copper spray it before welding the gutter on

Happy with it shape, I proceeded on

Yes the roof is badly rusted, but that's the next installment after this
Here is the gutter welded to the strip and connected to the original gutter


Plug welds every inch or so, only thing to do is drip check seams and it should be as good as factory..

Attached Image(s)

2023/05/15 13:08:40
deano
I cant think of many more difficult spots to repair nicely.
 
You get the trifecta of multiple panels, the reverse fold, plus the compound nature of the bends to replicate.
All in a very visible eyeline position when finished.
 
Beer o clock after that one was done for sure.
<< ..3132.. >> - Powered by APG vNext Trial

© 2025 APG vNext Trial Version 5.1

Use My Existing Forum Account

Use My Social Media Account