2021/10/22 21:45:05
martymexico
Threw a couple hrs at the car this rvo, welded the replacement panel on. After watching a few episodes of Make It Kustom on yt , his method of welding patch pieces on actually works, I tried it as with the Fitzee cutting in and the panel was very straight after fully welded, here's the raw welded pic

This one is after the welds were flatted , I done this very lightly so not to create hotspots

The inside, I had the welded set really low but still hot enough to penetrate. The pic didn't come out as expected.


Then finally I cleaned up the lower half of the rear quarter panel, found a few dents which I hammered some back out

That's about it for now..

Attached Image(s)

2021/10/23 11:21:57
Guest
Like that DeLorean look Marty. Once or twice I have been tempted to put clear over a bare metal job. But there is always one (or hundreds) of imperfections which make that thought lose its appeal.
KBS make Diamond Finish Clear Coat, which I have only used (so far) on some components. Maybe???
2021/10/23 16:12:38
martymexico
Shut up about Delorean, I had the chance a few years back to buy 1, maybe one of 2 in Adel for only, $6500, what a putts I am sometimes... It was broken, but had no idea there is more original parts n panels available for these in USA and Ireland than any other car 😞
2021/10/23 21:11:05
deano
who would have known that under all of that filler was a quarter just needing a few taps.
 
Maybe just go clearcoat on the bonnet..?
 
We all let at least one pass.
Mine was the V6 Capri special, sold on for about $300
2021/10/23 21:17:53
martymexico
First thing in the days list was fix the passenger side jacking point, the inner metal plate had been bent and began to go very brittle, to get to it I needed to create an access hole. And in doing this it made good sense to replace the cut out with new metal.... As ya do..


Next was move to the arch where I noticed yet again more rust in the tub, now I'll be grafting a new one
I gave the front arch a tweak with the shrinker/stretcher here n there and then trimmed it to a neat arc and pinned it in place with Cleco's .


I'm going to Fitzee the panel in and if I remember I'll go back to 0.6mm mig wire from 0.8mm, less wire, less heat is less warping, it's tacked in place waiting.. Just tacking it has brought the strength back into the panel, just shows each panel helps another

Attached Image(s)

2021/10/24 20:40:37
martymexico
Finally, the arch is connected to the quarter panel for good. Doing it the Fitzee way, you can't really go wrong, I cut thru 2 or 3 welds do the outer panel can be pushed in flush with the other panel and keep doing it till the part is welded on and the piece behind literally falls off.


I cleaned/stripped all the paint off the side and welded up the Cleco holes and the chrome trim holes, linnished back the weld lumps ready for etch/primer

It looks good from a distance but there's some dents still to sort out

And with the 2pk primer sealer

Attached Image(s)

2021/10/24 20:42:19
martymexico
That was close, nearly ran out of argo shield !

Attached Image(s)

2021/10/25 19:38:23
Guest
Ran out of argo shield on boxing day last year. A mate had a bottle of straight argon, woops I said. Never again
 
You've got some filling to do there son. But at least you will know what is underneath.
2021/10/25 20:18:39
martymexico
Yeah I did that once, it's as bad as no gas at all... And not that inshield stuff, lucky the gas shop swapped the bottle over for argoshield for free.

I did start flappering some of the wobbles flat, the main dent above the arch goes into the top panel, it was there before I welded and have got it about 80% better. Worst thing is there's a drumming piece(pops in n out) but when the arch is pulled out s smidge, it goes away. The crinkles at the rear do my head in, I've been using the tenderizer hammer to try and take up the stretch, I don't have OXY to shrink it so doing the best I can..
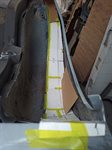
Didn't do much today except a little panel beating and making a cardboard template for the inner arch and marked out the sheet for cutting . I'll be making the outer tub in 3 parts, front, middle, back, it'll be easier to make and if I balls up it's only a small part. Planning on beading in some ribs for extra strength and it'll look like I've put planning into it too. Here's the card map


Mark, how's your new bead roller going ?

Attached Image(s)

2021/10/26 18:25:44
Guest
The bead roller came yesterday day and I haven't even taken it out of box. Twenty years ago I would have been ripping it open and hooking into it like a kid with a new rattle! Hopefully by the weekend I'll have it out and have a play with clamping it down and running some off-cuts through. I'll post some pics, (and ask for pointers) etc
I've got some plans for bits (ie, lightweight but strong) on the track car I'm building atm.
 
As an aside, a couple of years back I got taken in by fancy advertising and bought some of those aluminium filler rods. I have fabricated some nice little ali brackets etc. Took some experimenting (learnt not to use the oxy on aluminium cause finding the sweet spot is very temperamental, ie melts) but again compared to the cost of getting a spool feed gun etc for doing the ali with mig it works. I use my LPG torch and as long as the ali is spotless I reckon it is a good compromise.
<< ..1112.. >> - Powered by APG vNext Trial

© 2025 APG vNext Trial Version 5.1

Use My Existing Forum Account

Use My Social Media Account